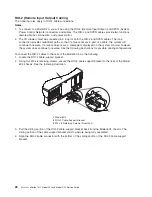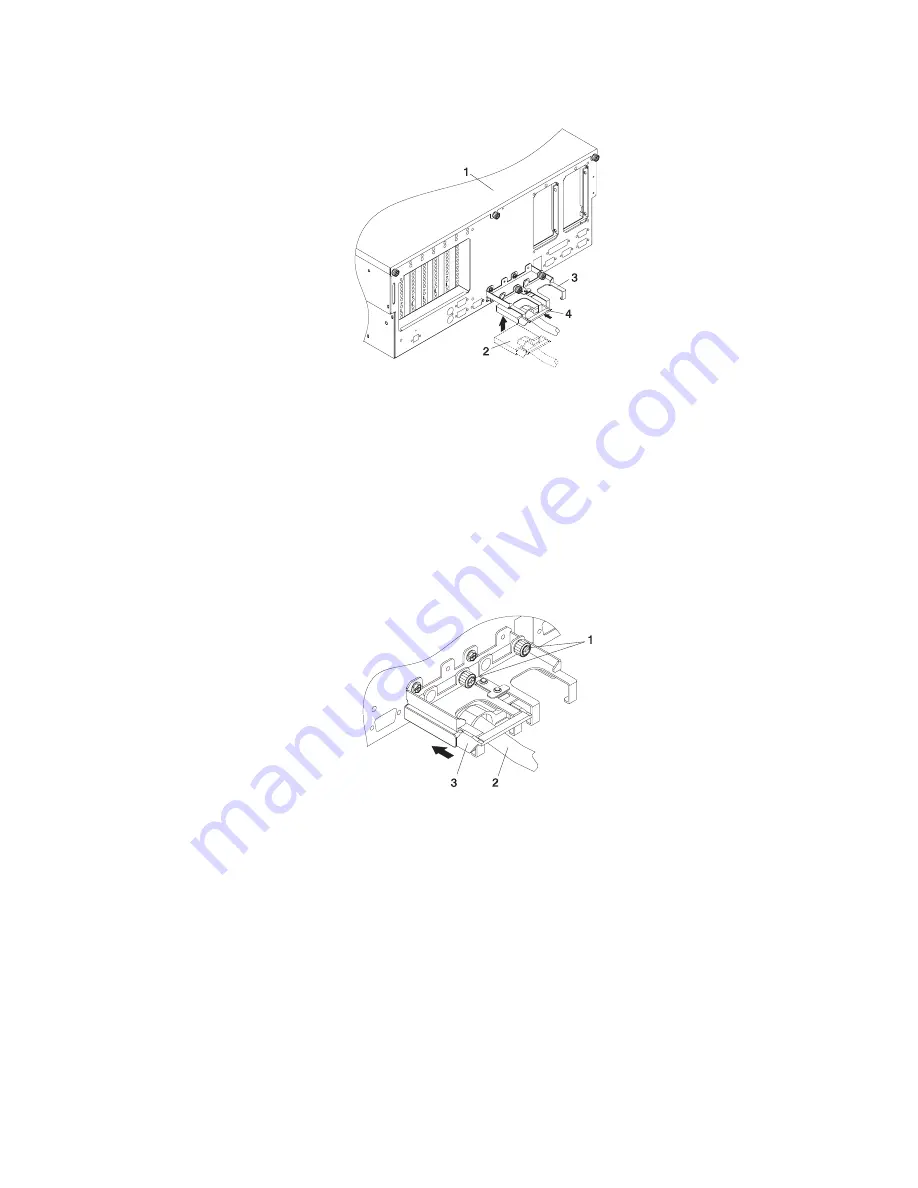
5.
Lift
the
RIO-2
cable
and
cable
connector
into
the
bottom
of
the
RIO-2
cable-support
bracket.
1
Model
6C4
2
RIO-2
Cable-Support
Bracket
3
Slide
Portion
of
RIO-2
Cable-Support
Bracket
4
RIO-2
Connector
Support
Lever
6.
Pull
the
RIO-2
connector
back
until
the
connector
is
seated
against
the
support
hook.
7.
Push
the
RIO-2
connector
forward,
ensuring
that
the
RIO-2
connector
lever
slides
over
the
top
of
the
connector
hooks.
8.
Slowly
push
the
assembly
toward
the
chassis.
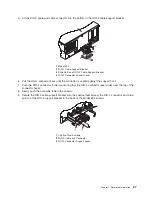
9.
Secure
the
RIO-2
cable-support
bracket
with
the
captive
thumbscrew,
the
RIO-2
connector
and
slide
portion
of
the
RIO-2
support
bracket
to
the
back
of
the
Model
6C4
chassis.
1
Captive
Thumbscrews
2
RIO-2
Cable
and
Connector
3
RIO-2
Connector
Support
Lever
Chapter
1.
Reference
Information
27
Summary of Contents for eserver pSeries 7311 D10
Page 1: ...pSeries 7311 Model D10 and Model D20 Service Guide SA38 0627 01 ERserver...
Page 2: ......
Page 3: ...pSeries 7311 Model D10 and Model D20 Service Guide SA38 0627 01 ERserver...
Page 8: ...vi Eserver pSeries 7311 Model D10 and Model D20 Service Guide...
Page 12: ...x Eserver pSeries 7311 Model D10 and Model D20 Service Guide...
Page 14: ...xii Eserver pSeries 7311 Model D10 and Model D20 Service Guide...
Page 25: ...1 Processor Subsystem 2 I O Subsystem Chapter 1 Reference Information 9...
Page 89: ...Chapter 3 Removal and Replacement Procedures 73...
Page 99: ...2 1 1 Top of Cassette 2 Handle Chapter 3 Removal and Replacement Procedures 83...
Page 179: ...D10 I O Subsystem Parts continued 1 2 3 4 5 6 7 Chapter 4 Parts Information 163...
Page 207: ......

