D10
Covers
Before
performing
the
following
procedure,
read
the
“Safety
Considerations”
on
page
41.
Service
Access
Cover
Removal
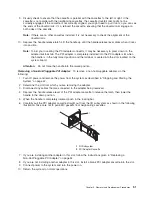
To
remove
the
service
access
cover,
do
the
following:
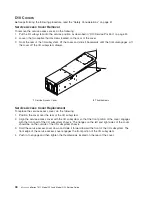
1.
Put
the
I/O
subsystem
into
the
service
position
as
described
in
“D10
Service
Position”
on
page
43.
2.
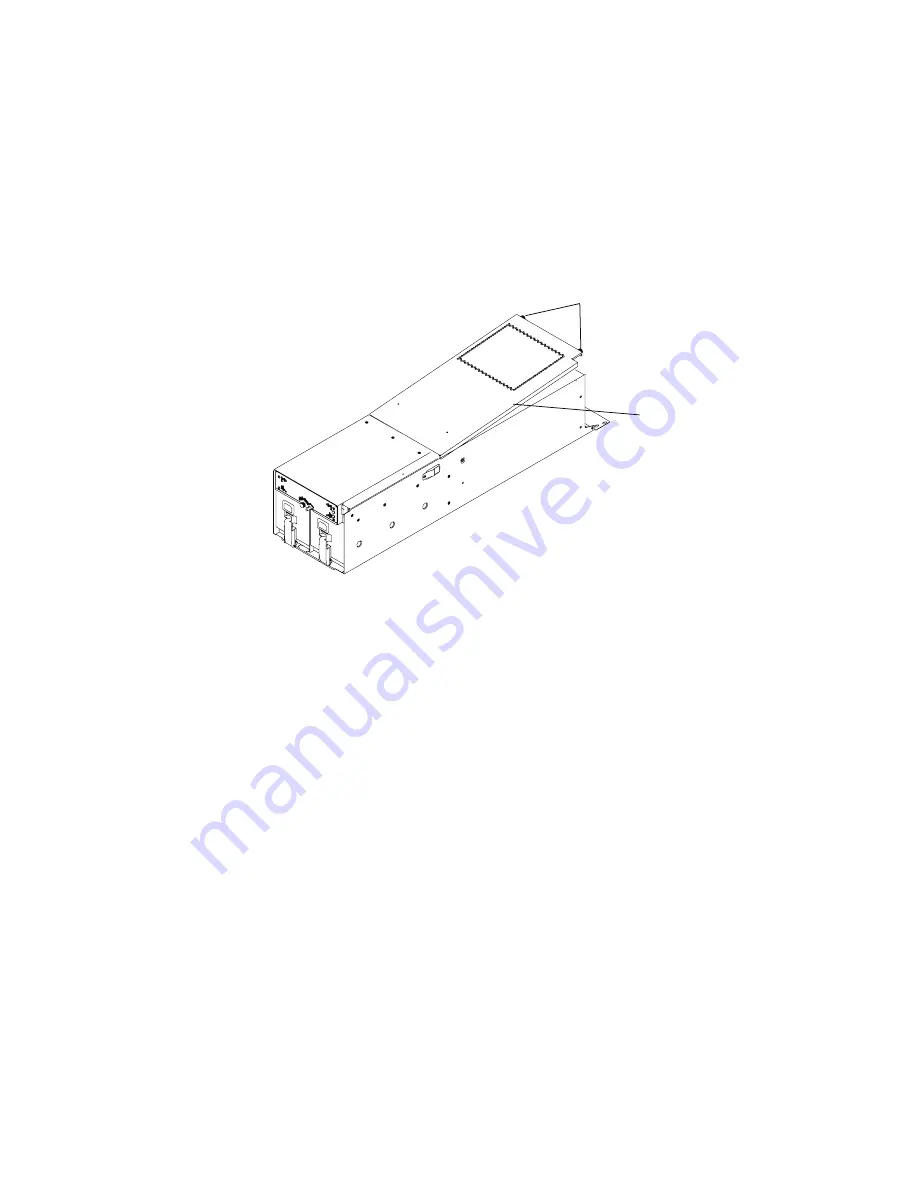
Loosen
the
two
captive
thumbscrews
located
on
the
rear
of
the
cover.
3.
From
the
rear
of
the
I/O
subsystem,
lift
the
cover
and
slide
it
backwards
until
the
front
disengages.
Lift
the
cover
off
the
I/O
subsystem
drawer.
1
2
1
Service
Access
Cover
2
Thumbscrews
Service
Access
Cover
Replacement
To
replace
the
service
access
cover,
do
the
following:
1.
Position
the
cover
over
the
rear
of
the
I/O
subsystem.
2.
Align
the
service
access
cover
with
the
I/O
subsystem
so
that
the
front
portion
of
the
cover
engages
with
the
front
part
of
the
I/O
subsystem
chassis.
The
flanges
on
the
left
and
right
sides
of
the
cover
should
be
on
the
outside
of
the
I/O
subsystem
chassis.
3.
Hold
the
service
access
cover
down
and
slide
it
forward
toward
the
front
of
the
I/O
subsystem.
The
front
edge
of
the
service
access
cover
engages
the
front
portion
of
the
I/O
subsystem.
4.
Push
in
to
engage
and
then
tighten
the
thumbscrews
located
on
the
rear
of
the
cover.
44
Eserver
pSeries
7311
Model
D10
and
Model
D20
Service
Guide
Summary of Contents for eserver pSeries 7311 D10
Page 1: ...pSeries 7311 Model D10 and Model D20 Service Guide SA38 0627 01 ERserver...
Page 2: ......
Page 3: ...pSeries 7311 Model D10 and Model D20 Service Guide SA38 0627 01 ERserver...
Page 8: ...vi Eserver pSeries 7311 Model D10 and Model D20 Service Guide...
Page 12: ...x Eserver pSeries 7311 Model D10 and Model D20 Service Guide...
Page 14: ...xii Eserver pSeries 7311 Model D10 and Model D20 Service Guide...
Page 25: ...1 Processor Subsystem 2 I O Subsystem Chapter 1 Reference Information 9...
Page 89: ...Chapter 3 Removal and Replacement Procedures 73...
Page 99: ...2 1 1 Top of Cassette 2 Handle Chapter 3 Removal and Replacement Procedures 83...
Page 179: ...D10 I O Subsystem Parts continued 1 2 3 4 5 6 7 Chapter 4 Parts Information 163...
Page 207: ......

