©
HDG Bavaria GmbH 07/2008
HDG Compact 99 - 200 - Version 1 - en
7 Cleaning and servicing the heating system – Procedure
145
9.
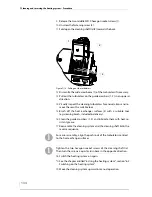
Unscrew the star-grip screws (7) on the front hatch (2).
10.
Remove the front hatch (2) by lifting towards the front.
11.
Check the steel pipe of the fill level indicator (5) for wear and re-
place it if necessary.
12.
If you have to replace the steel pipe, remove the retaining screw
(3) by pulling it upwards.
13.
Fit the new steel pipe in reverse order.
14.
Mount the components in the reverse sequence.
15.
Switch the heating system on again.
✎
See the chapter entitled “6 Using the heating system”, section “6.2
Switching on the heating system”.
✓
The inspection of the fill level indicator is completed.
C
HECKING
THE
PLUG
CONTACTS
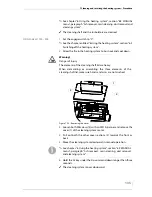
The HDG Compact 100/105/150/200 heating system is connected to
the EMD-C 215 Exclusiv control cabinet with various cables. The con-
nections for these are located on the front and flue pipe sides of the
boiler.
1.
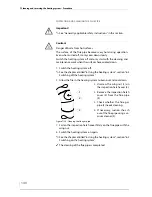
Check the electrical plug contacts are securely fit.
✓
The electrical plug contacts have been checked.
Danger!
Dangerous electrical current or voltage
The plug boards and electrical components carry current.
Have work on electrical components performed only by a qualified
electrician and turn the main switch off.


