7 Cleaning and servicing the heating system – Procedure
134
HDG Compact 99 - 200 - Version 1 - en
©
HDG Bavaria GmbH 07/2008
9.
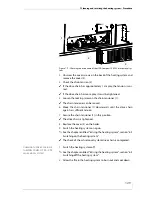
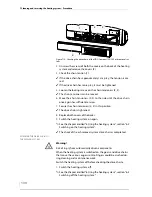
Release the two middle SW10 hexagon socket screws(1).
10.
Unscrew the fastening screw (3).
11.
Fold open the cleaning shaft lid (2) towards the back.
12.
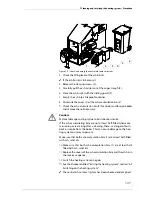
Dismantle the wide crossbeam (1) of the turbulators if necessary.
13.
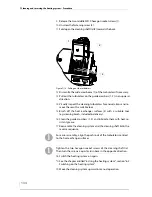
Pull out the turbulators on the guide crossbars (1, 2) in an upward
direction.
14.
Visually inspect the cleaning turbulators for encrustations and re-
move these with a suitable tool.
15.
Brush off the heat exchanger surfaces (3) with a suitable tool
(e.g.cleaning brush, included in delivery).
16.
Clean the guide crossbars (1, 2) and lubricate them with heat-re-
sistant grease.
17.
Reassemble the cleaning system and the cleaning shaft lid in the
reverse sequence.
18.
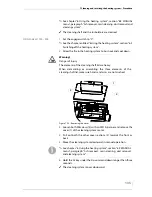
Switch the heating system on again.
✎
See the chapter entitled “6 Using the heating system”, section “6.2
Switching on the heating system”.
19.
Move the cleaning system upward in manual operation.
Figure 7/13 - Pulling out the turbulators
3
1
2
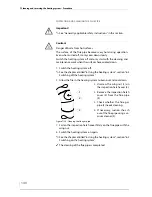
For easier assembly, align the push rods of the turbulators centred
to the heat exchanger surfaces.
Tighten the two hexagon socket screws of the cleaning shaft lid.
Then turn the screws a quarter-turn back in the opposite direction.


