©
HDG Bavaria GmbH 07/2008
HDG Compact 99 - 200 - Version 1 - en
7 Cleaning and servicing the heating system – Procedure
139
C
HECKING
AND
CLEANING
THE
LAMBDA
SENSOR
1.
Switch the heating system off.
✎
See the chapter entitled “6 Using the heating system”, section “6.3
Switching off the heating system”.
2.
Allow the fire in the heating system to burn out and cool down.
5.
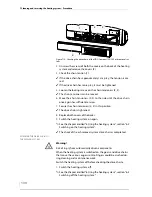
Brush off the lambda sensor (2) with a brass brush.
6.
Clean out any deposits inside the connection nozzle (3).
7.
Reinstall the lambda sensor (2) in the reverse sequence.
8.
Check that the lambda sensor is securely fit.
9.
Carefully tighten the lambda sensor with an SW22 spanner.
10.
Switch the heating system on again.
✎
See the chapter entitled “6 Using the heating system”, section “6.2
Switching on the heating system”.
11.
Calibrate the lambda sensor.
✎
See chapter “6 Using the heating system”, section “6.10 SERVICE
menu”, paragraph “Calibrating the lambda sensor”.
✓
The cleaning of the lambda sensor is completed.
Important!
✎
See “Generally applicable safety instructions” in this section.
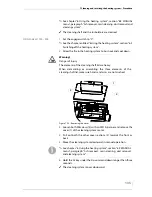
3.
Unscrew the union nut (1)
with a pipe wrench.
4.
Pull the lambda sensor (2)
with insulating washer out of
the connection nozzle (3) of
the flue pipe.
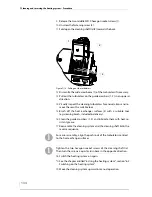
Figure 7/19 - Cleaning the lambda sensor
1
2
3
Important!
Steel bristles will damage the lambda sensor.
To clean the lambda sensor, use a fine brass brush instead of a steel
brush.
Important!
When reinstalling the lambda sensor, make sure its seal is intact.
Use a pipe wrench to tighten the union nut. Do not tighten the
lambda sensor excessively. Never tighten the lambda sensor by the
shaft body.

