5-12
Chapter 5 FUNCTION SETTINGS AND OPERATIONS
5.11 Setting the Tool Interval Adjustment Value
Ths functon allows you to make adjustments for any devaton between the ntal drawng/cuttng postons
of tool holder 1 and tool holder 2. Use plottng pens to draw the lnes for ths adjustment and specfy the
same plottng condtons for tool holder 1 and tool holder 2. The lowest assgned condton settng number
(COND No.) wll be used for each tool holder (see Secton 5.9, "Assgnng Tool Numbers" for further detals).
(1) Load a medum that s sutable for plottng.
(2) Mount a plottng pen n both tool holder 1 and tool holder 2.
(3) Press the
[PAUSE] key
to select PAUSE mode.
(4) Press the
[NEXT] key
repeatedly untl the followng menu s dsplayed.
FORCE
OFFSET
SPEED
QUALITY
I/F FUNCTION
TOOL COND AREA OPT
(5) Press the
[F2] key
(TOOL COND) to dsplay the menu shown below.
FORCE
OFFSET
SPEED
QUALITY
THICK CUT LINE
TOOL No. ADJ.T POS
(6) Press the
[F4] key
(ADJ.T POS) to dsplay the tool nterval adjustment settng screen.
FORCE
OFFSET
SPEED
QUALITY
TOOL WIDTH ADJ.
X= 0.0mm Y= 0.0mm
(7) Press the
[TEST] key
to dsplay the menu shown below.
FORCE
OFFSET
SPEED
QUALITY
SELECT PLOT POINT
PRESS ENTER KEY!
Use the
[ ] [ ] [ ] [ ]
keys
to move the pen carrage (the tp of the tool selected by the current settng) to the
poston where you want to draw the test pattern. Press the
[ENTER] key
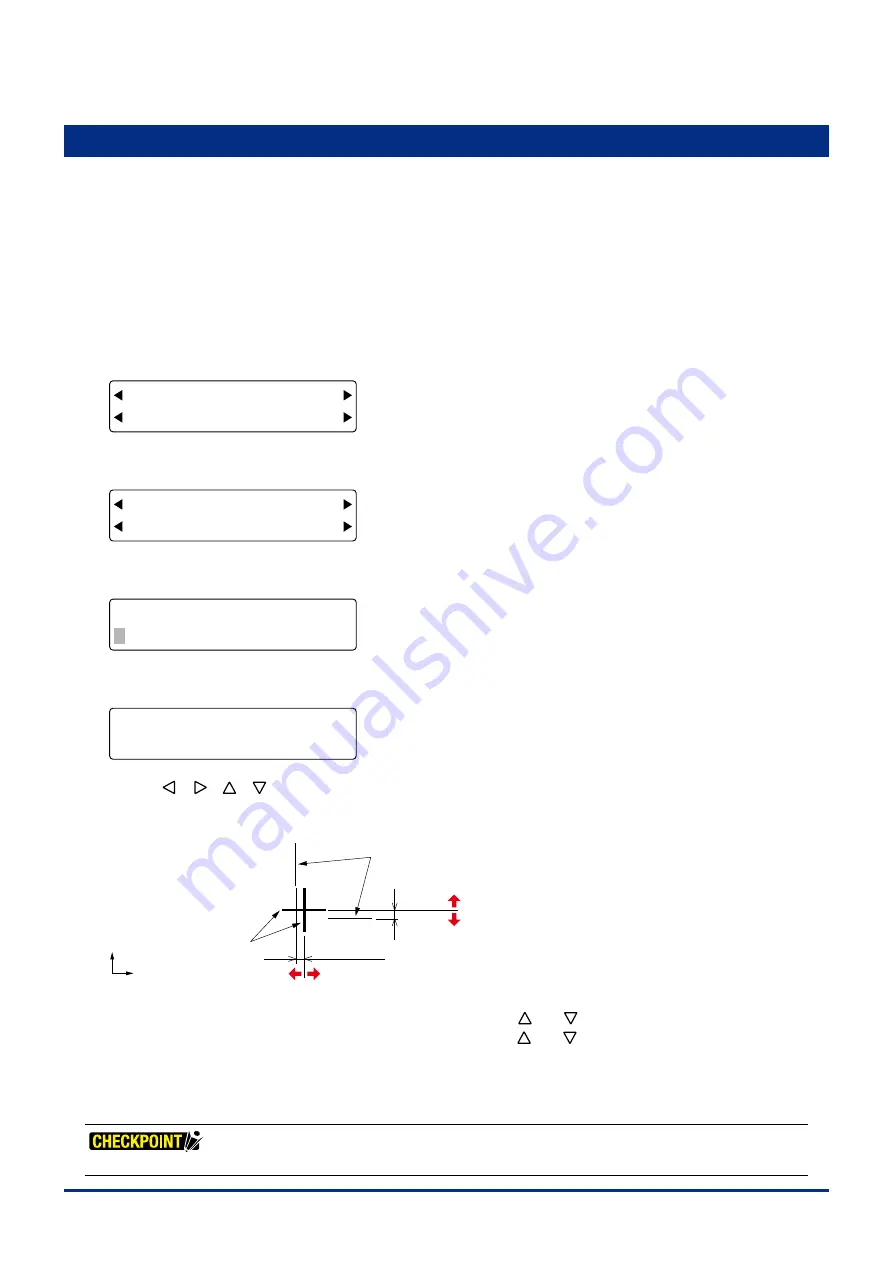
. The plotter wll start drawng the followng
test pattern.
X-axis deviation
Y-axis deviation
Lines drawn by tool holder 2 (the reference lines)
Lines drawn by tool holder 1
Y
X
Input a “+” value
Input a “+” value
Input a “-” value
Input a “-” value
Adjust the devaton of tool holder 1 based on the lnes drawn by tool holder 2.
To adjust the X-axs devaton, press the
[F2] key
and then use the
[ ]
or
[ ]
key
to adjust the numerc value.
To adjust the Y-axs devaton, press the
[F4] key
and then use the
[ ]
or
[ ]
key
to adjust the numerc value.
Setting range: -8.0 to +8.0 (mm)
In the case of the above figure, input a "–" value for both X= and Y=.
(8) Press the
[PAUSE] key
to cancel PAUSE mode.
This setting is retained in the plotter's internal memory even while the plotter is turned off.
Summary of Contents for FC2250 Series
Page 1: ...USER S MANUAL MANUAL NO FC2250 UM 151 FC2250 SERIES CUTTING PRO...
Page 105: ...5 29 Chapter 5 FUNCTION SETTINGS AND OPERATIONS Cutting Plotting Conditions List...
Page 111: ...CHAPTER 6 TROUBLESHOOTING PRODUCT SUMMARY 6 1 Troubleshooting 6 2 Error Messages...
Page 121: ...CHAPTER 8 SPECIFICATIONS PRODUCT SUMMARY 8 1 Main Specifications 8 2 External Dimensions...
Page 130: ......


