COPYRIGHT © 2001 CANON INC.
2000 2000 2000 2000
CANON iR5000i/iR6000i REV.0 JUNE 2001
2-2 T
CHAPTER 2 IMAGE ADJUSTMENT BASIC PROCEDURE
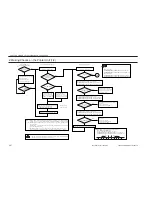
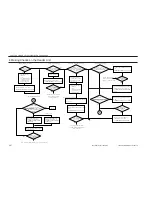
2. Making Checks on the Printer Unit (1/2)
Is there a
difference in density between
front and rear?
Is the rear lighter?
Turn the adjusting screw
found at the front of the
primary charging assembly
clockwise. (2 full turns max.)
Turn the adjusting screw
found at the rear of the
primary charging assembly
clockwise. (2 full turns max.)
Generate one print of a halftone image.
Is it foggy?
Are the readings ± 6 V
of the target value?
(*1)
Are the readings 70
±
15 V?
<
Checking the Density Slope
>
<Checking fro Fogging>
YES
NO
YES
NO
YES
NO
NO
YES
NO
YES
YES
NO
Are there vertical
lines in the image?
Are there vertical
lines in the image?
<
Checking Images
>
Checking Halftone Images
YES
YES
NO
NO
Execute forced
potential control.
Generate a halftone image.
Generate a blank print.
Make the selections in service mode, and turn off
and then on the main power switch:
COPIER>FUNCTION>DPC>DPC.
Check the following readings in service mode:
COPIER>DISPLAY>DPOT>VL1M (for copier image)
COPIER>DISPLAY>DPOT>VL1M-P (for printer image)
Check the following readings in service mode:
COPIER>DISPLAY>DPOT>VL2M (for copier image)
COPIER>DISPLAY>DPOT>VL2M-P (for printer image)
Check the following readings in service mode:
COPIER>DISPLAY>DPOT>VDM (for copier image)
COPIER>DISPLAY>DPOT>VDM-P (for printer image)
A
Check the following, and replace them if
necessary:
1. Laser (for output)
2. Potential control system
3. Photosensitive drum
Check the following, and replace them if
necessary.
1. Laser (for output)
2. Potential control system
3. Photosensitive drum
Check the primary charging
system and the potential control
system; if normal, replace the
photosensitive drum.
Clean the following; also check
for foreign matter:
1. Dust-proofing glass
2. Charging assemblies
1. If there still is a difference in density after giving the adjusting screw 2 turns (each turn
causing a change of about 0.7 mm), check the scanning lamp and the scanner for soiling.
2. When making a clockwise turn, be sure that the intervals between wire grid runs are not
larger than 9 mm.
When making a counterclockwise turn, be sure that the intervals between wire grid runs
are not smaller than 7.5 mm.
3. The machine will not execute potential control even when the main power switch is
turned off and then on if the temperature of the fixing assembly is 150˚C or higher.
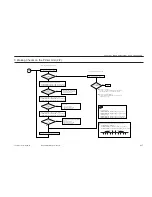
-50 -40 -30 -20 -10 0 +10 +20 +30 +40 +50
Default
Lighter image
Darker image
Adjusting the Offset of the VL Target Potential
(DE-OFFSET/DE-OFFSET-P)
Vary the value using the following as a guide:
COPIER>ADJUST>V-CONT>DE-OFST (for copier image)
COPIER>ADJUST>V-CONT>DE-OFST-P (for printer image)
Adjust the offset value of the VL target potential.
Memo
Are the readings ± 6 V
of the target value?
(*2)
REF.
*1:VD target value
COPIER >DISPLAY >DPOT >VDT (for copier image)
COPIER >DISPLAY >DPOT >VDT-P (for printer image)
*2:VL1 target value
COPIER >DISPLAY >DPOT >VD1T (for copier image)
COPIER >DISPLAY >DPOT >VD1T-P (for printer image)
Moving the wire from the photosensitive drum causes the image to be lighter, while
moving it closer causes the images to be darker.

