COPYRIGHT © 2001 CANON INC.
2000 2000 2000 2000
CANON iR5000i/iR6000i REV.0 JUNE 2001
CHAPTER 3 INSTALLATION
3-26 S
2.16
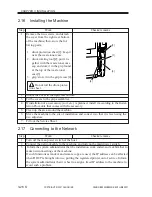
Installing the Machine
[1]
[2]
[3]
[4]
Step
1
2
3
4
5
6
7
Work
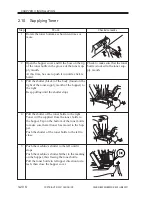
Remove the two screws, and detach
the cover from the right rear bottom
of the machine; then, store the fol-
lowing parts:
1. drum protection sheet[1]; keep it
near the waste toner case.
2. drum rotating tool[2]; put it to-
gether with the waste toner case
cap and store it in the grip found
at the top of the waste toner
case[3].
3. grip; store it in the grip recess[4].
Do not roll the drum protec-
tion sheet.
Checks/remarks
Mount the cover to the right rear bottom.
Fit the covers to the grip assemblies.
If installation of an accessory (sort, etc.) is planned, install it according to the Instal-
lation Procedure that comes with the accessory.
Clean up the area around the machine.
Move the machine to the site of installation and correct it so that it is level using the
two adjusters.
Fill out the Service Sheet.
2.17
Connecting to the Network
Step
1
2
3
Checks/remarks
Work
Turn off the man power switch of the host.
Connect the network cable to the machine, and turn on the main power switch.
Inform the system administrator that the installation work ended, and ask him/her to
make network settings of the machine.
If such functions as tandem and remote copy are used, the IP address can be affected
when DHCP is brought into use, putting the registered printer out of service. Inform
the system administrator that it is best to assign a fixed IP address to the machine to
avoid such a problem.

