


9-30 Upgrading Your Server
Removal
Remove the DIMM as follows.
NOTE:
To remove the failed DIMM, check the error message appearing in POST or use NEC
ESMPRO to identify the DIMM socket (group) in which the failed DIMM is installed.
1.
See the section "Preparing for Installation and Removal" described earlier.
2.
Pull out the server from the rack.
3.
Remove the top cover.
4.
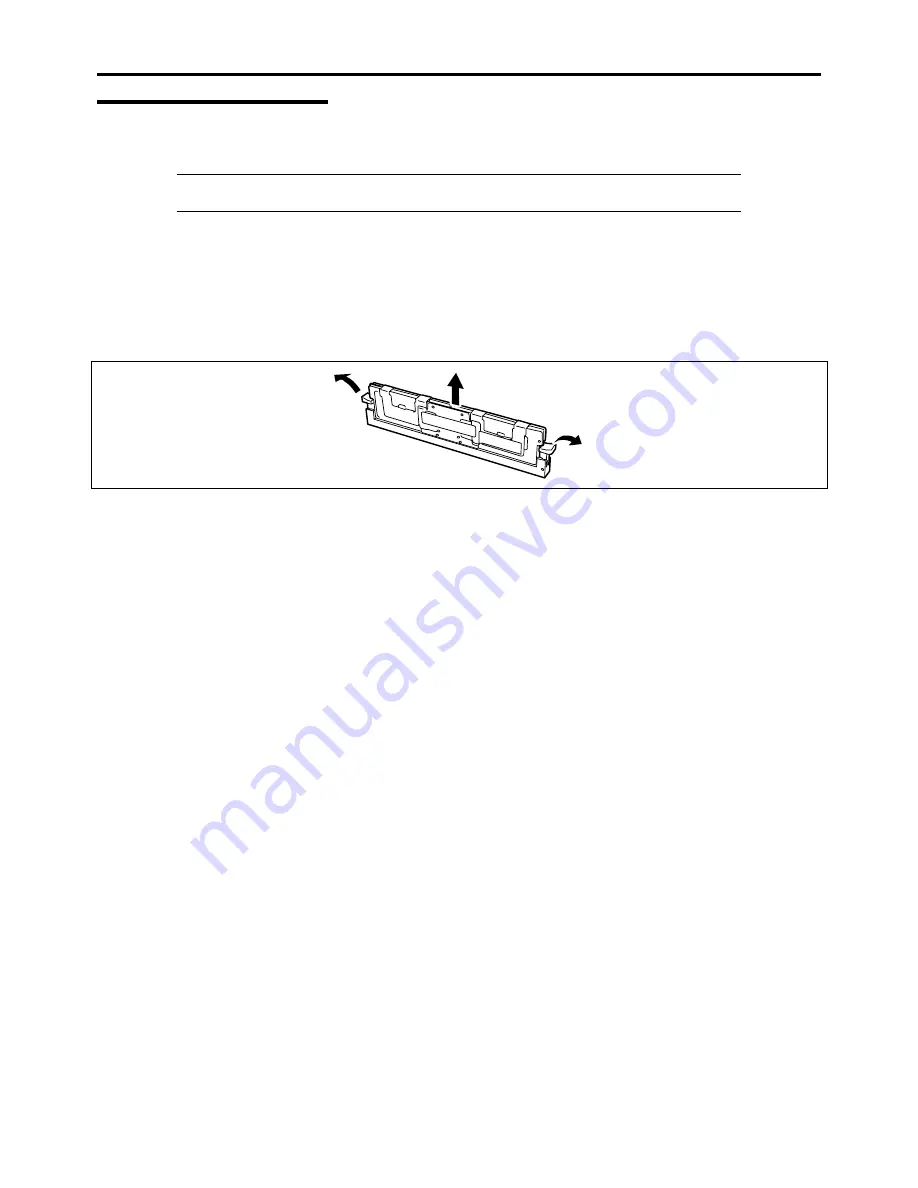
Open the clips at each end of the socket from which you remove the DIMM.
The DIMM pops out of the socket
5.
Hold the DIMM by the edges, lift it away from the socket, and store it in an anti-static package.
6.
Reinstall all parts removed in Steps 3 to 7.
See installation procedures for detail explanations.
7.
Power on the server and verify that POST does not display error messages.
If POST displays an error message, note down the message and see the POST error messages listed in Chapter 8.
8.
Start the SETUP utility and select [Advanced]
→
[Memory Configuration]
→
[Memory Retest]
→
[Enabled] to clear
the error information of the removed DIMM. (See Chapter 4 for details.)
9.
Select "Yes" for [Reset Configuration Data] on the Advanced menu.
This setting is required to change the hardware configuration data. See Chapter 4 for details.
Summary of Contents for NovaScale R440 E2
Page 1: ...NovaScale R440 E2 User s Guide NOVASCALE REFERENCE 86 A1 46FB 00...
Page 2: ......
Page 32: ...1 16 Notes on Using Your Server...
Page 70: ...2 38 General Description...
Page 94: ...3 24 Setting Up Your Server This page is intentionally left blank...
Page 147: ...Configuring Your Server 4 53 Property of Physical Device in the Universal RAID Utility...
Page 272: ...5 74 Installing the Operating System with Express Setup This page is intentionally left blank...
Page 308: ...7 12 Maintenance This page is intentionally left blank...
Page 408: ...9 54 Upgrading Your Server Screws...
Page 446: ...9 92 Upgrading Your Server This page is intentionally left blank...
Page 456: ......
Page 458: ...C 2 IRQ This page is intentionally left blank...
Page 490: ...D 32 Installing Windows Server 2008 4 Activate Windows The Windows activation is complete...
Page 494: ......
Page 544: ...G 2 Using a Client Computer with a CD Drive This page is intentionally left blank...
Page 548: ...H 4 Product Configuration Record Table This page is intentionally left blank...
Page 551: ......
Page 552: ...BULL CEDOC 357 AVENUE PATTON B P 20845 49008 ANGERS CEDEX 01 FRANCE REFERENCE 86 A1 46FB 00...