


144
FSN Series • User’s Guide
5. Menu Orientation
Keyer Menu
hÉóÉê=jÉåì=^ÅÅÉëë
There are two ways to access the
Keyer Menu
:
•
In the
Menu Bar
, press
{Page}
to display page
1
(if required). Then, press the
{Keys}
button. The parameters for the last selected or modified keyer are
displayed.
•
Arm the desired keyer first, then press and hold that Keyer button (e.g.,
KEY 1
or
KEY 2
in the M/E 1 bank, or the
DSK
button in the PGM bank). The parameters
for that specific keyer are displayed, and the location is named in the
Title Bar
(e.g.,
Keyer Menu: M/E 1, Key 1
).
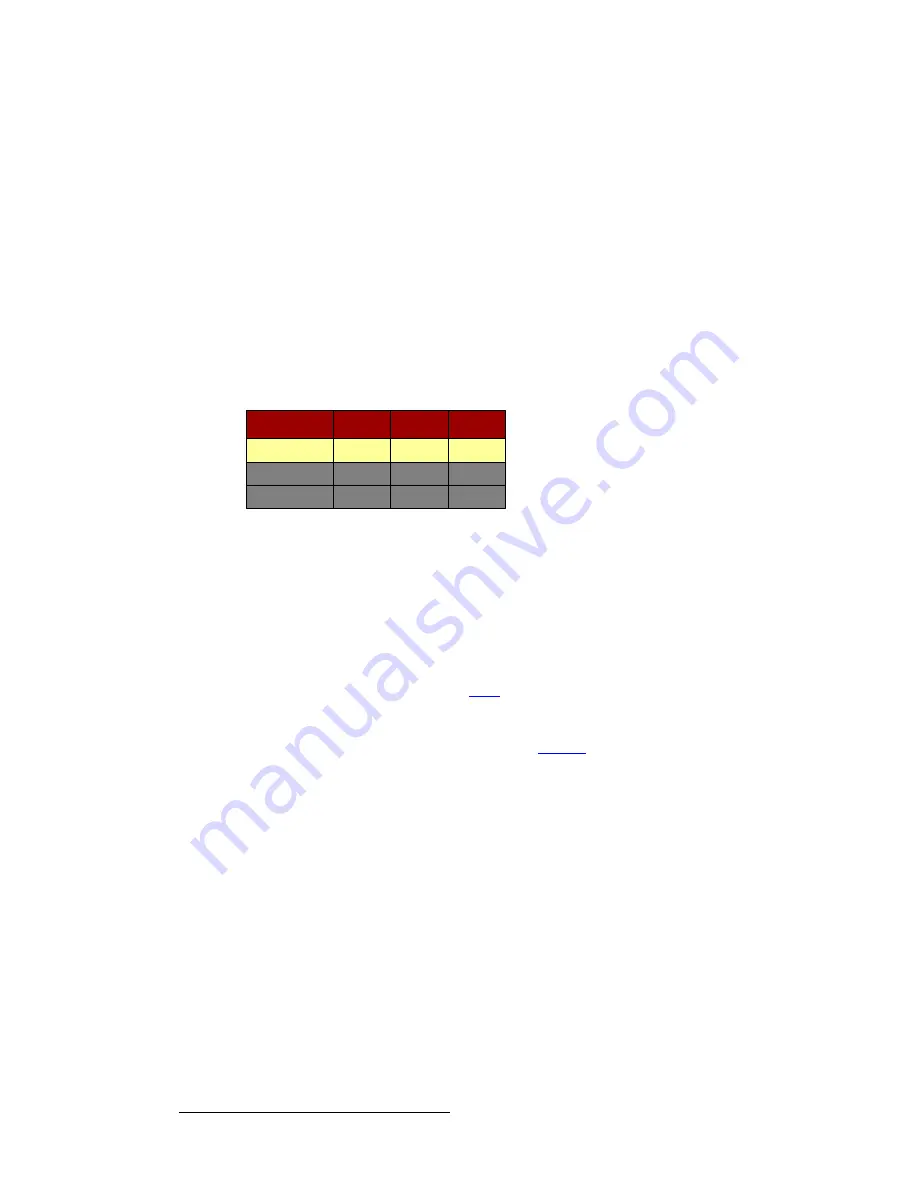
hÉóÉê=pí~íìë=q~ÄäÉ
A
Key Status Table
is displayed at the top of the
Palette
, as shown below:
Figure 5-39.
Key Status Table (sample)
In the table, rows are provided for each keyer on the panel, and the yellow highlight shows
the active keyer. This highlight changes automatically when different keyers are selected.
The following columns of information are provided:
•
Keyer
— Indicates the name of each keyer on the panel.
•
Cut
— Indicates the key’s cut source, as selected on the bank’s
Key Bus
.
•
Type
— Indicates the key type, either
Luma
or
Linear
, as selected with the
{Type}
button. Refer to the “
” section on page 146 for details.
•
Fill
— Indicates the key’s fill source, either
Self
,
Split
,
Matte
or
PST
(Preset Bus),
as selected with the
{Key Fill}
button. If the key is split, the name of the split fill
source appears in the cell. Refer to the “
” section on page 148 for details.
Fill
Type
Cut
Keyer
Self
Luma
CAM1
M/E 1, Key 1
CG
Linear
CG
M/E 1, Key 2
Self
Luma
PC3
DSK


