Coral FlexiCom 6000 Installation Manual
Hardware Installation Procedure
2-9
Eq
uipment Insta
llation
2
To Mount and Place the Cabinet:
1.
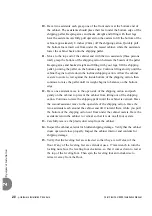
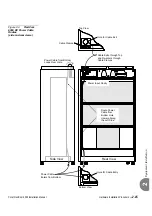
Carefully roll the cabinet to the location where it is to be installed. When the
cabinet is rolled over carpeted floors — particularly hallways, check ahead of
the cabinet to be sure the weight of the cabinet does not create a wave or
ripple in the carpet. If a wave starts to form, stop rolling the cabinet and push
the excess carpet under the cabinet until the carpet is flat. As the cabinet
approaches floor-to-carpet transitions or expansion gaps in cement floors, roll
the cabinet slowly and ease the casters over the obstruction to prevent undue
stress.
The cabinet leveling procedure below immobilizes the cabinet, and should
not be performed until the cabinet is stationary. If the installation environment
requires moving the cabinet during installation to gain access to the rear,
complete all communications and power wiring to the rear of the cabinet
before performing the leveling procedure.
2.
Once the cabinet is in position, use a 17mm wrench to loosen the locking nut
above each leveling foot, by turning it clockwise, if necessary. Spin each of the
four leveling feet to the left, extending them to the floor. With the help of an
assistant, tilt the front top of the cabinet back slightly, and turn the front two
leveling feet one or two additional turns, so that the weight of the cabinet rests
on the leveling feet instead of the casters. Repeat this procedure for the rear
two leveling feet.
Place a carpenter’s level on the top of the cabinet and check the pitch
left-to-right and front-to-back. Adjust the leveling feet accordingly, and
continue to check the pitch until the cabinet is level. Turn the locking nut
above each leveling foot to the right until it comes to rest against the base of
the cabinet. Tighten the locking nut by using a 17mm wrench until snug.
3.
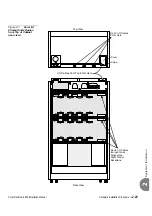
Cut and remove the tie wraps holding the wooden retaining bars across the
front of the Common Control shelf. These bars will not be used again, and
may be discarded.
4.
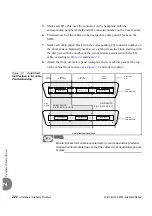
Check the alignment of all four doors on the cabinet to verify that the doors
open and close smoothly. Proper door alignment is essential to maintain
shielding of the cabinet from radio frequency interference (RFI).
The plastic bag containing extra cabinet hardware and cabinet placement
instruction includes 15 flat washers which may be placed over the hinge pin at
...................................................................................................
2
Cabinet Mounting and Placement
Содержание Coral FlexiCom 6000
Страница 2: ......
Страница 4: ......
Страница 18: ......
Страница 28: ...1 10 Introduction Coral FlexiCom 6000 Installation Manual Special Symbols Used in this Document 1 NOTES ...
Страница 32: ......
Страница 51: ...Coral FlexiCom 6000 Installation Manual Hardware Installation Procedure 2 19 Equipment Installation 2 NOTES ...
Страница 80: ...2 48 Hardware Installation Procedure Coral FlexiCom 6000 Installation Manual Equipment Installation 2 4 NOTES ...
Страница 86: ......
Страница 104: ...3 18 Initial Power Up Tests Coral FlexiCom 6000 Installation Manual Common Control Test 3 NOTES ...
Страница 110: ......
Страница 122: ...4 12 Software Installation Procedure Coral FlexiCom 6000 Installation Manual System Database Control 4 NOTES ...
Страница 134: ...4 24 Software Installation Procedure Coral FlexiCom 6000 Installation Manual Upgrading the Coral Version 4 NOTES ...
Страница 143: ...Coral FlexiCom 6000 Installation Manual Chapter 5 External Connections 5 1 External Connections 5 1 ...
Страница 144: ......
Страница 146: ...5 2 External Connections Coral FlexiCom 6000 Installation Manual External Connections 5 NOTES ...
Страница 147: ...Coral FlexiCom 6000 Installation 0DQXDO Chapter 6 Cabinet Descriptions 6 1 Cabinet Descriptions 6 1 ...
Страница 148: ......
Страница 190: ...6 42 Cabinet Descriptions Coral FlexiCom 6000 Installation Manual Cabinet Descriptions 6 NOTES ...
Страница 191: ...Coral FlexiCom 6000 Installation Manual Chapter 7 Power Supplies 7 1 PPS 7 1 7 2 RPS 7 9 7 3 PS ATS 7 19 ...
Страница 192: ......
Страница 210: ...7 18 Power Supplies Coral FlexiCom 6000 Installation Manual RPS Ring Generator Power Supply Unit 7 ...
Страница 224: ......
Страница 322: ...8 98 Common Control Cards Coral FlexiCom 6000 Installation Manual CLA ATS CoraLINK Adapter Card 8 NOTES ...
Страница 338: ...8 114 Common Control Cards Coral FlexiCom 6000 Installation Manual PBD24S Backplane Card 8 NOTES ...
Страница 339: ......


