2-8
Hardware Installation Procedure
Coral FlexiCom 6000 Installation Manual
Eq
uipment Insta
llation
2
10.
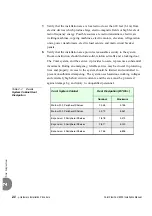
Have two assistants each grasp one of the front casters at the bottom end of
the cabinet. The assistants should place their feet under the bottom edge of the
shipping pallet. Keeping arms and backs straight and lifting with their legs,
have the assistants carefully pull upward on the casters to lift the bottom of the
cabinet approximately 8 inches (20cm) off the shipping carton. Quickly pull
the bottom foam insert out from under the raised cabinet, while the assistants
lower the cabinet back onto the shipping pallet.
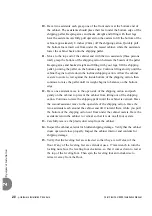
11.
Move to the top end of the cabinet and with the two assistants (three persons
total) grasp the bottom of the shipping carton between the boards of the pallet.
Keeping arms and backs straight and lifting with your legs, lift the shipping
pallet, pivoting the pallet on the bottom edge. Continue lifting slowly until the
cabinet begins to slide down the inclined shipping carton. Allow the cabinet
casters to come to rest against the inside bottom of the shipping carton, then
continue to raise the pallet until its weight begins to balance on the bottom
edge.
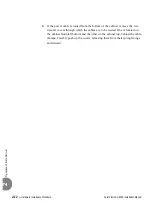
12.
Have one assistant move to the open side of the shipping carton and push
gently on the cabinet to prevent the cabinet from tilting out of the shipping
carton. Continue to raise the shipping pallet until the cabinet is vertical. Have
the second assistant move to the open side of the shipping carton. Have the
two assistants reach around the cabinet and tilt it toward them, while you pull
the bottom of the shipping carton out from under the cabinet casters. Have the
assistants return the cabinet to vertical so that it rests on all four casters.
13.
Carefully remove the plastic dust wrap from the cabinet.
14.
Inspect the cabinet exterior for hidden shipping damage. Verify that the cabinet
doors open and close properly. Inspect the cabinet interior and contents for
shipping damage.
15.
Verify that the leveling feet are retracted so that they are well clear of the
floor. If any of the leveling feet are extended, use a 17mm wrench to turn the
locking nut above the leveling foot clockwise, so that it comes down to rest at
the top of the leveling foot. Then spin the leveling foot anti-clockwise to
retract it away from the floor.
Содержание Coral FlexiCom 6000
Страница 2: ......
Страница 4: ......
Страница 18: ......
Страница 28: ...1 10 Introduction Coral FlexiCom 6000 Installation Manual Special Symbols Used in this Document 1 NOTES ...
Страница 32: ......
Страница 51: ...Coral FlexiCom 6000 Installation Manual Hardware Installation Procedure 2 19 Equipment Installation 2 NOTES ...
Страница 80: ...2 48 Hardware Installation Procedure Coral FlexiCom 6000 Installation Manual Equipment Installation 2 4 NOTES ...
Страница 86: ......
Страница 104: ...3 18 Initial Power Up Tests Coral FlexiCom 6000 Installation Manual Common Control Test 3 NOTES ...
Страница 110: ......
Страница 122: ...4 12 Software Installation Procedure Coral FlexiCom 6000 Installation Manual System Database Control 4 NOTES ...
Страница 134: ...4 24 Software Installation Procedure Coral FlexiCom 6000 Installation Manual Upgrading the Coral Version 4 NOTES ...
Страница 143: ...Coral FlexiCom 6000 Installation Manual Chapter 5 External Connections 5 1 External Connections 5 1 ...
Страница 144: ......
Страница 146: ...5 2 External Connections Coral FlexiCom 6000 Installation Manual External Connections 5 NOTES ...
Страница 147: ...Coral FlexiCom 6000 Installation 0DQXDO Chapter 6 Cabinet Descriptions 6 1 Cabinet Descriptions 6 1 ...
Страница 148: ......
Страница 190: ...6 42 Cabinet Descriptions Coral FlexiCom 6000 Installation Manual Cabinet Descriptions 6 NOTES ...
Страница 191: ...Coral FlexiCom 6000 Installation Manual Chapter 7 Power Supplies 7 1 PPS 7 1 7 2 RPS 7 9 7 3 PS ATS 7 19 ...
Страница 192: ......
Страница 210: ...7 18 Power Supplies Coral FlexiCom 6000 Installation Manual RPS Ring Generator Power Supply Unit 7 ...
Страница 224: ......
Страница 322: ...8 98 Common Control Cards Coral FlexiCom 6000 Installation Manual CLA ATS CoraLINK Adapter Card 8 NOTES ...
Страница 338: ...8 114 Common Control Cards Coral FlexiCom 6000 Installation Manual PBD24S Backplane Card 8 NOTES ...
Страница 339: ......


