Coral FlexiCom 6000 Installation Manual
Hardware Installation Procedure
2-7
Eq
uipment Insta
llation
2
2.2
Equipment Installation
Unpacking
1.
Inspect the shipping carton for evidence of physical damage or mishandling.
Report any damage to the carrier immediately.
2.
If it is necessary to make a damage claim to the carrier, do not move the
shipping carton until it has been examined by a representative of the carrier.
Otherwise, move the shipping carton as near as possible to the installation area
before opening.
3.
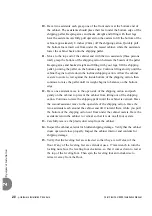
Use a utility knife or pair of shears to cut the three plastic bands around the
shipping carton.
4.
Lift the top of the shipping carton.
5.
Remove the front and rear nameplates from the depressions in the top foam
inserts and carefully place them aside. Remove any other items on top of the
foam insert and place aside.
6.
Remove the top foam inserts and set aside.
7.
Remove any circuit card boxes laying on top of the Coral system cabinet.
8.
Remove the plastic bag containing extra cabinet hardware and cabinet
placement instructions, and place it aside.
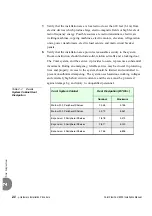
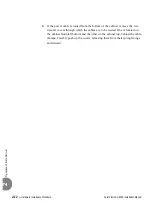
9.
Lift and remove the wrap-around side panel of the shipping carton and set
aside.
...................................................................................................
1
Unpacking the Shipping Container
The plastic bands are under tension. The ends may snap unpredictably when cut.
Wear suitable eye and hand protection while cutting the plastic bands.
Содержание Coral FlexiCom 6000
Страница 2: ......
Страница 4: ......
Страница 18: ......
Страница 28: ...1 10 Introduction Coral FlexiCom 6000 Installation Manual Special Symbols Used in this Document 1 NOTES ...
Страница 32: ......
Страница 51: ...Coral FlexiCom 6000 Installation Manual Hardware Installation Procedure 2 19 Equipment Installation 2 NOTES ...
Страница 80: ...2 48 Hardware Installation Procedure Coral FlexiCom 6000 Installation Manual Equipment Installation 2 4 NOTES ...
Страница 86: ......
Страница 104: ...3 18 Initial Power Up Tests Coral FlexiCom 6000 Installation Manual Common Control Test 3 NOTES ...
Страница 110: ......
Страница 122: ...4 12 Software Installation Procedure Coral FlexiCom 6000 Installation Manual System Database Control 4 NOTES ...
Страница 134: ...4 24 Software Installation Procedure Coral FlexiCom 6000 Installation Manual Upgrading the Coral Version 4 NOTES ...
Страница 143: ...Coral FlexiCom 6000 Installation Manual Chapter 5 External Connections 5 1 External Connections 5 1 ...
Страница 144: ......
Страница 146: ...5 2 External Connections Coral FlexiCom 6000 Installation Manual External Connections 5 NOTES ...
Страница 147: ...Coral FlexiCom 6000 Installation 0DQXDO Chapter 6 Cabinet Descriptions 6 1 Cabinet Descriptions 6 1 ...
Страница 148: ......
Страница 190: ...6 42 Cabinet Descriptions Coral FlexiCom 6000 Installation Manual Cabinet Descriptions 6 NOTES ...
Страница 191: ...Coral FlexiCom 6000 Installation Manual Chapter 7 Power Supplies 7 1 PPS 7 1 7 2 RPS 7 9 7 3 PS ATS 7 19 ...
Страница 192: ......
Страница 210: ...7 18 Power Supplies Coral FlexiCom 6000 Installation Manual RPS Ring Generator Power Supply Unit 7 ...
Страница 224: ......
Страница 322: ...8 98 Common Control Cards Coral FlexiCom 6000 Installation Manual CLA ATS CoraLINK Adapter Card 8 NOTES ...
Страница 338: ...8 114 Common Control Cards Coral FlexiCom 6000 Installation Manual PBD24S Backplane Card 8 NOTES ...
Страница 339: ......


