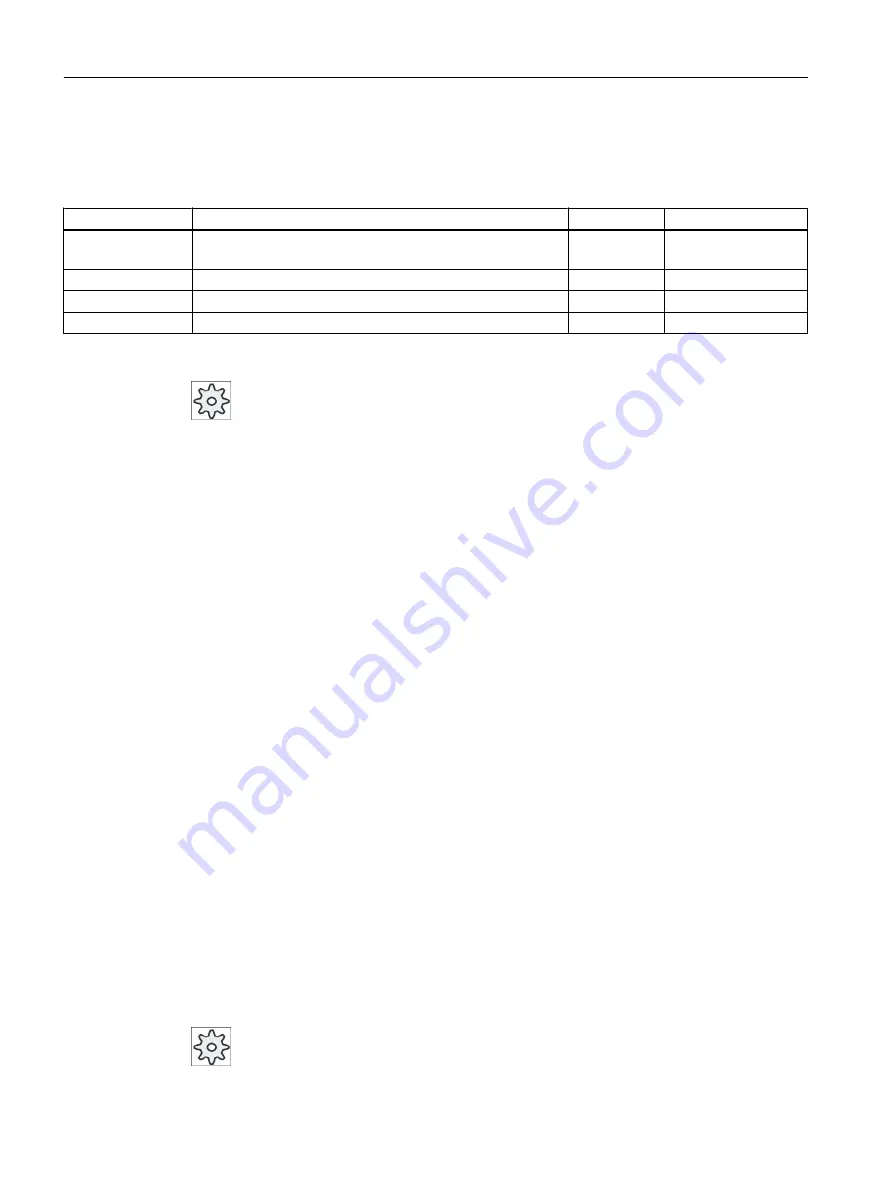
Hidden parameters
The following parameters are hidden. They are pre-assigned fixed values or values that can
be adjusted using setting data.
Parameter
Description
Value
Can be set in SD
PL
Machining plane
Defined in MD
52005
VR
Return distance
x
Multiple threads
1 Thread
No
α0
Starting angle offset
0°
Machine manufacturer
Please observe the information provided by the machine manufacturer.
10.4.8
Cut-off (CYCLE92)
Function
The "Cut-off" cycle is used when you want to cut off dynamically balanced parts (e.g. screws,
bolts, or pipes).
You can program a chamfer or rounding on the edge of the machined part. You can machine
at a constant cutting rate V or speed S up to a depth X1, from which point the workpiece is
machined at a constant speed. As of depth X1, you can also program a reduced feedrate FR
or a reduced speed SR, in order to adapt the velocity to the smaller diameter.
Use parameter X2 to enter the final depth that you wish to reach with the cut-off. With pipes,
for example, you do not need to cut-off until you reach the center; cutting off slightly more than
the wall thickness of the pipe is sufficient.
Approach/retraction
1. The tool first moves to the starting point calculated internally in the cycle at rapid traverse.
2. The chamfer or radius is machined at the machining feedrate.
3. Cut-off down to depth X1 is performed at the machining feedrate.
4. Cut-off is continued down to depth X2 at reduced feedrate FR and reduced speed SR.
5. The tool moves back to the safety distance at rapid traverse.
If your turning machine is appropriately set up, you can extend a workpiece drawer (part
catcher) to accept the cut-off workpiece. Extension of the workpiece drawer must be enabled
in a machine data element.
Machine manufacturer
Please refer to the machine manufacturer's specifications.
Programming technological functions (cycles)
10.4 Turning - milling/turning machine
Milling
570
Operating Manual, 08/2018, 6FC5398-7CP41-0BA0
Содержание SINUMERIK 828D Turning
Страница 68: ...Introduction 2 4 User interface Milling 68 Operating Manual 08 2018 6FC5398 7CP41 0BA0 ...
Страница 162: ...Setting up the machine 4 12 MDA Milling 162 Operating Manual 08 2018 6FC5398 7CP41 0BA0 ...
Страница 270: ...Machining the workpiece 6 17 Setting for automatic mode Milling 270 Operating Manual 08 2018 6FC5398 7CP41 0BA0 ...
Страница 278: ...Swivel combination 45 90 Simulating machining 7 1 Overview Milling 278 Operating Manual 08 2018 6FC5398 7CP41 0BA0 ...
Страница 294: ...Simulating machining 7 9 Displaying simulation alarms Milling 294 Operating Manual 08 2018 6FC5398 7CP41 0BA0 ...
Страница 316: ...Generating a G code program 8 10 Measuring cycle support Milling 316 Operating Manual 08 2018 6FC5398 7CP41 0BA0 ...
Страница 684: ...Collision avoidance 12 2 Set collision avoidance Milling 684 Operating Manual 08 2018 6FC5398 7CP41 0BA0 ...
Страница 746: ...Tool management 13 16 Working with Multitool Milling 746 Operating Manual 08 2018 6FC5398 7CP41 0BA0 ...
Страница 830: ...Alarm error and system messages 15 9 Remote diagnostics Milling 830 Operating Manual 08 2018 6FC5398 7CP41 0BA0 ...
Страница 846: ... Working with Manual Machine 16 7 More complex machining Milling 846 Operating Manual 08 2018 6FC5398 7CP41 0BA0 ...
Страница 870: ...HT 8 840D sl only 18 5 Calibrating the touch panel Milling 870 Operating Manual 08 2018 6FC5398 7CP41 0BA0 ...
Страница 890: ...Easy Message 828D only 20 7 Making settings for Easy Message Milling 890 Operating Manual 08 2018 6FC5398 7CP41 0BA0 ...
Страница 924: ...Edit PLC user program 828D only 23 8 Searching for operands Milling 924 Operating Manual 08 2018 6FC5398 7CP41 0BA0 ...
Страница 925: ...Appendix A A 1 840D sl 828D documentation overview Milling Operating Manual 08 2018 6FC5398 7CP41 0BA0 925 ...


