Service
and
upgrades
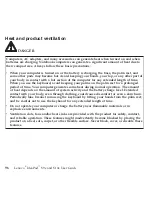
CAUTION
Do
not
attempt
to
service
a
product
yourself
unless
instructed
to
do
so
by
the
Customer
Support
Center
or
your
documentation.
Only
use
a
service
provider
who
is
approved
to
repair
your
particular
product.
Note:
Some
computer
parts
can
be
upgraded
or
replaced
by
the
customer.
Upgrades
typically
are
referred
to
as
options.
Replacement
parts
approved
for
customer
installation
are
referred
to
as
Customer
Replaceable
Units,
or
CRUs.
Lenovo
provides
documentation
with
instructions
when
it
is
appropriate
for
customers
to
install
options
or
replace
CRUs.
You
must
closely
follow
all
instructions
when
installing
or
replacing
parts.
The
Off
state
of
a
power
indicator
does
not
necessarily
mean
that
voltage
levels
inside
a
product
are
zero.
Before
you
remove
the
covers
from
a
product
equipped
with
an
AC
power
cord,
always
make
sure
that
the
power
is
turned
off
and
that
the
product
is
unplugged
from
any
power
source.
For
more
information
on
CRUs,
see
Appendix
B,
“Customer
Replaceable
Units
(CRUs),”
on
page
133.
If
you
have
any
questions
or
concerns,
contact
the
Customer
Support
Center.
Although
there
are
no
moving
parts
in
your
computer
after
the
power
cord
has
been
disconnected,
the
following
warnings
are
required
for
your
safety.
86
Lenovo
®
IdeaPad
™
S9e
and
S10e
User
Guide
Содержание S10e - IdeaPad 4187 - Atom 1.6 GHz
Страница 1: ...Lenovo IdeaPad S9e and S10e User Guide ...
Страница 8: ...viii Lenovo IdeaPad S9e and S10e User Guide ...
Страница 44: ...36 Lenovo IdeaPad S9e and S10e User Guide ...
Страница 66: ...58 Lenovo IdeaPad S9e and S10e User Guide ...
Страница 68: ...3 Slide the battery latch to the unlocked position 1 1 60 Lenovo IdeaPad S9e and S10e User Guide ...
Страница 69: ...4 Slide and hold the battery latch Then remove the battery 2 Chapter 5 Upgrading and replacing devices 61 ...
Страница 70: ...5 Install a fully charged battery into the computer 62 Lenovo IdeaPad S9e and S10e User Guide ...
Страница 74: ...5 Slide the HDD in the direction of the arrow 66 Lenovo IdeaPad S9e and S10e User Guide ...
Страница 75: ...6 Remove the HDD by pulling out the tab Chapter 5 Upgrading and replacing devices 67 ...
Страница 76: ...7 Align the HDD as shown in the drawing then put it gently in place 68 Lenovo IdeaPad S9e and S10e User Guide ...
Страница 77: ...8 Slide the HDD in the direction of the arrow Chapter 5 Upgrading and replacing devices 69 ...
Страница 82: ...1 2 1 2 74 Lenovo IdeaPad S9e and S10e User Guide ...
Страница 126: ...118 Lenovo IdeaPad S9e and S10e User Guide ...
Страница 144: ...136 Lenovo IdeaPad S9e and S10e User Guide ...
Страница 146: ...138 Lenovo IdeaPad S9e and S10e User Guide ...
Страница 166: ...158 Lenovo IdeaPad S9e and S10e User Guide ...
Страница 174: ...166 Lenovo IdeaPad S9e and S10e User Guide ...
Страница 175: ......
Страница 176: ......

