8.
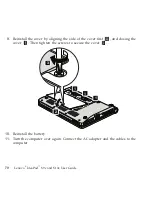
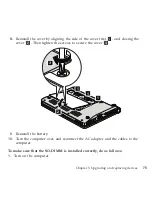
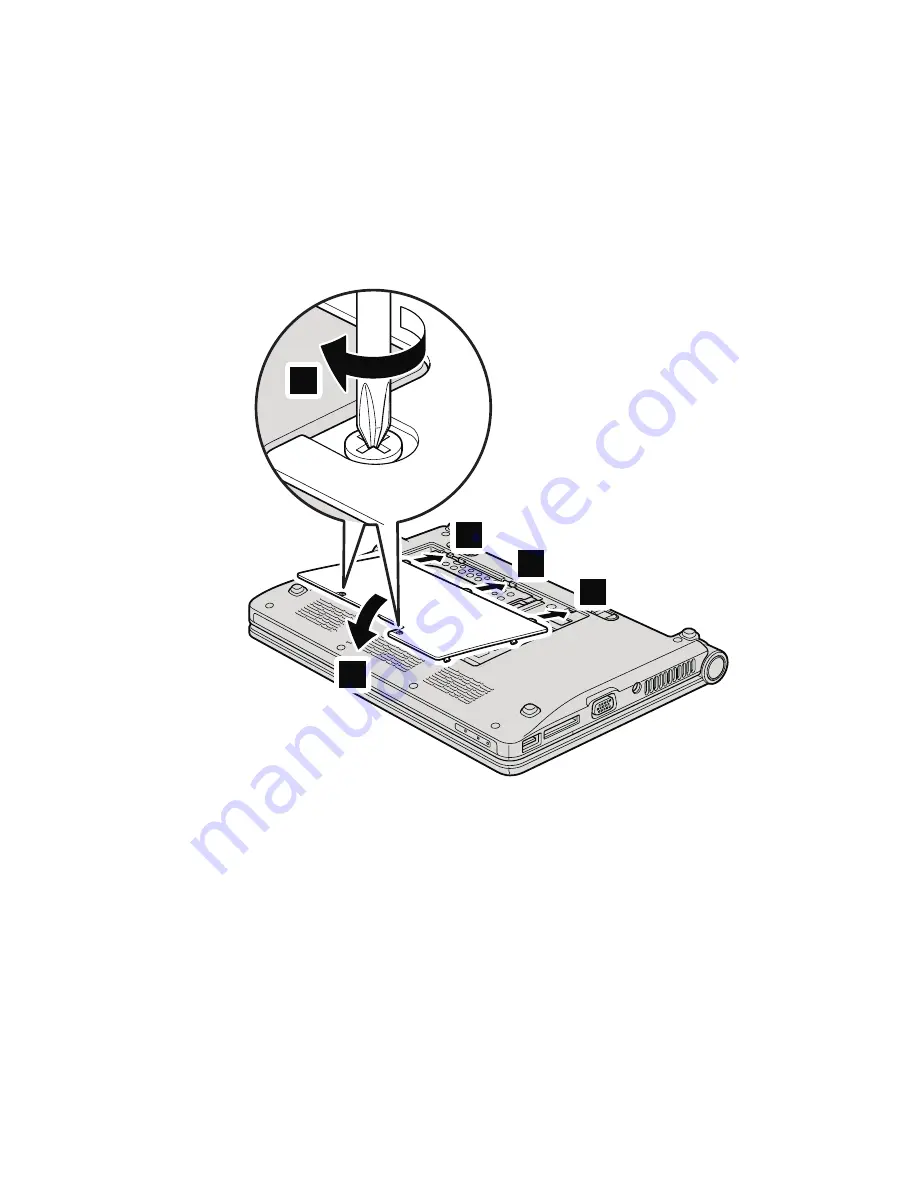
Reinstall
the
cover
by
aligning
the
side
of
the
cover
first
1
,
and
closing
the
cover
2
.
Then
tighten
the
screws
to
secure
the
cover
3
.
1
1
1
2
3
9.
Reinstall
the
battery.
10.
Turn
the
computer
over,
and
reconnect
the
AC
adapter
and
the
cables
to
the
computer.
To
make
sure
that
the
SO-DIMM
is
installed
correctly,
do
as
follows:
1.
Turn
on
the
computer.
Chapter
5.
Upgrading
and
replacing
devices
75
Содержание S10e - IdeaPad 4187 - Atom 1.6 GHz
Страница 1: ...Lenovo IdeaPad S9e and S10e User Guide ...
Страница 8: ...viii Lenovo IdeaPad S9e and S10e User Guide ...
Страница 44: ...36 Lenovo IdeaPad S9e and S10e User Guide ...
Страница 66: ...58 Lenovo IdeaPad S9e and S10e User Guide ...
Страница 68: ...3 Slide the battery latch to the unlocked position 1 1 60 Lenovo IdeaPad S9e and S10e User Guide ...
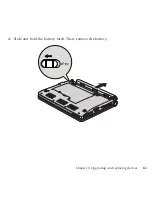
Страница 69: ...4 Slide and hold the battery latch Then remove the battery 2 Chapter 5 Upgrading and replacing devices 61 ...
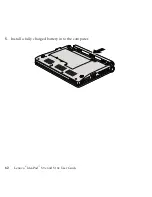
Страница 70: ...5 Install a fully charged battery into the computer 62 Lenovo IdeaPad S9e and S10e User Guide ...
Страница 74: ...5 Slide the HDD in the direction of the arrow 66 Lenovo IdeaPad S9e and S10e User Guide ...
Страница 75: ...6 Remove the HDD by pulling out the tab Chapter 5 Upgrading and replacing devices 67 ...
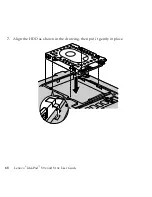
Страница 76: ...7 Align the HDD as shown in the drawing then put it gently in place 68 Lenovo IdeaPad S9e and S10e User Guide ...
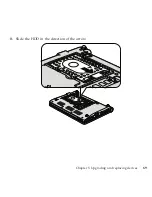
Страница 77: ...8 Slide the HDD in the direction of the arrow Chapter 5 Upgrading and replacing devices 69 ...
Страница 82: ...1 2 1 2 74 Lenovo IdeaPad S9e and S10e User Guide ...
Страница 126: ...118 Lenovo IdeaPad S9e and S10e User Guide ...
Страница 144: ...136 Lenovo IdeaPad S9e and S10e User Guide ...
Страница 146: ...138 Lenovo IdeaPad S9e and S10e User Guide ...
Страница 166: ...158 Lenovo IdeaPad S9e and S10e User Guide ...
Страница 174: ...166 Lenovo IdeaPad S9e and S10e User Guide ...
Страница 175: ......
Страница 176: ......

