For
more
information
about
the
application,
see
the
Help
in
Lenovo
Quick
Start
system.
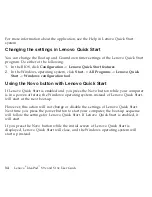
Changing
the
settings
in
Lenovo
Quick
Start
You
can
change
the
Boot
up
and
Countdown
timer
settings
of
the
Lenovo
Quick
Start
program.
Do
either
of
the
following:
1.
In
the
BIOS,
click
Configuration
->
Lenovo
Quick
Start
features
.
2.
In
the
Windows
operating
system,
click
Start
->
All
Programs
->
Lenovo
Quick
Start
->
Windows
configuration
tool
.
Using
the
Novo
button
with
Lenovo
Quick
Start
If
Lenovo
Quick
Start
is
enabled
and
you
press
the
Novo
button
while
your
computer
is
in
a
power-off
state,
the
Windows
operating
system,
instead
of
Lenovo
Quick
Start,
will
start
at
the
next
boot-up.
However,
this
action
will
not
change
or
disable
the
settings
of
Lenovo
Quick
Start.
Next
time
you
press
the
power
button
to
start
your
computer,
the
boot-up
sequence
will
follow
the
settings
for
Lenovo
Quick
Start.
If
Lenovo
Quick
Start
is
enabled,
it
will
start.
If
you
press
the
Novo
button
while
the
initial
screen
of
Lenovo
Quick
Start
is
displayed,
Lenovo
Quick
Start
will
close,
and
the
Windows
operating
system
will
start
up
instead.
34
Lenovo
®
IdeaPad
™
S9e
and
S10e
User
Guide
Содержание S10e - IdeaPad 4187 - Atom 1.6 GHz
Страница 1: ...Lenovo IdeaPad S9e and S10e User Guide ...
Страница 8: ...viii Lenovo IdeaPad S9e and S10e User Guide ...
Страница 44: ...36 Lenovo IdeaPad S9e and S10e User Guide ...
Страница 66: ...58 Lenovo IdeaPad S9e and S10e User Guide ...
Страница 68: ...3 Slide the battery latch to the unlocked position 1 1 60 Lenovo IdeaPad S9e and S10e User Guide ...
Страница 69: ...4 Slide and hold the battery latch Then remove the battery 2 Chapter 5 Upgrading and replacing devices 61 ...
Страница 70: ...5 Install a fully charged battery into the computer 62 Lenovo IdeaPad S9e and S10e User Guide ...
Страница 74: ...5 Slide the HDD in the direction of the arrow 66 Lenovo IdeaPad S9e and S10e User Guide ...
Страница 75: ...6 Remove the HDD by pulling out the tab Chapter 5 Upgrading and replacing devices 67 ...
Страница 76: ...7 Align the HDD as shown in the drawing then put it gently in place 68 Lenovo IdeaPad S9e and S10e User Guide ...
Страница 77: ...8 Slide the HDD in the direction of the arrow Chapter 5 Upgrading and replacing devices 69 ...
Страница 82: ...1 2 1 2 74 Lenovo IdeaPad S9e and S10e User Guide ...
Страница 126: ...118 Lenovo IdeaPad S9e and S10e User Guide ...
Страница 144: ...136 Lenovo IdeaPad S9e and S10e User Guide ...
Страница 146: ...138 Lenovo IdeaPad S9e and S10e User Guide ...
Страница 166: ...158 Lenovo IdeaPad S9e and S10e User Guide ...
Страница 174: ...166 Lenovo IdeaPad S9e and S10e User Guide ...
Страница 175: ......
Страница 176: ......


