


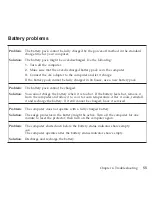


Battery
problems
Problem:
The
battery
pack
cannot
be
fully
charged
by
the
power-off
method
in
the
standard
charge
time
for
your
computer.
Solution:
The
battery
pack
might
be
over-discharged.
Do
the
following:
1.
Turn
off
the
computer.
2.
Make
sure
that
the
over-discharged
battery
pack
is
in
the
computer.
3.
Connect
the
AC
adapter
to
the
computer
and
let
it
charge.
If
the
battery
pack
cannot
be
fully
charged
in
24
hours,
use
a
new
battery
pack.
Problem:
The
battery
pack
cannot
be
charged.
Solution:
You
cannot
charge
the
battery
when
it
is
too
hot.
If
the
battery
feels
hot,
remove
it
from
the
computer
and
allow
it
to
cool
to
room
temperature.
After
it
cools,
reinstall
it
and
recharge
the
battery.
If
it
still
cannot
be
charged,
have
it
serviced.
Problem:
The
computer
does
not
operate
with
a
fully
charged
battery.
Solution:
The
surge
protector
in
the
battery
might
be
active.
Turn
off
the
computer
for
one
minute
to
reset
the
protector;
then
turn
on
the
computer
again.
Problem:
The
computer
shuts
down
before
the
battery
status
indicator
shows
empty.
-or-
The
computer
operates
after
the
battery
status
indicator
shows
empty.
Solution:
Discharge
and
recharge
the
battery.
Chapter
4.
Troubleshooting
55
Содержание S10e - IdeaPad 4187 - Atom 1.6 GHz
Страница 1: ...Lenovo IdeaPad S9e and S10e User Guide ...
Страница 8: ...viii Lenovo IdeaPad S9e and S10e User Guide ...
Страница 44: ...36 Lenovo IdeaPad S9e and S10e User Guide ...
Страница 66: ...58 Lenovo IdeaPad S9e and S10e User Guide ...
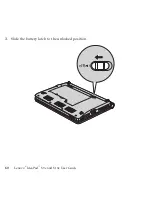
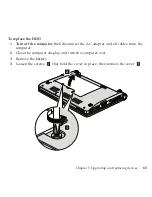
Страница 68: ...3 Slide the battery latch to the unlocked position 1 1 60 Lenovo IdeaPad S9e and S10e User Guide ...
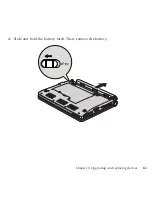
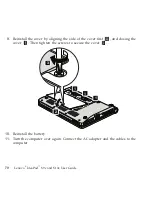
Страница 69: ...4 Slide and hold the battery latch Then remove the battery 2 Chapter 5 Upgrading and replacing devices 61 ...
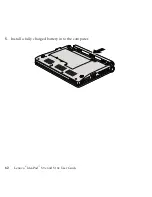
Страница 70: ...5 Install a fully charged battery into the computer 62 Lenovo IdeaPad S9e and S10e User Guide ...
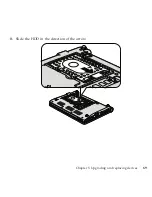
Страница 74: ...5 Slide the HDD in the direction of the arrow 66 Lenovo IdeaPad S9e and S10e User Guide ...
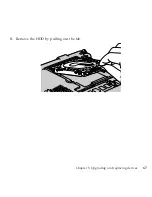
Страница 75: ...6 Remove the HDD by pulling out the tab Chapter 5 Upgrading and replacing devices 67 ...
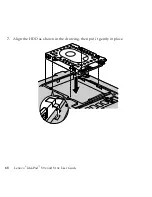
Страница 76: ...7 Align the HDD as shown in the drawing then put it gently in place 68 Lenovo IdeaPad S9e and S10e User Guide ...
Страница 77: ...8 Slide the HDD in the direction of the arrow Chapter 5 Upgrading and replacing devices 69 ...
Страница 82: ...1 2 1 2 74 Lenovo IdeaPad S9e and S10e User Guide ...
Страница 126: ...118 Lenovo IdeaPad S9e and S10e User Guide ...
Страница 144: ...136 Lenovo IdeaPad S9e and S10e User Guide ...
Страница 146: ...138 Lenovo IdeaPad S9e and S10e User Guide ...
Страница 166: ...158 Lenovo IdeaPad S9e and S10e User Guide ...
Страница 174: ...166 Lenovo IdeaPad S9e and S10e User Guide ...
Страница 175: ......
Страница 176: ......


