Sequencer mode
438
• Control each Track’s EQ settings and Master Effects
Send levels
• Modulate sounds and effects using the Real Time
Knobs
• Control KARMA, and select KARMA scenes, using
the sliders and switches
• Edit sounds using Tone Adjust
• Assign sliders, knobs, and switches to different
Tone Adjust parameters
• Select the Keyboard Track and the HDR Audio
record track
Local Control On/Off and the Control Surface
The Control Surface generates and receives MIDI CCs
and System Exclusive messages, so that you can record
knob, switch, and slider movements into a sequencer.
This means that the Global mode
Local Control
setting
is important:
• If
Local Control
is On, the physical Control Surface
will work properly as long as MIDI is
not
being
looped back into the OASYS.
• If
Local Control
is Off, you
must
loop back MIDI
into the OASYS in order for the physical Control
Surface to work properly.
• Regardless of the
Local Control
setting, you can
always edit Control Surface parameters via the
touch-screen.
For more information, see “Local Control and the
Control Surface” on page 651.
Control Assign Switches and Tabs
You can switch the Control Surface between its
different functions using either the tabs on the left side
of the LCD display, or the front-panel Control Assign
switches. The tabs and the front-panel switches mirror
one another; when you change one of them, the other
changes as well.
Control Assign switches
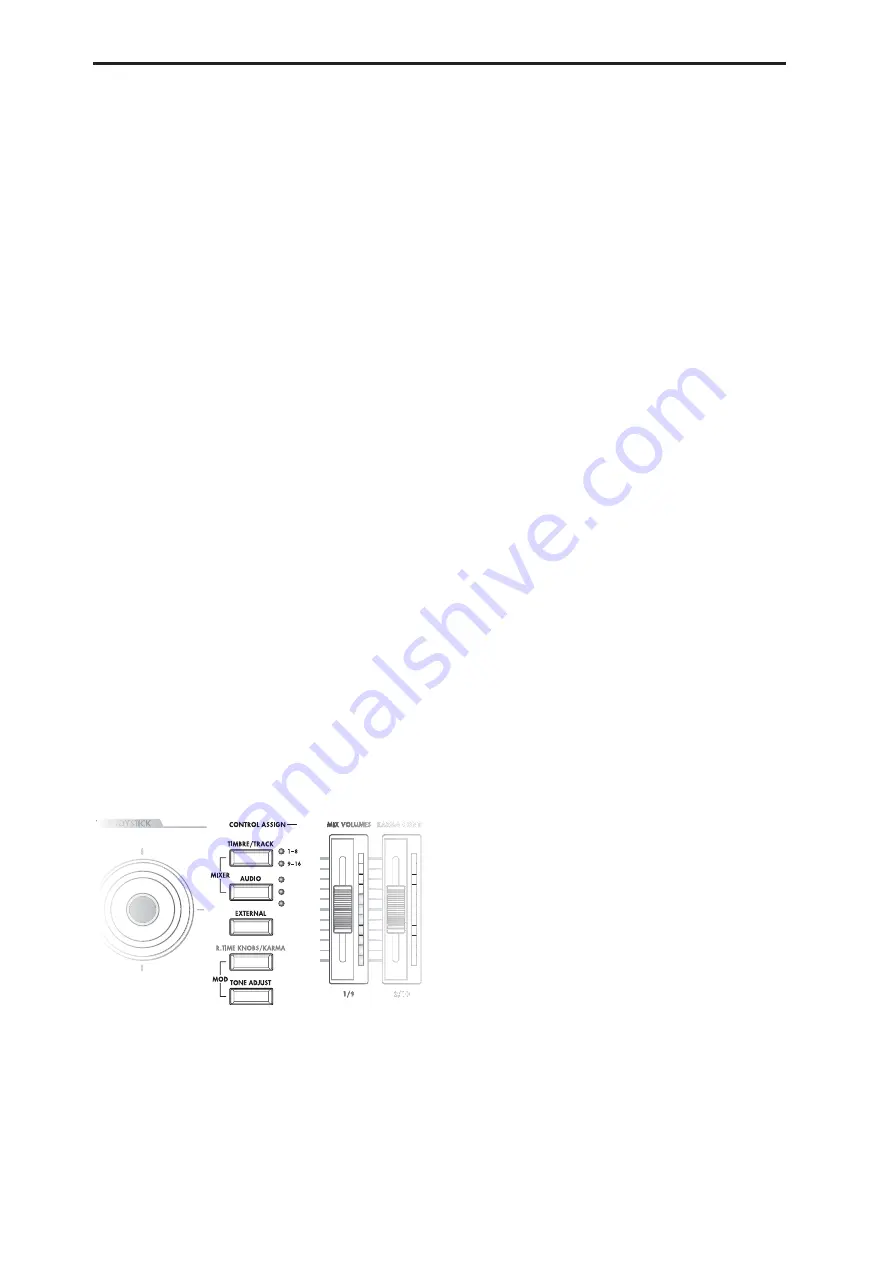
In Sequencer mode, you can select one of six different
functions:
TIMBRE/TRACK
lets you adjust the volume, pan, EQ,
and send levels for each of the 16 Tracks, eight at a
time. The LEDs to the right of the switch show whether
you’re currently editing Tracks 1–8 or 9–16; press the
TIMBRE/TRACK
button to toggle between the two.
If you switch to one of the other Control Assign modes,
and then go back to
TIMBRE/TRACK
, it will
automatically return to the previously selected group
(1–8 or 9–16).
The
AUDIO
button lets you control both the HDR
Audio Tracks, and the Audio Inputs. The LEDs to the
right of the switch show whether you’re currently
editing HDR Tracks 1–8, HDR Tracks 9–16, or the
Audio Inputs; press the
AUIDIO
button repeatedly to
step through the three options.
As with
TIMBRE/TRACK
above, the Control Surface
remembers your last selection under
AUDIO.
If you
switch to one of the other Control Assign modes, and
then go back to
AUDIO
, it will automatically return to
the previously selected group.
AUDIO HDR 1–8 and HDR 9–16
let you adjust the
volume, pan, EQ, and send levels for each of the 16
hard-disk Audio Tracks, eight at a time.
AUDIO INPUTS
lets you adjust the volume, pan, and
send levels for the analog and S/P DIF audio inputs.
EXTERNAL
lets you send MIDI messages to external
MIDI devices.
R.TIME KNOBS/KARMA
lets you modulate sounds
and effects with the knobs, and control KARMA with
the sliders and switches.
TONE ADJUST
lets you edit Programs within the
context of the Song, and without making any changes
to the original Program data. You also get hands-on
access to these edits, using the sliders, knobs, and
switches.
You can freely change back and forth between the
different functions, without losing any of your edits.
Front-panel LEDs for sliders and knobs
There’s a vertical column of LEDs next to each slider,
and a ring of LEDs around each knob. Similarly, each
of the switches has an LED to show whether it’s on or
off.
As you switch between the different Control Assign
settings, you’ll notice that the LEDs change to show the
current values for all of the controllers.
You can edit these values using either the physical
sliders, knobs, and switches, or by selecting the on-
screen parameters and using the standard data entry
controls. When you edit a value using the LCD and
data entry, you’ll notice that the LEDs on the sliders,
knobs, and switches reflect the change as well.
Jump/Catch
When you change the Control Assign setting, the
physical position of the knobs or sliders may be
different than the parameter value, as shown by the
LEDs.
The
Knob/Slider Mode
parameter, under System
Preferences on the Global mode Basic page, determines
how and when moving the physical slider or knob will
start to edit the parameter value.
When it is set to
Jump
, the parameter will snap to the
physical position as soon as you start to move the knob
or slider. Use this if you’d like the parameters to
respond instantly to controller movements.
INPUTS
HDR 1-8
HDR 9-16
6
Содержание Electronic Keyboard
Страница 1: ...Parameter Guide Parameter Guide ...
Страница 2: ......
Страница 180: ...Program mode EXi 170 ...
Страница 290: ...EXi STR 1 Plucked String 280 ...
Страница 572: ...Sequencer mode 562 ...
Страница 700: ...Global mode 690 ...
Страница 751: ...Insert Effects IFX1 IFX12 Routing 741 Fig 2 3a Fig 2 3b ...
Страница 902: ...Effect Guide 892 ...


