Sequencer: Page Menu Commands Audio Event Edit
537
“Control Change” lets you specify the control
change number. Normally you will leave this set at
ALL.
You can also check various other events (“Pitch
Bend,” “Program Change,” “After Touch,” “Poly
After Touch,” and “Exclusive”).
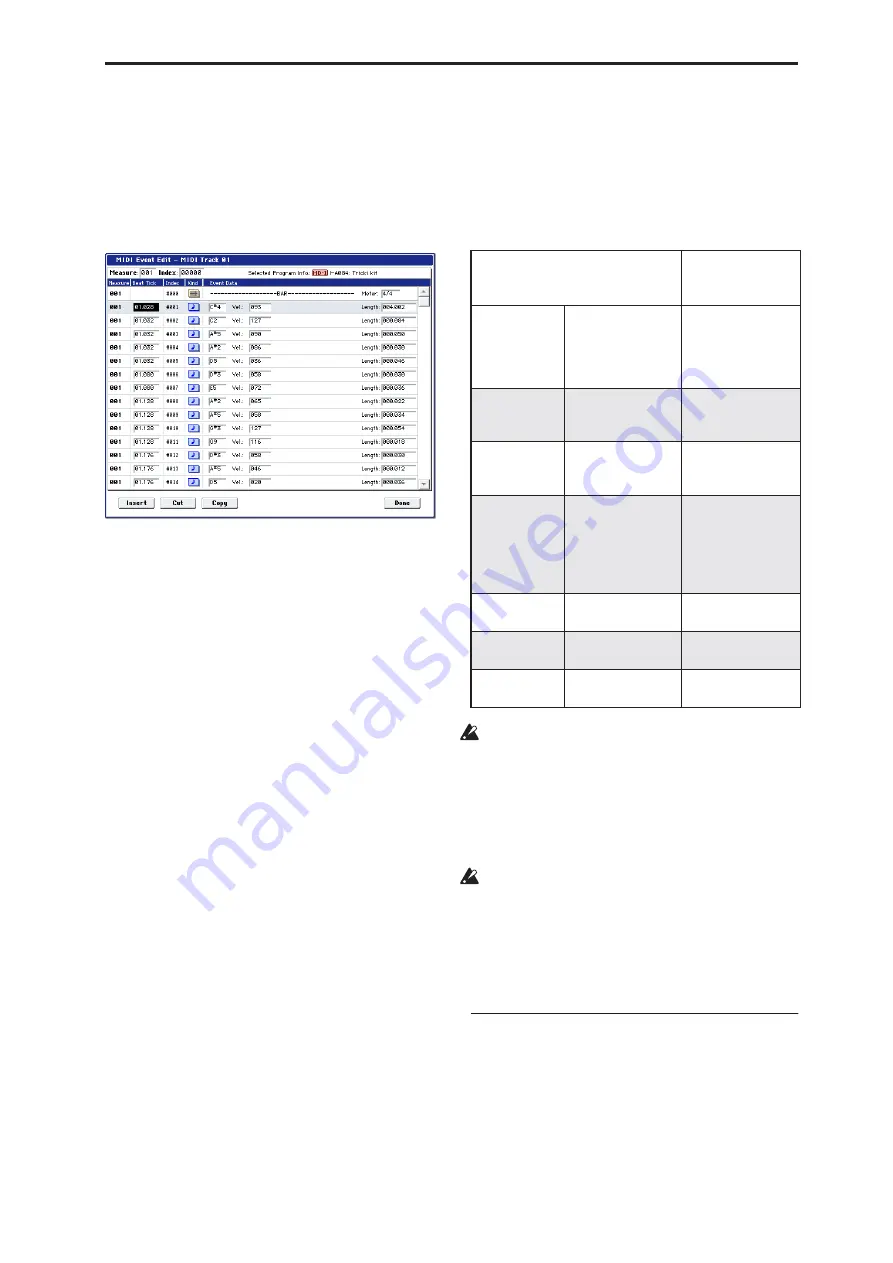
2. Press the OK button to open the Event Edit dialog
box.
3. In the upper part of the dialog box, Measure and
Index show the measure that you are editing and
the events of the index numbers within the
measure.
You can touch the scroll bar located at the right to
move to the event that you wish to edit.
4. Select the event that you wish to edit, and use the
VALUE controller etc. to modify its value(s).
• By modifying the value of the “Beat Tick” location
within the measure, you can move the event within
the measure.
• You can edit each event by modifying its data
value(s). When you select a note event, it will
sound.
5. You can press the buttons located at the bottom of
the dialog box to edit events as follows.
• Inserting an event
Select the location “Beat Tick” at which you wish to
insert an event, and press the Insert button to insert
an event.
• Deleting an event
Select the event that you wish to delete, and press
the Cut button to delete the event.
• Moving an event
You can use the Cut button and Insert button to
move an event (by “cut and paste”).
Use the Cut button to delete the event that you wish
to move, then use the Insert button to insert it at the
desired location.
You can also move an event by modifying its “Beat
Tick” value.
• Copying an event
Select the event that you wish to copy, and press the
Copy button. Then select the copy destination and
press the Insert button to insert the event at that
location.
6. When you are
fi
nished event editing, press the
Done button.
If you press the COMPARE switch you will return
the data to the condition in which it was before you
began event editing.
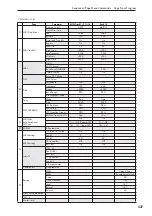
The following table shows the types of musical data
that can be edited by “MIDI Event Edit” and the range
of their values.
*1: Be aware that because the time signature is
recorded in the master track, modifying it from any
track will affect the same measure of all tracks,
causing them all to be played in the modified time
signature.
Note:
*2: Note data and velocity values can also be
entered by holding down the ENTER switch and
playing a note on the keyboard.
*3: You cannot change System Exclusive events into
a different type of event (e.g., a Note or Control
Change event). Nor can you change any other type
of event into a System Exclusive event.
Pattern numbers will be displayed in locations in
which a pattern has been “put” (placed). At the end of
the track there will be an indication of End of Track.
Audio Event Edit
This command lets you edit individual audio events
that have been recorded, or trim (i.e., make
adjustments in steps of a single sample to) the region
used by audio events.
If you want to change the name of a region after
recording, use the Select Region dialog box.
BAR (displayed only)
(Measure line)
Meter:
1/4…16/16
*1
(Time signature)
C–1…G9 *
2
(Note data)
V: 1…127 *
2
(Velocity)
L:
000.000…15984.00
0
(Length: beats,
clocks)
PAFT
(Polyphonic
after touch)
C–1…G9
(Note number)
0…127
(Value)
CTRL
(Control
change)
C: 0…101
(Control change
number)
0…127
(Value)
PROG
(Program
change)
Bank: I–A…I–F
000…127,
G, g(1)…g(9) g(d), -
- -,
U–A…U–G
(Program bank)
P: 0…127,
1…128 (G,
g(1)…g(d))
(Program number)
AFTT
(After Touch)
0…127
(value)
BEND
(Pitch bend)
–8192…+8191
(value)
EXCL *
3
(Exclusive)
Содержание Electronic Keyboard
Страница 1: ...Parameter Guide Parameter Guide ...
Страница 2: ......
Страница 180: ...Program mode EXi 170 ...
Страница 290: ...EXi STR 1 Plucked String 280 ...
Страница 572: ...Sequencer mode 562 ...
Страница 700: ...Global mode 690 ...
Страница 751: ...Insert Effects IFX1 IFX12 Routing 741 Fig 2 3a Fig 2 3b ...
Страница 902: ...Effect Guide 892 ...


