Sampling: Page Menu Commands Rate Convert
627
5. In “Curve,” specify the way in which the volume
will change.
Linear:
The volume will change linearly. For normal
fade-in or fade-out, select Linear.
Power:
The volume will change non-linearly. When
you use the “Mix” menu command to combine a
faded-in waveform with a different faded-out
waveform (i.e., crossfade), using a Linear fade-
in/out may produce an impression that the volume
has dropped in the middle of the curve. In such
cases, use Power to perform the fade-in/out.
6. In “Save to No.,” specify the save destination
sample number. By default, an unused sample
number will be selected.
The sample number cannot be specified if
“Overwrite” is checked (page 615).
For stereo samples, use “Save to No.(L)” and
“(R)” to specify the save-destination of the L and R
channels.
7. To execute the Volume Ramp command, press the
OK button. To cancel, press the Cancel button.
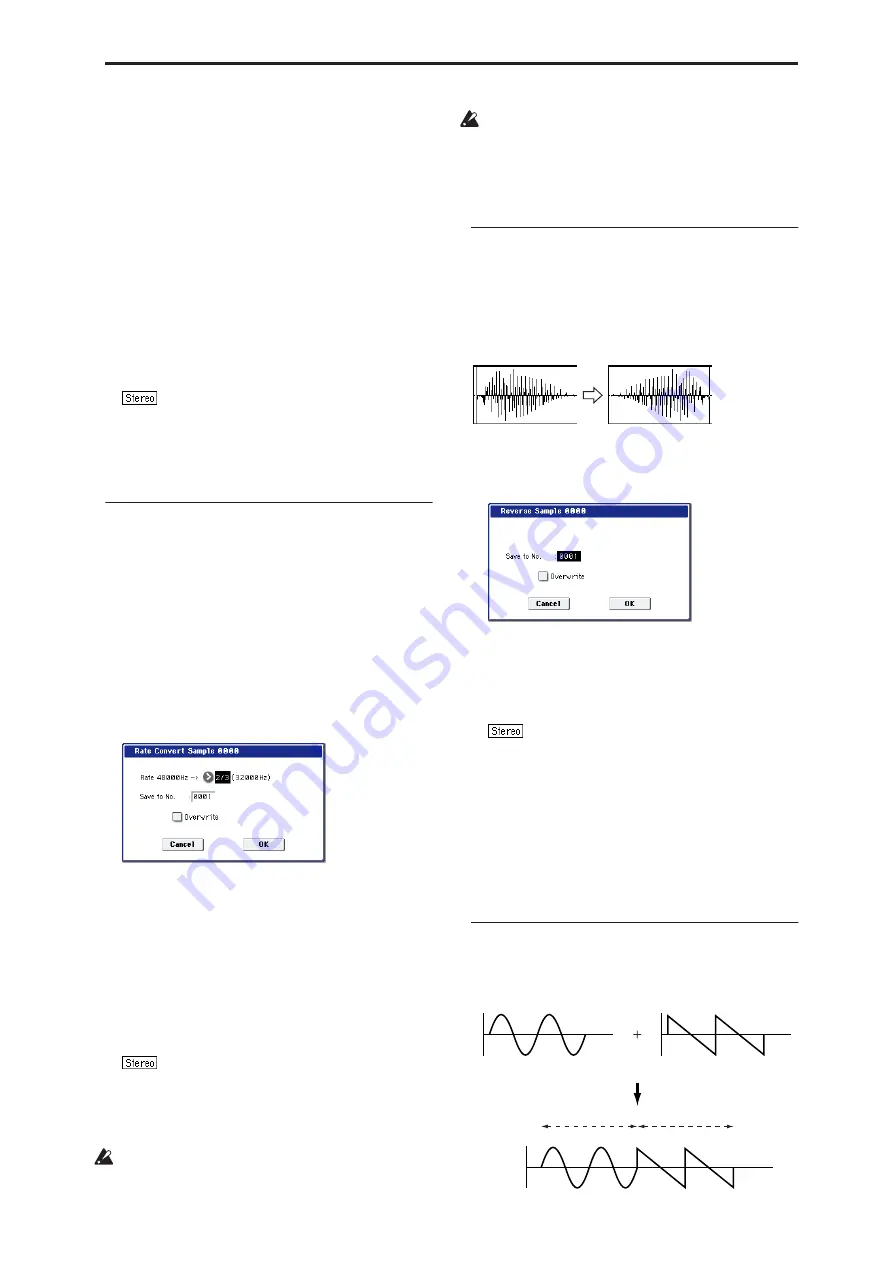
Rate Convert
This command lowers the sampling rate (frequency) of
the sampled data by 2/3, 1/2, 1/3, 1/4, or 1/6. You can
use this command to create “down-sampling” effects.
The sample data is thinned to convert it to the lower
sampling frequency.
The “Rate Convert” command is always executed on
all waveform data of the selected sample, regardless of
the “Start” and “End” settings.
1. Use “Sample Select” (1–1b) to select the sample
that you wish to edit.
2. Select “Rate Convert” to open the dialog box.
3. The sampling rate of the selected sample is shown
at the right of “Rate.” At the right of the “
→
” you
can select the desired amount of the sampling rate
conversion: 2/3, 1/2, 1/3, 1/4 1/6. The sampling rate
following conversion will be displayed in Hz.
4. In “Save to No.,” specify the save destination
sample number. By default, an unused sample
number will be selected.
The sample number cannot be specified if
“Overwrite” is checked (page 615).
For stereo samples, use “Save to No.(L)” and
“(R)” to specify the save-destination of the L and R
channels.
5. To execute the Insert Zero command, press the OK
button. To cancel, press the Cancel button.
This command cannot be executed on a sample
whose sampling rate is 192Hz or less.
The left and right channels of a Stereo sample must
have the same sampling rate. Although it is possible
to select mono multisamples for -L and -R and
convert their sampling rate separately, the system
will then no longer be able to handle the pair as a
stereo sample.
Reverse
This command reverses the sample data (i.e.,
exchanges the beginning and end).
The “Reverse” command is always executed on all
waveform data of the selected sample, regardless of
the “Start” and “End” settings.
1. Use “Sample Select” (1–1b) to select the sample
that you wish to edit.
2. Select “Reverse” to open the dialog box.
3. In “Save to No.,” specify the save destination
sample number. By default, an unused sample
number will be selected.
The sample number cannot be specified if
“Overwrite” is checked (page 615).
For stereo samples, use “Save to No.(L)” and
“(R)” to specify the save-destination of the L and R
channels.
4. To execute the Reverse command, press the OK
button. To cancel, press the Cancel button.
Note:
When you execute this command, all of the
sample data will be rewritten to reverse its direction.
The P2: Loop Edit also contains a “Reverse” (2–1d)
command, which simply reverses the playback
direction without affecting the sample data itself.
Link
This command connects the currently selected sample
with another sample.
SOUND A
SOUND B
LINK
SOUND A
SOUND B
Содержание Electronic Keyboard
Страница 1: ...Parameter Guide Parameter Guide ...
Страница 2: ......
Страница 180: ...Program mode EXi 170 ...
Страница 290: ...EXi STR 1 Plucked String 280 ...
Страница 572: ...Sequencer mode 562 ...
Страница 700: ...Global mode 690 ...
Страница 751: ...Insert Effects IFX1 IFX12 Routing 741 Fig 2 3a Fig 2 3b ...
Страница 902: ...Effect Guide 892 ...


