• 4 - 11
The test page will be formatted and a message box will appear asking you if the test
page printed successfully. If the test page printed (this may take a minute), click Yes.
If the test page does not print, check that the printer is turned on and does not show
an error message in its control panel. Make sure there is paper in the printer and all
cables are properly connected. If there is still a problem, click No in the message box.
Windows 95 will display troubleshooting steps.
If your page printed correctly, you have completed the normal installation process.
You may need to install printer description files if your applications need them. Read
the section “Installing printer description files” later in this chapter.
A few users may have special printing requirements; for instance, they may have
added extra paper trays or more memory to their printer, or want the default resolu-
tion or paper size to be different from the factory default settings. Read the section
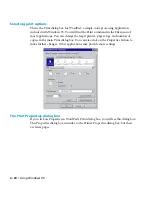
“Exploring the Properties dialog box” later in this chapter.
The next section, “Solutions to possible software installation problems,” refers only
to problems users may encounter in step 15 of the installation process. If you com-
pleted step 15 without problems this section does not apply to you.
If none of these situations applies to you, you have completed installing the printer
software on this computer. Install the software on any other computers that will use
the printer, and the printer is ready to use.
Solutions to possible software installation problems
In some cases you may not be able to complete the software installation process when
you click the Finish button in step 15. Normally, the program stops and asks you to
insert a Windows 95 floppy disk or the CD-ROM. Once you have removed the Elite
XL 20ppm CD-ROM (if necessary) and inserted the Windows 95 disk, the program
continues and the installation is complete.
Two things may prevent this:
• You may have a Windows 95 computer that was not supplied with the program
on floppy disks or CD-ROM.
• In some cases you may find that after you have inserted the Windows 95 CD-
ROM in the drive and clicked OK, the printer installation does not continue
and you are prompted to insert the Windows 95 CD-ROM again.
The installation process requires you to install files that are found on the Windows
95 CD-ROM or disks. Some versions of the Windows 95 CD-ROM have these files in
Содержание Elite XL 20ppm
Страница 1: ...USER S MANUAL GCC TECHNOLOGIES EliteTM XL20ppm ...
Страница 148: ...11 4 Maintenance and Troubleshooting 6 Place the remaining packing materials on top of the printer 7 Tape the box shut ...
Страница 168: ...A 5 G H F Skew 2 0mm 0 0787in E 2 0mm 0 0787in E F G H 245mm Paper feed direction ...
Страница 169: ...A 6 Lead Edge Registration 4 0 2 0mm 0 1575 0 0787in A 4 0 2 0mm 0 1575 0 0787in B B A Paper feed direction B B ...
Страница 170: ...A 7 Side Edge Registration 4 0 2 5mm 0 1575 0 0984in C 4 0 2 5mm 0 1575 0 0984in D D Paper feed direction D D C ...
Страница 171: ...A 8 Parallelism 2 0mm 0 0787in T 2 0mm 0 0787in T U V U 390mm W 245mm Paper feed direction U W V ...
Страница 172: ...A 9 Squareness 1 3mm 0 0512in J 1 3mm 0 0512in K L M 210mm M L Paper feed direction K J 90 ...
Страница 187: ...D 3 On Line Comm Paper Servic e ...


