• 3 - 7
Print dialog box to scaling percentages other than 100 percent, you will get
unpredictable results.
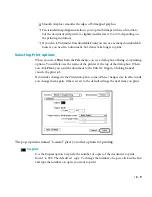
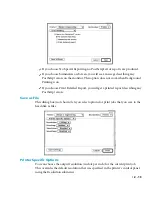
• Margins
If you choose Default Margins, certain applications will be limited to placing
page elements (i.e., text and graphics) within the page’s margins. This is only
important if you are using Letter Small or A4 Small paper sizes, since the other
sizes are all edge-to-edge and thus have no margins. Letter Small and A4 Small
have margins of .35 inches (9 mm) all around.
If you select Default, the printer will tell your applications that these margins
exist on Letter Small and A4 Small. If you select None, your applications will be
told that there are no margins. However, the printer will not reproduce any text
or graphics in the margin area.
• Send Header ...
If you choose Send Header, a PostScript header will be sent at the beginning of
each print job you send to the printer.
• Smoothing ...
Select either printer’s default, enabled or disabled. If you enable smoothing
here, Windows 3.1 will smooth text and graphics.
• Toner Miser ...
Select either printer’s default, enabled or disabled. If you enable Toner Miser
here, pages will appear lighter. This is suitable for draft printing..
Advanced Options
To make more changes, click
Advanced
to see the Advanced Options dialog box.
• You can set a default resolution for this computer by choosing the output
resolution (in dots per inch) from the Resolution menu. The resolution you
select overrides the resolution selected in the printer’s front panel Default
Resolution submenu.
You may have a computer on a network that is used for work which can be
printed at lower resolutions than the maximum. For instance, spreadsheets and
internal documents can usually be printed satisfactorily at 300 dots per inch.
You can set the resolution in the Advanced Options dialog box and override
this as necessary in an application’s Page Setup or Print dialog boxes.
Содержание Elite XL 20ppm
Страница 1: ...USER S MANUAL GCC TECHNOLOGIES EliteTM XL20ppm ...
Страница 148: ...11 4 Maintenance and Troubleshooting 6 Place the remaining packing materials on top of the printer 7 Tape the box shut ...
Страница 168: ...A 5 G H F Skew 2 0mm 0 0787in E 2 0mm 0 0787in E F G H 245mm Paper feed direction ...
Страница 169: ...A 6 Lead Edge Registration 4 0 2 0mm 0 1575 0 0787in A 4 0 2 0mm 0 1575 0 0787in B B A Paper feed direction B B ...
Страница 170: ...A 7 Side Edge Registration 4 0 2 5mm 0 1575 0 0984in C 4 0 2 5mm 0 1575 0 0984in D D Paper feed direction D D C ...
Страница 171: ...A 8 Parallelism 2 0mm 0 0787in T 2 0mm 0 0787in T U V U 390mm W 245mm Paper feed direction U W V ...
Страница 172: ...A 9 Squareness 1 3mm 0 0512in J 1 3mm 0 0512in K L M 210mm M L Paper feed direction K J 90 ...
Страница 187: ...D 3 On Line Comm Paper Servic e ...

