6 - 10 • Using Windows NT 4.0
Other items in the Advanced page
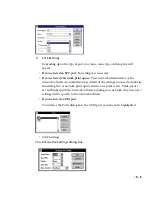
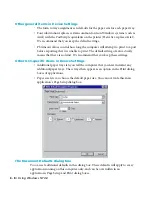
Most of the items in Document Defaults control what will be the defaults in the Page
Setup and Print dialog boxes in your applications. Any changes you make will
override the settings in the printer’s control panel for this computer only.
If you are constantly making changes in these dialog boxes, you may find that you
can avoid this by making changes in the Paper/Output and Graphic section. The new
settings will then become the defaults in applications. Note that the Graphic section
applies to the whole document and not just to any graphic images within documents.
We recommend that unless you need to change paper sizes and paper sources, you
should leave these settings at their defaults. However, you may want to change the
Resolution setting (see next section).
Resolution
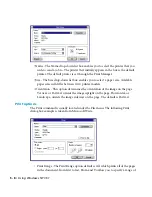
You can change the output resolution of your documents using the Resolution
section of the Graphic part of the Advanced Document Defaults. If some computers
on a network are not used for documents that need a high resolution, you can set the
resolution to the lowest setting (typically 300 dots per inch). Documents printed at
low resolution print faster than those printed at high resolution.
The figure you set here becomes the default setting for the dialog boxes in applica-
tions on this computer. All resolutions that the printer supports are still options
within application dialog boxes, so you can select higher resolutions when necessary.
Installing printer description files
Some graphics applications need more information about the printer than the
standard printer software provides. This extra information comes in files known as
printer description files. You must copy one or more of these files from the CD-ROM
into a specified folder in your application folder.
Printer description files have the following extensions: .PDF, .PDX, or .PPD. Please
refer to the documentation included with the application for more information on
where to copy these files and how to use them.
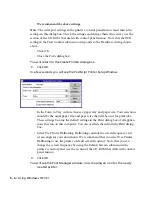
If you want to install printer description files, you can use Windows Explorer or
open a DOS window.
Installing printer description files using Windows Explorer
1.
Insert the Elite XL 20ppm CD-ROM into your CD-ROM drive.
2.
Open Windows Explorer and choose Details from the View menu.
Содержание Elite XL 20ppm
Страница 1: ...USER S MANUAL GCC TECHNOLOGIES EliteTM XL20ppm ...
Страница 148: ...11 4 Maintenance and Troubleshooting 6 Place the remaining packing materials on top of the printer 7 Tape the box shut ...
Страница 168: ...A 5 G H F Skew 2 0mm 0 0787in E 2 0mm 0 0787in E F G H 245mm Paper feed direction ...
Страница 169: ...A 6 Lead Edge Registration 4 0 2 0mm 0 1575 0 0787in A 4 0 2 0mm 0 1575 0 0787in B B A Paper feed direction B B ...
Страница 170: ...A 7 Side Edge Registration 4 0 2 5mm 0 1575 0 0984in C 4 0 2 5mm 0 1575 0 0984in D D Paper feed direction D D C ...
Страница 171: ...A 8 Parallelism 2 0mm 0 0787in T 2 0mm 0 0787in T U V U 390mm W 245mm Paper feed direction U W V ...
Страница 172: ...A 9 Squareness 1 3mm 0 0512in J 1 3mm 0 0512in K L M 210mm M L Paper feed direction K J 90 ...
Страница 187: ...D 3 On Line Comm Paper Servic e ...

