1
Setting up the hardware
This section shows the steps to set up the hardware which is explained in the Placemat.
Make sure you read the Placemat and complete the following steps:
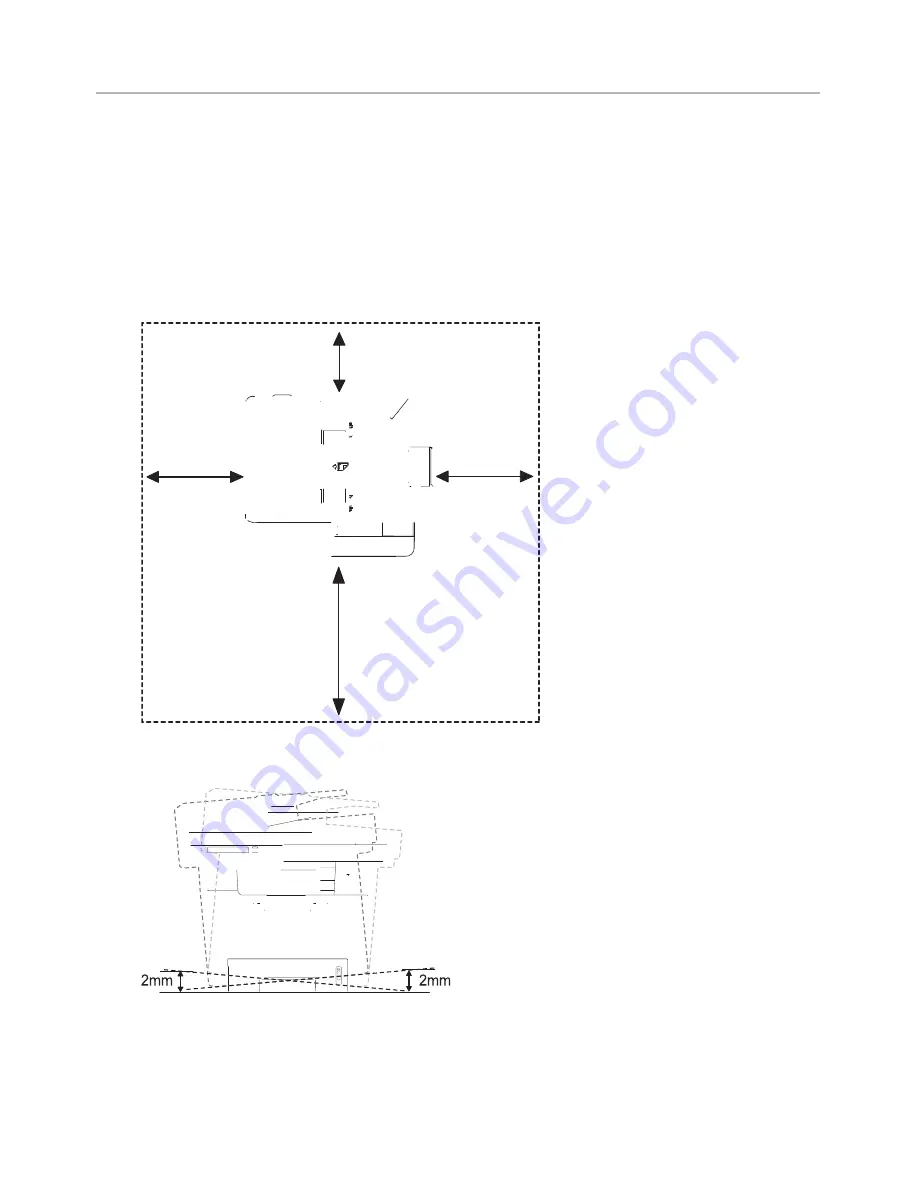
Select a stable location.
Select a level, stable place with adequate space for air circulation. Allow extra space to
open covers and trays.
The area should be well-ventilated and away from direct sunlight or sources of heat,
cold, and humidity. Do not set the machine close to the edge of your desk or table.
200 mm
(7.8 inches)
100 mm
(3.9 inches)
200 mm
(7.8 inches)
485 mm (19 inches)
Place the machine on a flat, stable surface so that there is no incline greater than 2
mm (0.08 inch). Otherwise, printing quality may be affected.
2
Unpack the machine and check all the enclosed items.
3
Remove the tape holding the machine tightly.
4
Install the print cartridge.
- 33
Содержание B2375dfw
Страница 1: ...Dell B2375dfw Mono MFP Dell B2375dnf Mono MFP User s Guide ...
Страница 179: ...3 Click the Advanced tab and click Edit in the Overlay section 4 In the Edit Overlays window click Create 178 ...
Страница 215: ...3 Select Setup in New Printer area 4 Select Ethernet 214 ...
Страница 225: ...4 Click New Printer 5 Choose Wireless 224 ...
Страница 226: ...6 The software searches for printers 7 Set your printer name and click Next 225 ...
Страница 229: ...4 Select New Printer 5 Choose Wireless 228 ...
Страница 268: ...Mac Installing Software for Mac Printing Scanning Wireless network setup 267 ...
Страница 348: ...Installing Accessories Installing Printer Accessories Installing an Optional Tray 2 347 ...
Страница 350: ...3 Grasp the control board cover and open it 4 Connect the cable as below 349 ...
Страница 351: ...5 Close the control board cover 6 Combine machine and optional tray 2 as below 350 ...
Страница 353: ...Specifications General Specifications Dell technical support policy Contacting Dell Warranty and return policy 352 ...
Страница 359: ...USB memory managing 51 W watermarks printing 175 358 ...


