334
Chapter 7 – Color Workflow
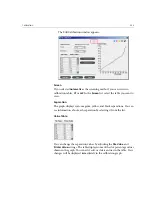
Editing Calibration Value Tables
To add an entry to the value table:
1.
Highlight a row in the value table. The new entry row will appear
below this row.
2.
Click
Add Entry
.
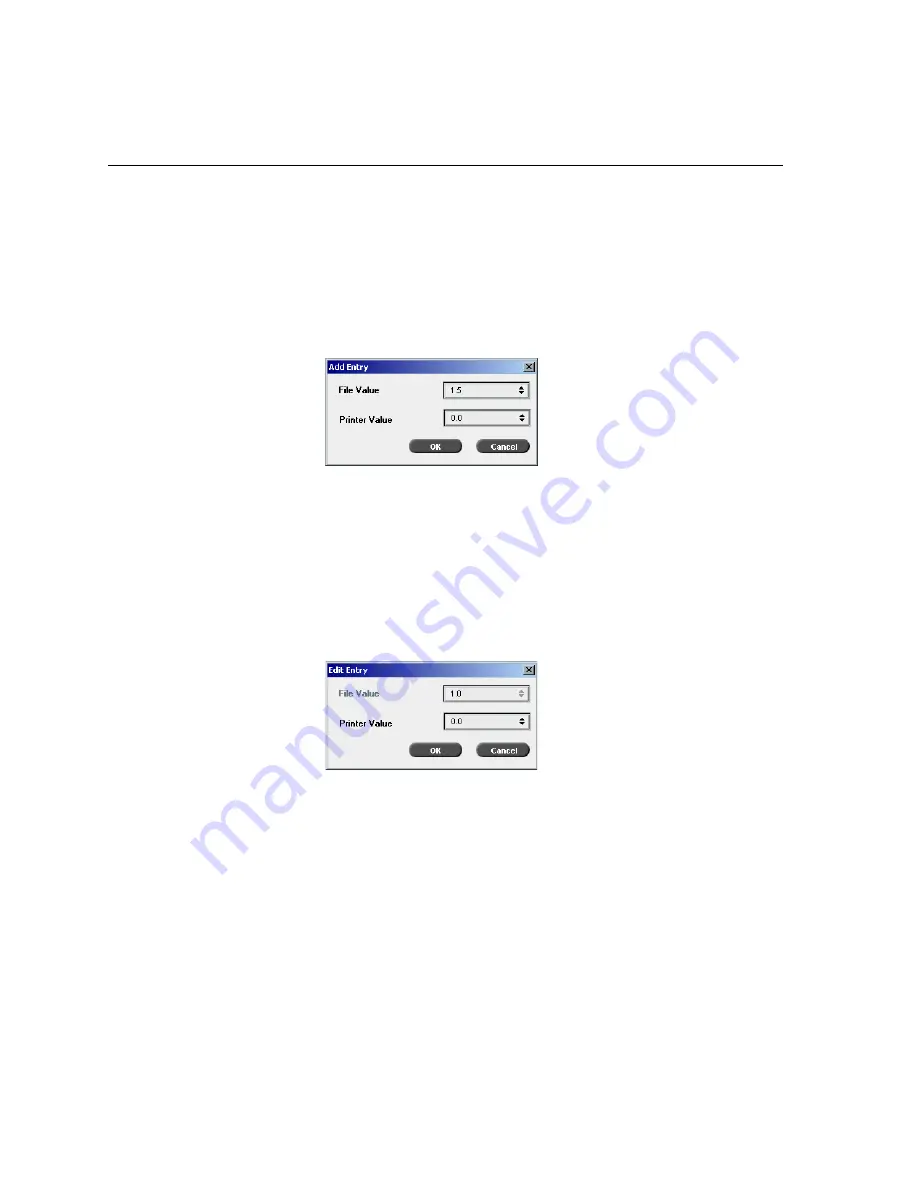
The Add Entry dialog box appears.
3.
Select the required values from the
File
and
Printer
lists.
4.
Click
OK
.
The value table is updated and the calibration graph is adjusted.
To change an existing value table:
1.
Highlight a row and double-click on the row you want to edit.
The Edit Entry dialog box appears.
2.
Adjust the
File Value
and
Printer
Value
as required by clicking on the
arrow buttons.
3.
Click
OK
.
The value table is updated and the calibration graph is adjusted.
Содержание CXP6000 Color Server
Страница 2: ...This page is intentionally left blank...
Страница 3: ...Spire CXP6000 color server version 4 0 User Guide...
Страница 4: ...This page is intentionally left blank...
Страница 8: ...This page is intentionally left blank...
Страница 28: ...This page is intentionally left blank...
Страница 99: ...Spire Web Center 85 Links The Links page enables you to link to related vendors or products...
Страница 169: ...Basic Workflows Importing and Printing Jobs 156 Reprinting Jobs 158 Basic Settings 159...
Страница 174: ...160 Chapter 4 Basic Workflows No of Copies Enter the Number of Copies to be printed Print Range...
Страница 177: ...Basic Settings 163 Print Order Set the print order to From 1 to N front to back or From N to 1 back to front...
Страница 182: ...168 Chapter 4 Basic Workflows Rotate 180 To rotate your job by 180 select Yes Gallop...
Страница 190: ...176 Chapter 4 Basic Workflows Coating Select Coated to print on coated paper...
Страница 244: ...This page is intentionally left blank...
Страница 326: ...This page is intentionally left blank...
Страница 327: ...Color Workflow Calibration 314 Default Color Flow 340 Color Tools 358...
Страница 391: ...Graphic Arts Workflow Printing PrePress Files GAP Files 378 Preflight Check 380 Export as Creo Synapse InSite Job 385...
Страница 416: ...This page is intentionally left blank...
Страница 473: ...Reinstalling the System 459 10 Click Next in Step 2 Recovery window The View Configuration window appears 11 Click Close...
Страница 476: ...462 Chapter 10 System Administration Setting the Language Select the required interface language and click Next...
Страница 494: ...This page is intentionally left blank...
Страница 506: ...This page is intentionally left blank...
Страница 514: ...This page is intentionally left blank...


