Chapter 2 Configuration
Configure and manage your TeraStation using the Settings interface, accessible from a browser window. Open the
interface using the procedure below or type the TeraStation's IP address in the URL field of your browser. Within
Settings, the Easy Admin page gives you quick access to commonly used settings.
Note:
Microsoft Edge, Firefox, Google Chrome, Internet Explorer 9 or later, and Safari 9 or later are supported. If
you have difficulty viewing Settings, check the following:
• If there are a large number of registered users, groups, or shared folders, use another browser instead of
Internet Explorer.
• If you have a proxy server enabled in the browser settings, disable the proxy server.
• With Internet Explorer, set security to
Local intranet
. On Windows Server operating systems, higher-level
security is configured by default. Set the security to a lower level temporarily.
• On a Mac, you can also use Bonjour to log in to Settings. Navigate to
Bookmarks
-
Bonjour
-
TeraStation name
from the menu bar of Safari. If you don't see "Bonjour" in the Bookmarks menu, click
Safari
-
Preferences
and
select "Include Bonjour in the Bookmarks menu" under "Advanced".
Setting Up Through Initial Setup Wizard
When you access Settings for the first time, or after initializing the TeraStation's settings, the initial setup wizard will
be displayed. To set up the TeraStation using the wizard, follow the procedure below.
1
Double-click the
icon to start NAS Navigator2.
2
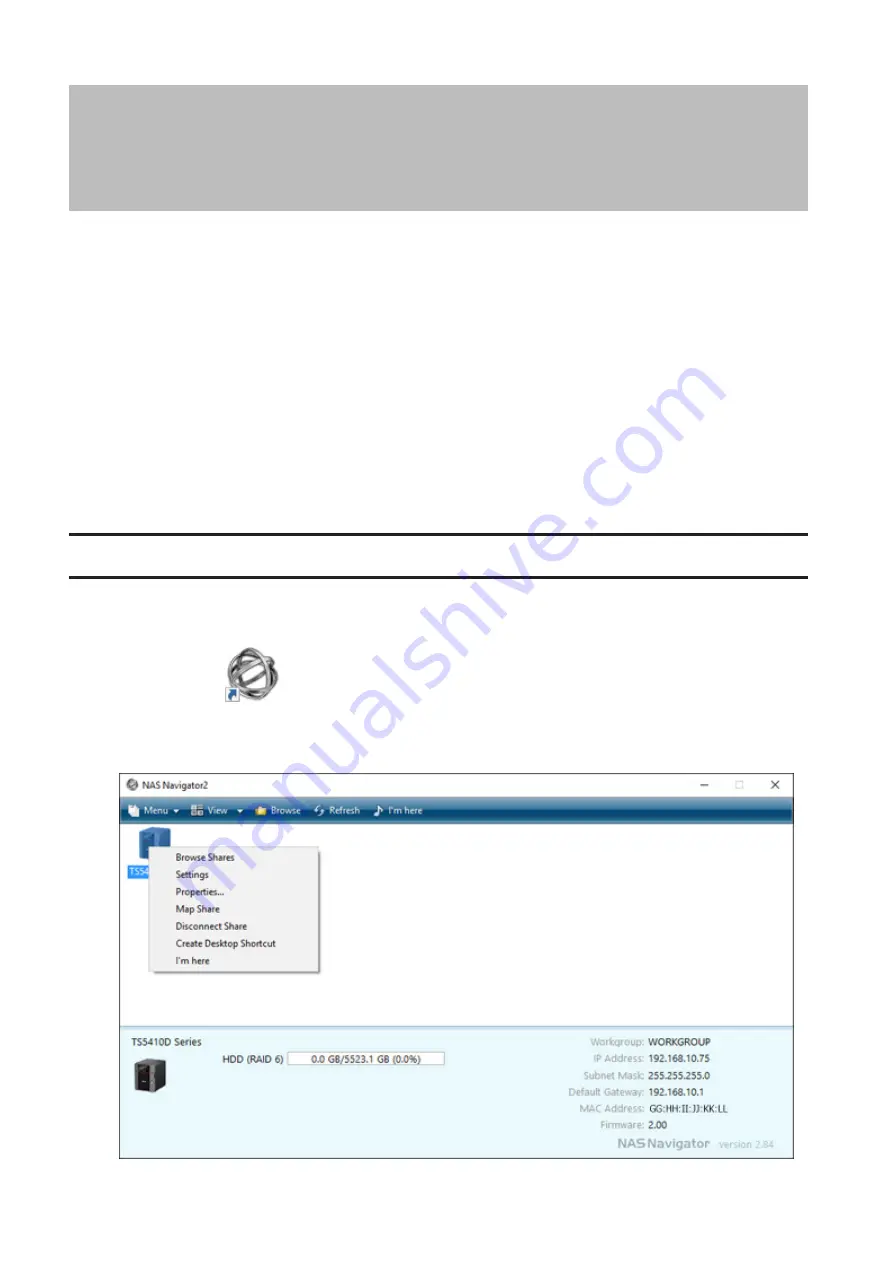
Right-click on your TeraStation's icon in NAS Navigator2 and select
Settings
. For macOS, click your TeraStation's
icon while holding down the control key, then select
Settings
.
15
Содержание TeraStation 5010
Страница 8: ...7 For Customers in Taiwan 175 ...
Страница 67: ...66 1 In Settings click Backup 2 Click to the right of Backup 3 Click List of LinkStations and TeraStations ...
Страница 75: ...74 3 Click Edit 4 Click Add 5 Click Browse under Replication Source ...
Страница 87: ...86 18Click Time Machine ...
Страница 88: ...87 19Click Select Backup Disk 20Select the TeraStation then click Use Disk ...
Страница 97: ...96 3 Click Create New Job 4 Select backup settings such as date and time to run 5 Click Add ...
Страница 103: ...102 4 Click the Options tab 5 Click Edit ...
Страница 114: ...113 7 Move the NFS switch to the position to enable NFS 8 Click to the right of NFS 9 Click the Client Settings tab ...
Страница 128: ...127 Updating Automatically 1 In Settings click Management 2 Click to the right of Update 3 Click Edit ...
Страница 137: ...136 3 Click Edit ...
Страница 138: ...137 4 Select or enter the desired MTU size and click OK ...
Страница 140: ...139 3 Click Edit 4 Clear the DHCP checkbox and enter the desired IP address and its subnet mask ...


