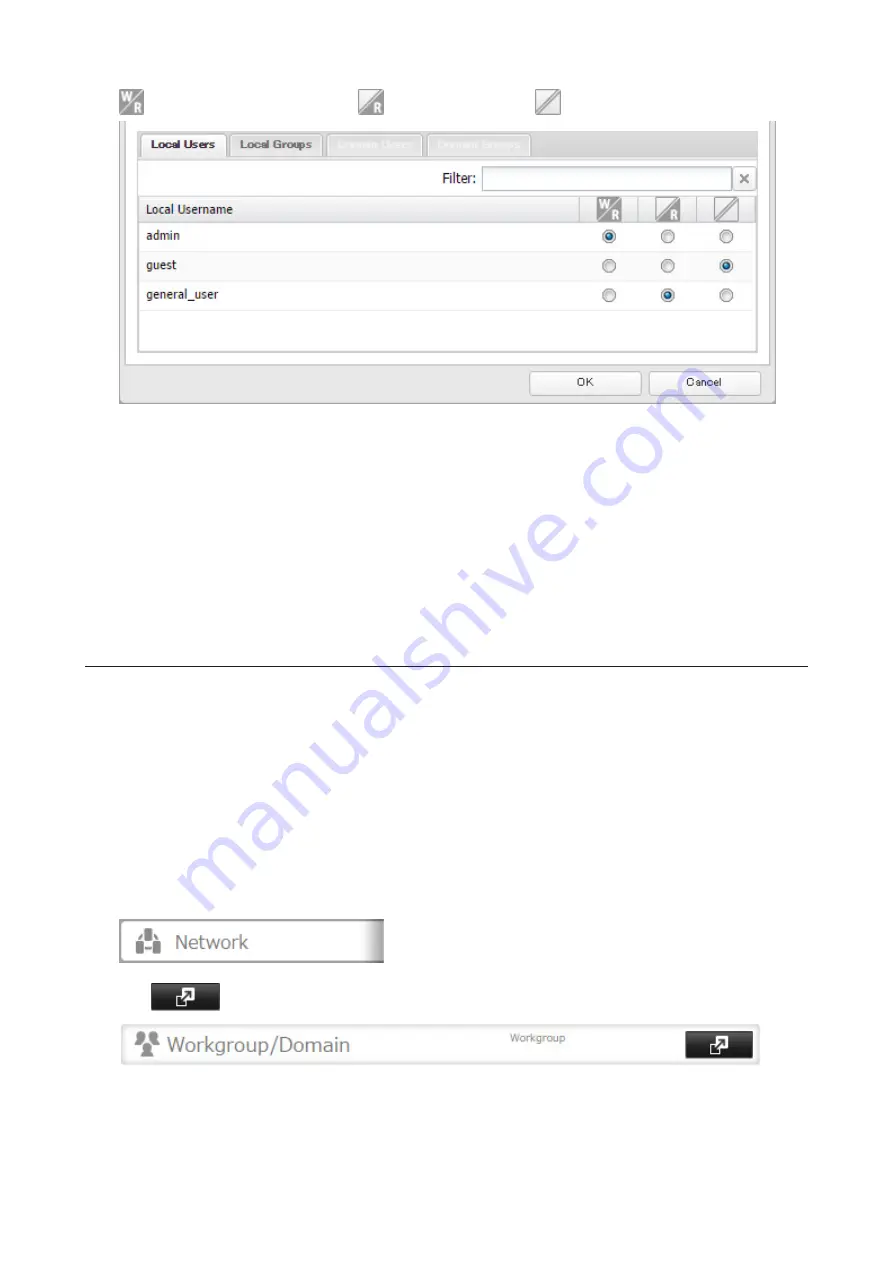
31
: Read and write access allowed
: Read access allowed
: Access prohibited
7
Click
OK
.
Notes:
• The example above shows access restriction by user. To restrict access by group, click the
Local Groups
tab
and select group permissions.
• If both read-only and read and write permissions are given to a user, the user will have read-only access. The
most restrictive access always applies.
• For an access-restricted shared folder, if you change the access restrictions of all users and groups from read
and write or read only to access prohibited from the user or group list page in Settings, that shared folder can
only be accessed by admin users and groups.
Active Directory
If there is an Active Directory environment, the TeraStation will use account information from the Active Directory
domain controller to set access restrictions for TeraStation's shared folders. There is no need to perform individual
account management for the TeraStation. If multiple TeraStations are installed on the network, the account
information is centrally managed in Active Directory, greatly reducing the operations required for installation and
management.
Notes:
• If usernames or group names from Active Directory include multibyte characters, you will not be able to
configure access restrictions for them.
• The TeraStation supports a domain environment with a maximum of 1000 users and 1000 groups.
1
In Settings, click
Network
.
2
Click
to the right of "Workgroup/Domain".
3
Click
Edit
.
Содержание TeraStation 5010
Страница 8: ...7 For Customers in Taiwan 175 ...
Страница 67: ...66 1 In Settings click Backup 2 Click to the right of Backup 3 Click List of LinkStations and TeraStations ...
Страница 75: ...74 3 Click Edit 4 Click Add 5 Click Browse under Replication Source ...
Страница 87: ...86 18Click Time Machine ...
Страница 88: ...87 19Click Select Backup Disk 20Select the TeraStation then click Use Disk ...
Страница 97: ...96 3 Click Create New Job 4 Select backup settings such as date and time to run 5 Click Add ...
Страница 103: ...102 4 Click the Options tab 5 Click Edit ...
Страница 114: ...113 7 Move the NFS switch to the position to enable NFS 8 Click to the right of NFS 9 Click the Client Settings tab ...
Страница 128: ...127 Updating Automatically 1 In Settings click Management 2 Click to the right of Update 3 Click Edit ...
Страница 137: ...136 3 Click Edit ...
Страница 138: ...137 4 Select or enter the desired MTU size and click OK ...
Страница 140: ...139 3 Click Edit 4 Clear the DHCP checkbox and enter the desired IP address and its subnet mask ...


