Fabric OS Administrator’s Guide
25
53-1001763-02
Date and time settings
2
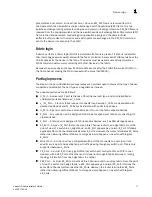
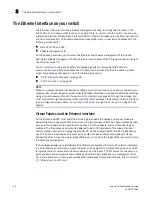
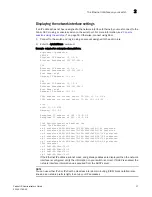
There are two methods of autoconfiguration for IPv6 addresses, stateless and stateful.
Stateless
allows an IPv6 host to obtain a unique address using the IEEE 802 MAC address;
stateful
uses a
DHCPv6 server which keeps a record of the IP address and other configuration information for the
host. Whether a host engages in autoconfiguration and which method it uses is dictated by the
routers serving the local network, not by a configuration of the host. There can be multiple routers
serving the network, each potentially advertising multiple network prefixes. Thus the host is not in
full control of the number of IPv6 addresses that it configures, much less the values of those
addresses, and the number and values of addresses can change as routers are added to or
removed from the network.
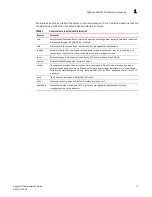
When IPv6 autoconfiguration is enabled, the platform will engage in stateless IPv6
autoconfiguration. When IPv6 autoconfiguration is disabled, the platform will relinquish usage of
any autoconfigured IPv6 addresses that it may have acquired while it was enabled. This same
enable and disable state also enables or disables the usage of a link local address for each
managed entity, though a link local address will continue to be generated for each
nonchassis-based platform and for each CP of a chassis-based platform because those link local
addresses are required for router discovery. The enabled or disabled state of autoconfiguration is
independent of whether any static IPv6 addresses have been configured.
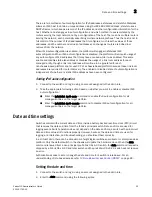
Setting IPv6 autoconfiguration
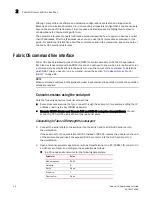
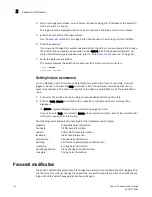
1. Connect to the switch and log in using an account assigned to the admin role.
2. Take the appropriate following action based on whether you want to enable or disable IPv6
autoconfiguration:
•
Enter the ipAddrSet -ipv6 -auto command to enable IPv6 autoconfiguration for all
managed entities on the target platform.
•
Enter the ipAddrSet -ipv6 -noauto command to disable IPv6 autoconfiguration for all
managed entities on the target platform.
Date and time settings
Switches maintain the current date and time inside a battery-backed real-time clock (RTC) circuit
that receives the date and time from the fabric’s principal switch. Date and time are used for
logging events. Switch operation does not depend on the date and time; a switch with an incorrect
date and time value still functions properly. However, because the date and time are used for
logging, error detection, and troubleshooting, you should set them correctly.
In a Virtual Fabric, there can be a maximum of eight logical switches per director or enterprise-class
platform. Only the default switch in the chassis will update the hardware clock. When the date
command is issued from a non-principal pre-Fabric OS v6.2.0 switch, the date command request is
dropped by a Fabric OS v6.2.0 and later switch and the pre-Fabric OS v6.2.0 switch will not receive
an error.
Authorization access to set or change the date and time for a switch is role-based. For an
understanding of role-based access, refer to
“Role-Based Access Control (RBAC)”
on page 84.
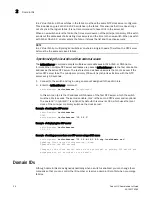
Setting the date and time
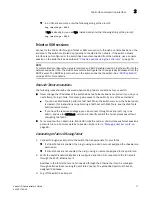
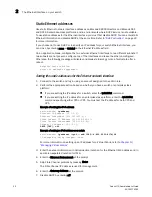
1. Connect to the switch and log in using an account assigned to the admin role.
2. Enter the date command, using the following syntax:
Содержание 53-1001763-02
Страница 1: ...53 1001763 02 13 September 2010 Fabric OS Administrator s Guide Supporting Fabric OS v6 4 0 ...
Страница 4: ...iv Fabric OS Administrator s Guide 53 1001763 02 ...
Страница 24: ...xxiv Fabric OS Administrator s Guide 53 1001763 02 ...
Страница 28: ...xxviii Fabric OS Administrator s Guide 53 1001763 02 ...
Страница 32: ...xxxii Fabric OS Administrator s Guide 53 1001763 02 ...
Страница 40: ...xl Fabric OS Administrator s Guide 53 1001763 02 ...
Страница 42: ...2 Fabric OS Administrator s Guide 53 1001763 02 ...
Страница 54: ...14 Fabric OS Administrator s Guide 53 1001763 02 High availability of daemon processes 1 ...
Страница 74: ...34 Fabric OS Administrator s Guide 53 1001763 02 Basic connections 2 ...
Страница 102: ...62 Fabric OS Administrator s Guide 53 1001763 02 Audit log configuration 3 ...
Страница 156: ...116 Fabric OS Administrator s Guide 53 1001763 02 The authentication model using RADIUS and LDAP 5 ...
Страница 214: ...174 Fabric OS Administrator s Guide 53 1001763 02 Management interface security 7 ...
Страница 228: ...188 Fabric OS Administrator s Guide 53 1001763 02 Brocade configuration form 8 ...
Страница 276: ...236 Fabric OS Administrator s Guide 53 1001763 02 Creating a logical fabric using XISLs 10 ...
Страница 404: ...364 Fabric OS Administrator s Guide 53 1001763 02 ...
Страница 440: ...400 Fabric OS Administrator s Guide 53 1001763 02 Performance data collection 17 ...
Страница 464: ...424 Fabric OS Administrator s Guide 53 1001763 02 Disabling bottleneck detection on a switch 18 ...
Страница 480: ...440 Fabric OS Administrator s Guide 53 1001763 02 F_Port masterless trunking 19 ...
Страница 494: ...454 Fabric OS Administrator s Guide 53 1001763 02 Buffer credit recovery 20 ...
Страница 560: ...520 Fabric OS Administrator s Guide 53 1001763 02 Port indexing on the Brocade DCX 4S backbone C ...
Страница 574: ...534 Fabric OS Administrator s Guide 53 1001763 02 Hexadecimal overview E ...

