


Specify First Point or [Invisible]: Specify a point (1) or enter i
First Point
Defines the start point for the 3D surface. After entering the first point,
enter the remaining points in a natural clockwise or counterclockwise order
to create a normal 3D face. If you locate all four points on the same plane,
a planar face is created that is similar to a region object. When you shade
or render the object, planar faces are filled.
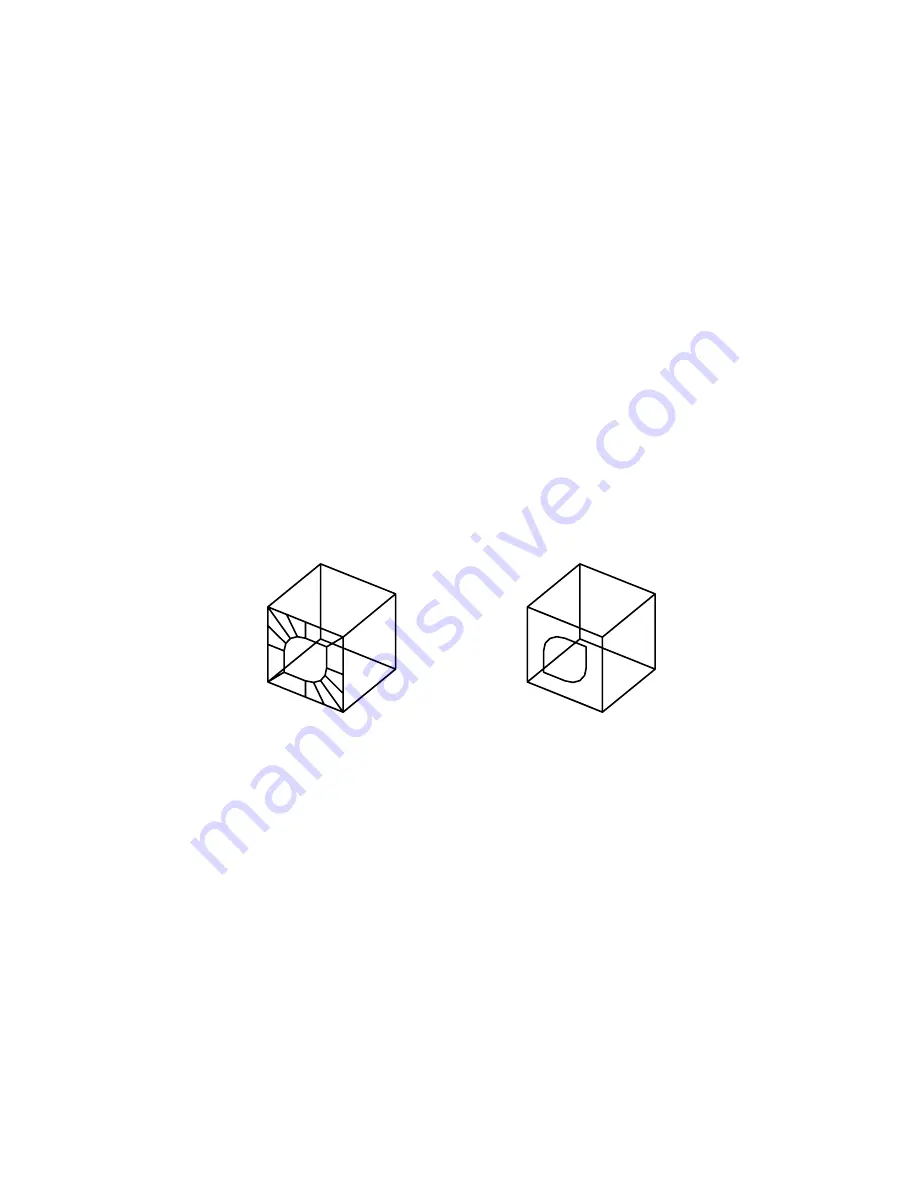
Invisible
Controls which edges of a 3D face are visible, allowing for accurate modeling
of objects with holes. Entering
i
or
invisible
before the first point of an
edge makes the edge invisible.
The invisible specification must precede any object snap modes, XYZ filters,
or coordinate input for that edge. You can create a 3D face in which all
edges are invisible. Such a face is a phantom; it does not appear in wireframe
presentations but can hide material in line drawings. 3D faces do appear in
shaded renderings.
You can combine 3D faces to model complex 3D surfaces.
invisible edges
visible edges
Specify second point or [Invisible]: Specify a point (2) or enter i
Specify third point or [Invisible] <exit>: Specify a point (3), enter i, or press ENTER
Specify fourth point or [Invisible] <create three-sided face>: Specify a point (4),
enter i , or press ENTER
The Third Point and Fourth Point prompts are repeated until you press ENTER
. Specify points 5 and 6 at these repeating prompts. When you finish entering
points, press ENTER .
3D DWF Publish Dialog Box | 31
Содержание AUTOCAD 2006
Страница 1: ...February 2005 AutoCAD 2006 Command Reference ...
Страница 24: ......
Страница 30: ...6 ...
Страница 212: ...188 ...
Страница 448: ...424 ...
Страница 554: ...530 ...
Страница 584: ...560 ...
Страница 588: ...564 ...
Страница 660: ...636 ...
Страница 750: ...726 ...
Страница 760: ...736 ...
Страница 889: ...You can display more options in the Plot dialog box by clicking the More Options button Plot Dialog Box 865 ...
Страница 960: ...936 ...
Страница 1194: ...1170 ...
Страница 1244: ...Undo Reverses the most recent change made by TRIM 1220 Chapter 21 ...
Страница 1310: ...1286 ...
Страница 1328: ...1304 ...
Страница 1354: ...Zoom Window Zooms to display an area specified by a rectangular window 1330 Chapter 26 ...
Страница 1490: ......