


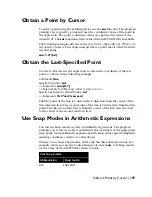


Obtain a Point by Cursor
To enter a point using the pointing device, use the
cur
function. The program
prompts you to specify a point and uses the coordinate values of the point in
the expression. The point coordinate values are expressed in terms of the
current UCS. The
cur
function sets the value of the LASTPOINT system variable.
The following example adds the vector [3.6,2.4,0]—the result of 1.2*[3,2]—to
the point you select. This expression produces a point that is offset from the
selected point.
cur+1.2*[3,2]
Obtain the Last-Specified Point
Use the @ character in the expression to obtain the coordinate of the last
point, as shown in the following example:
Command: line
Specify first point: 'cal
>> Expression: cen+[0,1]
>> Select entity for CEN snap: Select a circle or an arc
Specify next point or [Close/Undo]: 'cal
>> Expression: @+3*vec1(cen,cen)
The first point of the line is 1 unit in the Y direction from the center of the
first selected circle. The second point of the line is 3 units away from the first
point. The direction of the line is from the center of the first selected circle
to the center of the second selected circle.
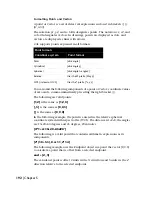
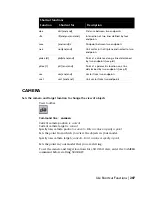
Use Snap Modes in Arithmetic Expressions
You can use Snap modes as parts of arithmetic expressions. The program
prompts you to select an object and returns the coordinate of the appropriate
snap point. Using arithmetic expressions with Snap modes greatly simplifies
entering coordinates relative to other objects.
When you use these Snap modes, enter only the three-character name. For
example, when you use the Center Snap mode, enter
cen
. CAL Snap modes
set the value of the LASTPOINT system variable.
CAL Snap modes
Snap mode
Abbreviation
ENDPOINT
END
Obtain a Point by Cursor | 197
Содержание AUTOCAD 2006
Страница 1: ...February 2005 AutoCAD 2006 Command Reference ...
Страница 24: ......
Страница 30: ...6 ...
Страница 212: ...188 ...
Страница 448: ...424 ...
Страница 554: ...530 ...
Страница 584: ...560 ...
Страница 588: ...564 ...
Страница 660: ...636 ...
Страница 750: ...726 ...
Страница 760: ...736 ...
Страница 889: ...You can display more options in the Plot dialog box by clicking the More Options button Plot Dialog Box 865 ...
Страница 960: ...936 ...
Страница 1194: ...1170 ...
Страница 1244: ...Undo Reverses the most recent change made by TRIM 1220 Chapter 21 ...
Страница 1310: ...1286 ...
Страница 1328: ...1304 ...
Страница 1354: ...Zoom Window Zooms to display an area specified by a rectangular window 1330 Chapter 26 ...
Страница 1490: ......