


Replacing Consumables
77
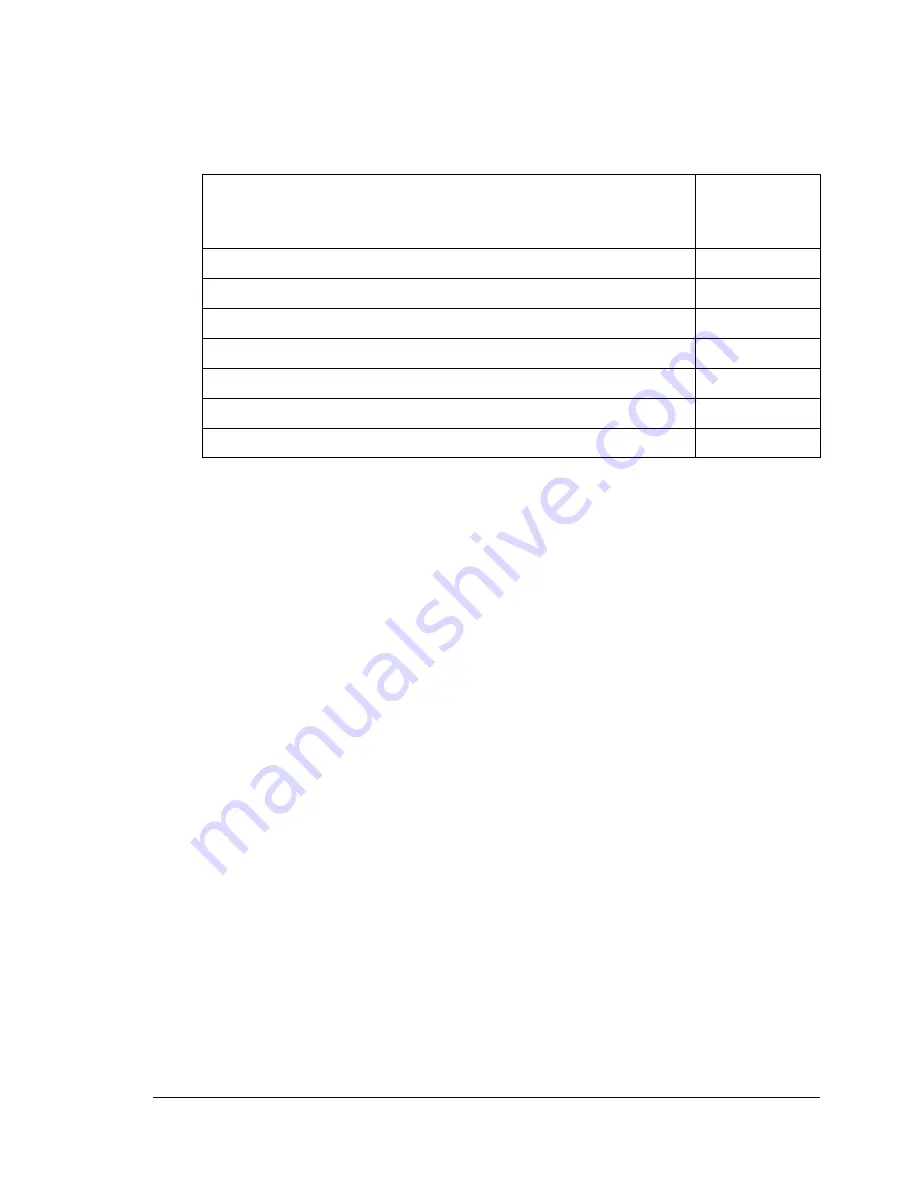
When replacing a toner cartridge, refer to the following table. For optimum
print quality and performance, use only approved Xerox toner cartridges for
your specific printer type, as listed in the table below. If you open the top
cover, you can find your printer type and the toner cartridge part numbers on
the consumables reorder label inside your printer.
Keep toner cartridges:
In their packaging until you’re ready to install them.
In a cool, dry location away from sunlight (due to heat).
The maximum storage temperature is 35
°
C (95
°
F) and the maximum
storage humidity is 85% (noncondensing). If the toner cartridge is moved
from a cold place to a warm, humid place, condensation may occur,
degrading print quality. Allow the toner to adapt to the environment for
about one hour before use.
Level during handling and storage.
Toner Cartridge Type
Toner
Cartridge
Part Number
Standard-Capacity Toner Cartridge - Yellow (Y)
113R00690
Standard-Capacity Toner Cartridge - Magenta (M)
113R00691
Standard-Capacity Toner Cartridge - Cyan (C)
113R00689
High-Capacity Toner Cartridge - Black (K)
113R00692
High-Capacity Toner Cartridge - Yellow (Y)
113R00694
High-Capacity Toner Cartridge - Magenta (M)
113R00695
High-Capacity Toner Cartridge - Cyan (C)
113R00693
Summary of Contents for Phaser 6120
Page 8: ...Introduction...
Page 12: ...Network Printing...
Page 20: ...About the Software...
Page 31: ...Printer Control Panel and Configuration Menu...
Page 51: ...Using Media...
Page 70: ...Loading Media 63 8 Raise both green fuser separator levers 9 Carefully close the top cover...
Page 72: ...Loading Media 65 b Lower both green fuser separator levers c Close the top cover...
Page 78: ...Loading Media 71 7 Reinsert Tray 2 into the printer...
Page 82: ...Replacing Supplies...
Page 95: ...Maintaining the Printer...
Page 102: ...Cleaning the Printer 95 6 Carefully close the top cover...
Page 104: ...Cleaning the Printer 97 4 Carefully close the duplex cover...
Page 108: ...Troubleshooting...
Page 117: ...Clearing Paper Jams 110 5 Carefully close the top cover...
Page 120: ...Clearing Paper Jams 113 6 Load the media in Tray 2 and attach the lid 7 Reinsert Tray 2...
Page 142: ...Installing Options...
Page 157: ...Appendix...
Page 169: ...Appendix...


