


Solving Other Problems
118
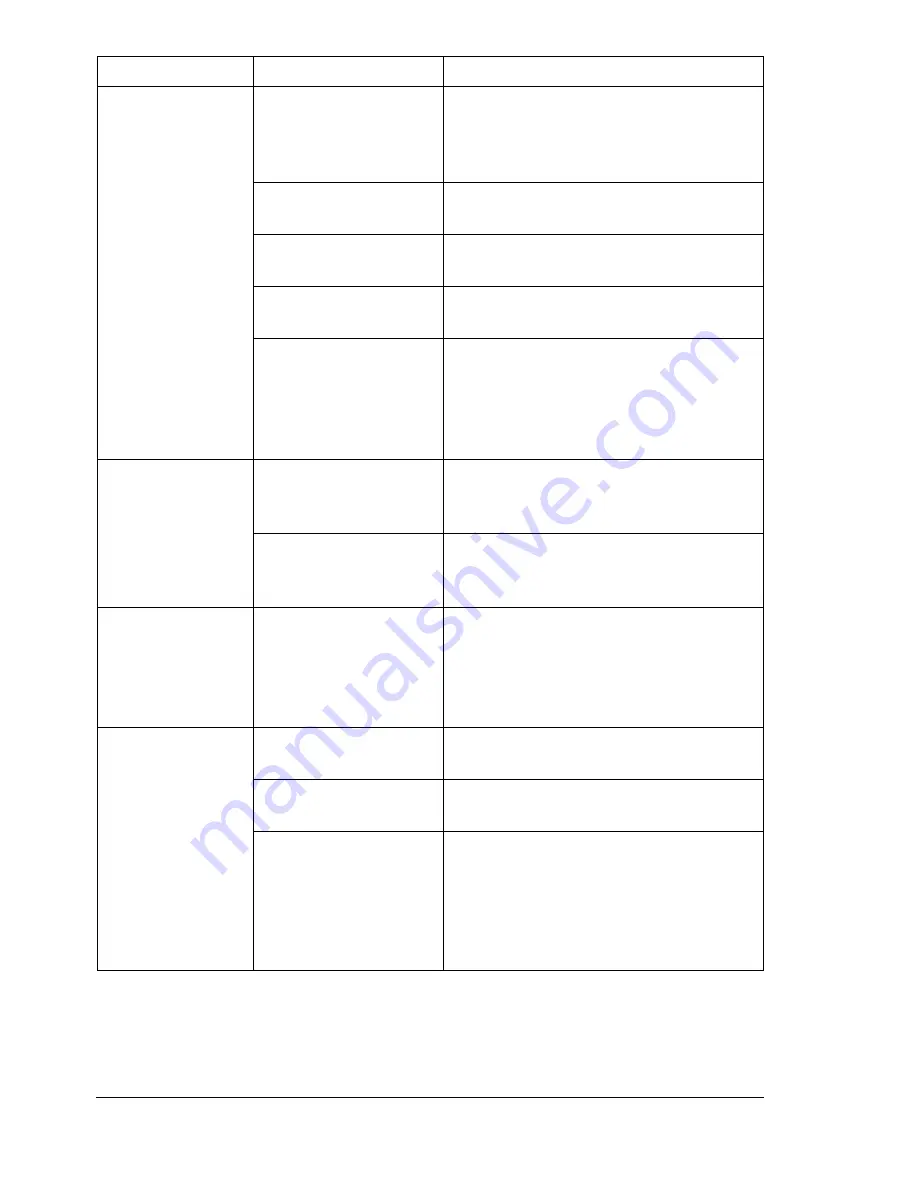
Printing takes too
much time.
The printer is set to a
slow printing mode (for
example, thick stock or
transparency).
It takes more time to print with special
media. When using regular paper,
make sure that the media type is set
properly in the driver.
The printer is set to
power saving mode.
It takes time for printing to start in
power saving mode.
The job is very
complex.
Wait. No action needed.
The printer memory is
insufficient.
Add more memory.
An unapproved toner
cartridge is installed (
X
INCORRECT
is
displayed in the
message window).
Install a toner cartridge approved for
your specific printer.
Blank pages are
printed.
One or more of the
toner cartridges are
defective or empty.
Check the toner cartridges. The image
will not print correctly or not at all, if a
cartridge is empty.
The wrong media is
being used.
Check that the media type set in the
driver matches the media loaded in the
printer.
Printer returned to
READY
before the
configuration
menu was
changed.
The printer was in the
configuration menu
structure without a
selection being made
within two minutes.
When in the configuration menu
structure, select your choice within
2 minutes.
Not all pages print. The Cancel key was
pressed.
Make sure no one pressed the Cancel
key while your job was printing.
The tray is empty.
Check that the tray is loaded with
media, in place, and secure.
A document is printed
with an overlay file
which has been
created by a
non-Phaser 6120
driver.
Print the overlay file using a
Phaser 6120 driver.
Symptom
Cause
Solution
Summary of Contents for Phaser 6120
Page 8: ...Introduction...
Page 12: ...Network Printing...
Page 20: ...About the Software...
Page 31: ...Printer Control Panel and Configuration Menu...
Page 51: ...Using Media...
Page 70: ...Loading Media 63 8 Raise both green fuser separator levers 9 Carefully close the top cover...
Page 72: ...Loading Media 65 b Lower both green fuser separator levers c Close the top cover...
Page 78: ...Loading Media 71 7 Reinsert Tray 2 into the printer...
Page 82: ...Replacing Supplies...
Page 95: ...Maintaining the Printer...
Page 102: ...Cleaning the Printer 95 6 Carefully close the top cover...
Page 104: ...Cleaning the Printer 97 4 Carefully close the duplex cover...
Page 108: ...Troubleshooting...
Page 117: ...Clearing Paper Jams 110 5 Carefully close the top cover...
Page 120: ...Clearing Paper Jams 113 6 Load the media in Tray 2 and attach the lid 7 Reinsert Tray 2...
Page 142: ...Installing Options...
Page 157: ...Appendix...
Page 169: ...Appendix...


