


Dual In-Line Memory Module (DIMM)
139
4
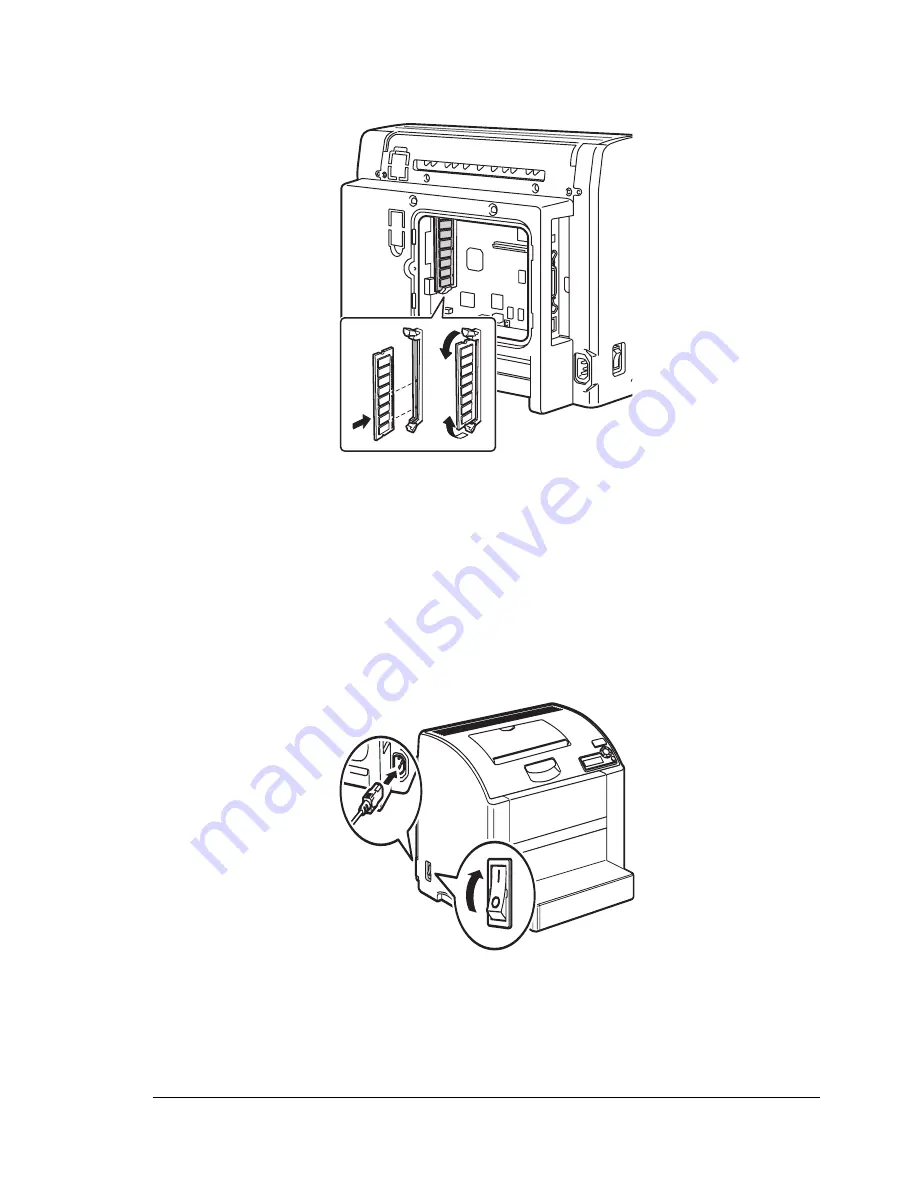
Insert the new DIMM straight into the DIMM connector until the latches
snap into the locked position.
Observe the keyed side of the DIMM to align it with the connector. If you
cannot snap the DIMM into place, do not force it. Reposition it, making
sure that the DIMM is seated completely in the connector.
5
Reinstall the panel and tighten the screw.
"
If you removed the duplex unit in step 1, reinstall it.
6
Reconnect all interface cables.
7
Reconnect the power cord, and turn on the printer.
8
Enable the memory in the driver. For instruction on enabling the memory,
see “Selecting Driver Options/Defaults (for Windows)” on page 17.
Summary of Contents for Phaser 6120
Page 8: ...Introduction...
Page 12: ...Network Printing...
Page 20: ...About the Software...
Page 31: ...Printer Control Panel and Configuration Menu...
Page 51: ...Using Media...
Page 70: ...Loading Media 63 8 Raise both green fuser separator levers 9 Carefully close the top cover...
Page 72: ...Loading Media 65 b Lower both green fuser separator levers c Close the top cover...
Page 78: ...Loading Media 71 7 Reinsert Tray 2 into the printer...
Page 82: ...Replacing Supplies...
Page 95: ...Maintaining the Printer...
Page 102: ...Cleaning the Printer 95 6 Carefully close the top cover...
Page 104: ...Cleaning the Printer 97 4 Carefully close the duplex cover...
Page 108: ...Troubleshooting...
Page 117: ...Clearing Paper Jams 110 5 Carefully close the top cover...
Page 120: ...Clearing Paper Jams 113 6 Load the media in Tray 2 and attach the lid 7 Reinsert Tray 2...
Page 142: ...Installing Options...
Page 157: ...Appendix...
Page 169: ...Appendix...


