1
2
3
4
5
6
7
8
9
10
11
12
3-7
1
Place paper in the drawer(s).
Page 2-4
- When using this mode in bypass copying (
Page 6-5),
be sure to specify the paper size.
2
Place the original(s) (photos).
Page 2-9
3
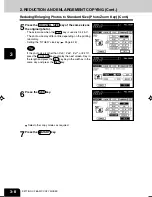
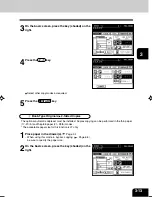
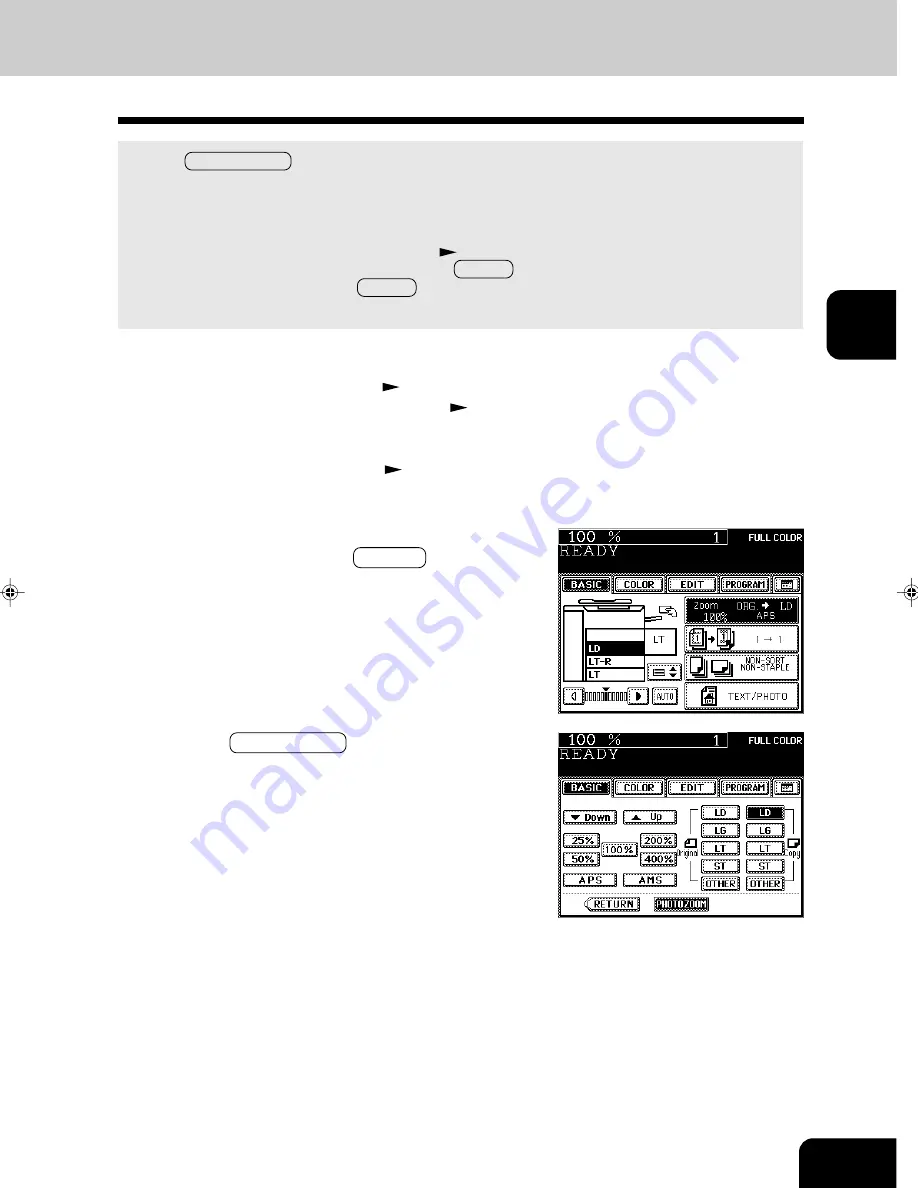
Press the drawer icon representing the desired copy
paper size, then press the ZOOM… key.
- The copy paper size is selectable on the screen of step 5
as well.
Reducing/Enlarging Photos to Standard Size (Photo Zoom Key)
Use the PHOTO ZOOM key for reduction/enlargement of photos as originals. There are four types of
photo sizes as set items, however, the desired size other than these four can be set.
- Place a photo on the original glass in a landscape direction. Select the same direction for the paper to
be copied.
- The area 2 mm from the edge is not printed out.
* Set the size for “the OTHER” key as required (
Page 6-16). When the set paper is a standard size
other than LD, LG, LT or ST, you will select the OTHER key on the screen of step 5 below. Before
pressing it, you need to make the OTHER key recognize the same size as the originals or paper that
have been set.
4
Press the PHOTO ZOOM key.
Summary of Contents for e-studio 211c
Page 1: ......
Page 2: ......
Page 61: ...1 2 3 4 5 6 7 8 9 10 11 12 3 18 SETTING OF BASIC COPY MODES ...
Page 71: ...1 2 3 4 5 6 7 8 9 10 11 12 4 10 COLOR EDITING AND ADJUSTMENT ...
Page 93: ...1 2 3 4 5 6 7 8 9 10 11 12 USING THE EDITING FUNCTIONS 5 22 ...
Page 129: ...1 2 3 4 5 6 7 8 9 10 11 12 6 36 USING THE SPECIAL FUNCTIONS ...
Page 199: ...1 2 3 4 5 6 7 8 9 10 11 12 9 30 WHENTHE GRAPHIC SYMBOLS FLASH ONTHETOUCH PANEL ...
Page 222: ...1 2 3 4 5 6 7 8 9 10 11 12 11 17 MEMO ...
Page 223: ...1 2 3 4 5 6 7 8 9 10 11 12 11 18 SPECIFICATIONS OPTIONS MEMO ...
Page 224: ......
Page 225: ......


