


1
2
3
4
5
6
7
8
9
10
11
12
6-22
USING THE SPECIAL FUNCTIONS
1
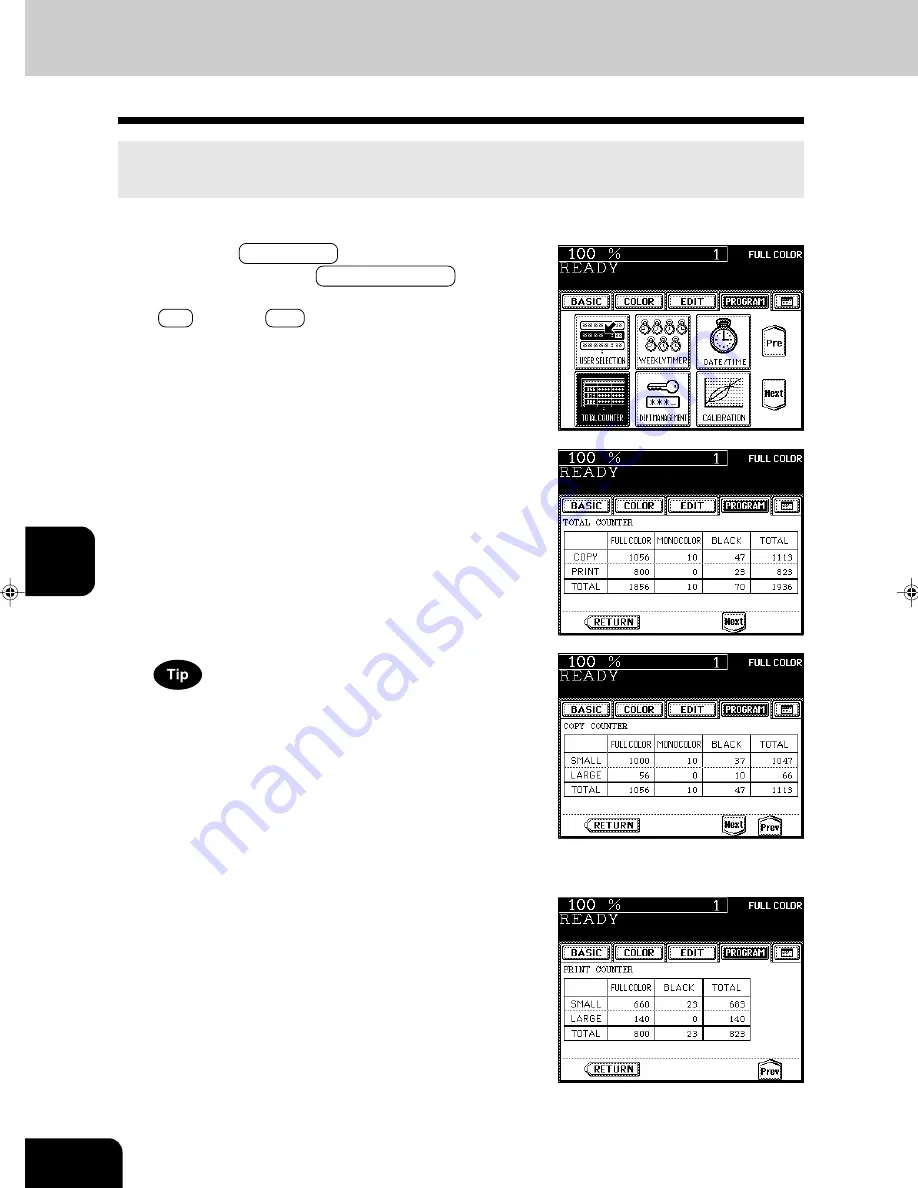
Press the PROGRAM key to enter the program
menu, and press the TOTAL COUNTER key.
- If the key for the desired function is not shown, press the
Pre key or the Next key to switch the display.
This function displays the total number of copies.
The total counter is a cumulative counter. You cannot clear this counter.
- The total number of copies or prints of the copier is dis-
played classified by the color mode.
9. TOTAL COUNTER
The total number of copies or prints (with the optional printer
controller installed) is displayed by size group. Each group
of the default setting is defined as follows (ask your service
technician for details):
- Small: LT, ST, A4, A5, A6, B5, and paper with less than 13.0”
width in the R direction
- Large: LD, LG, COMP, Full Bleed, A3, B4, FOLIO, non-stan-
dard size paper with size unknown, and paper with 13.0”
width or over in the R direction.
- The counter value can be either “Sheet” or “Count” depending
on the contract.
- The screen on the right is displayed when the printer control-
ler (option) is installed.
Summary of Contents for e-studio 211c
Page 1: ......
Page 2: ......
Page 61: ...1 2 3 4 5 6 7 8 9 10 11 12 3 18 SETTING OF BASIC COPY MODES ...
Page 71: ...1 2 3 4 5 6 7 8 9 10 11 12 4 10 COLOR EDITING AND ADJUSTMENT ...
Page 93: ...1 2 3 4 5 6 7 8 9 10 11 12 USING THE EDITING FUNCTIONS 5 22 ...
Page 129: ...1 2 3 4 5 6 7 8 9 10 11 12 6 36 USING THE SPECIAL FUNCTIONS ...
Page 199: ...1 2 3 4 5 6 7 8 9 10 11 12 9 30 WHENTHE GRAPHIC SYMBOLS FLASH ONTHETOUCH PANEL ...
Page 222: ...1 2 3 4 5 6 7 8 9 10 11 12 11 17 MEMO ...
Page 223: ...1 2 3 4 5 6 7 8 9 10 11 12 11 18 SPECIFICATIONS OPTIONS MEMO ...
Page 224: ......
Page 225: ......