


8-11
If a misfeed was not found
in the above step, remove
the misfed paper from
under the paper guide.
Be careful not to tear the
misfed paper during
removal.
Return the paper guide
lever to its original position.
(4) Original misfeed
Open the document feeder
cover and remove the
misfed originals.
Open the automatic
document feeder. Rotate
the transfer roller in the
direction of the arrow and
remove the original.
Press switch A to release
the cover lock and remove
the misfed original.
After removing the original,
be sure to attach the cover
securely.
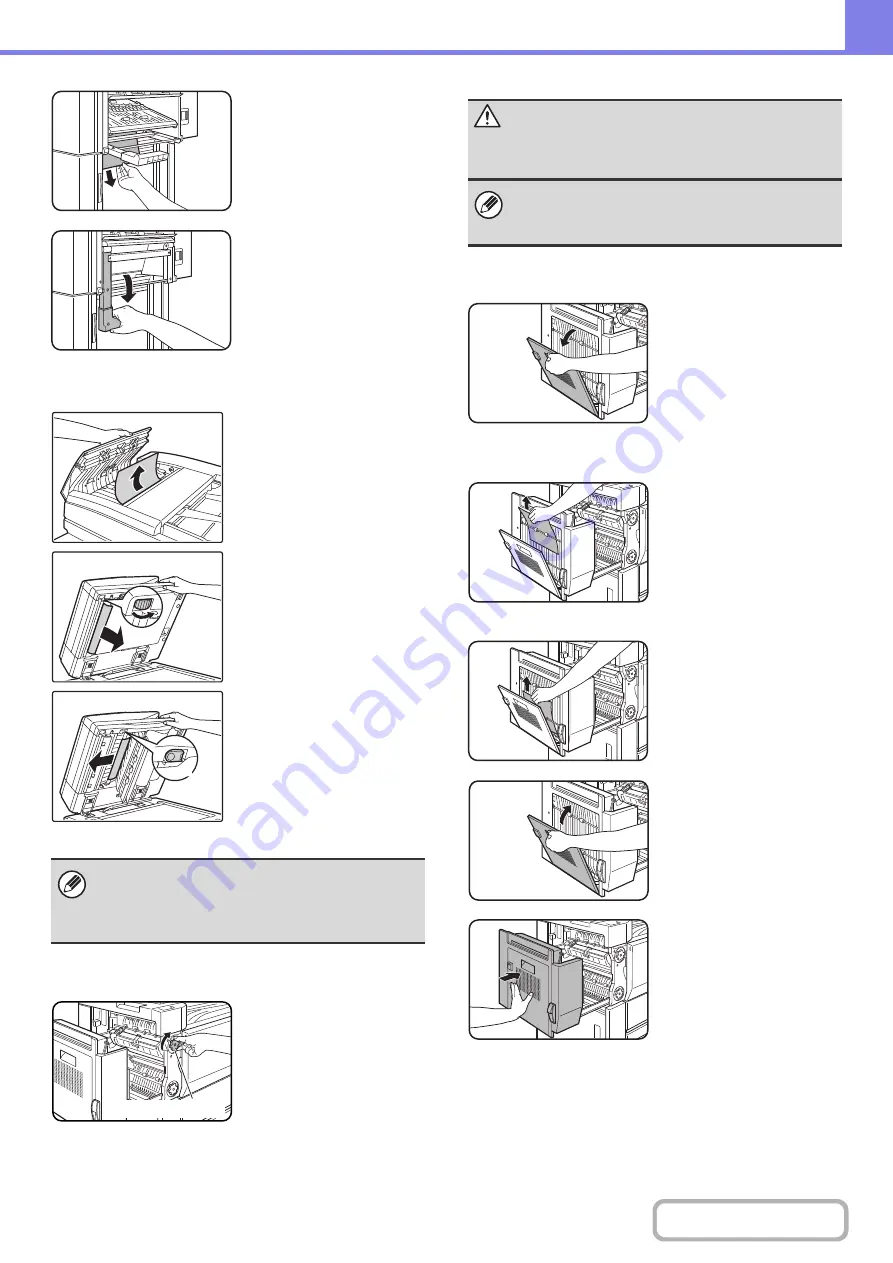
(5) Paper misfeed in the fusing unit
Turn roller rotating knob in
the direction of the arrow to
remove the misfed paper.
(6) Misfeed in the duplex unit
Open the cover of the
duplex unit.
Remove the misfed paper.
Misfeed in upper part of unit
Be careful not to tear the
misfed paper during
removal.
Misfeed in lower part of unit
Be careful not to tear the
misfed paper during
removal.
Close the cover of the
duplex unit.
Gently close the duplex unit.
After closing the duplex unit,
confirm that the misfeed
message has been cleared
and the normal display
appears.
After removing the misfeed, open and close the
automatic document feeder (or the document feeding
area cover or document feeder tray) to clear the
misfeed display from the touch panel.
A
Roller rotating knob
Caution
The fusing unit and paper exit area are hot. Take care
not to burn yourself. (Do not touch any metal parts.)
Unfused toner may remain on the paper that is
removed. Take care that it does not soil your hands or
clothing.
Summary of Contents for MX-M623
Page 6: ...Make a copy on this type of paper Tab Paper Transparency film ...
Page 11: ...Conserve Print on both sides of the paper Print multiple pages on one side of the paper ...
Page 35: ...Organize my files Delete a file Delete all files Periodically delete files Change the folder ...
Page 324: ...3 18 PRINTER Contents 4 Click the Print button Printing begins ...