


2-14
MAKING A COPY USING THE DOCUMENT GLASS
To make a copy of a book or other thick original that cannot be scanned with the automatic document feeder, open the
automatic document feeder and place the original on the document glass. This section explains how to make a copy
(1-sided copy of a 1-sided original) using the document glass.
1
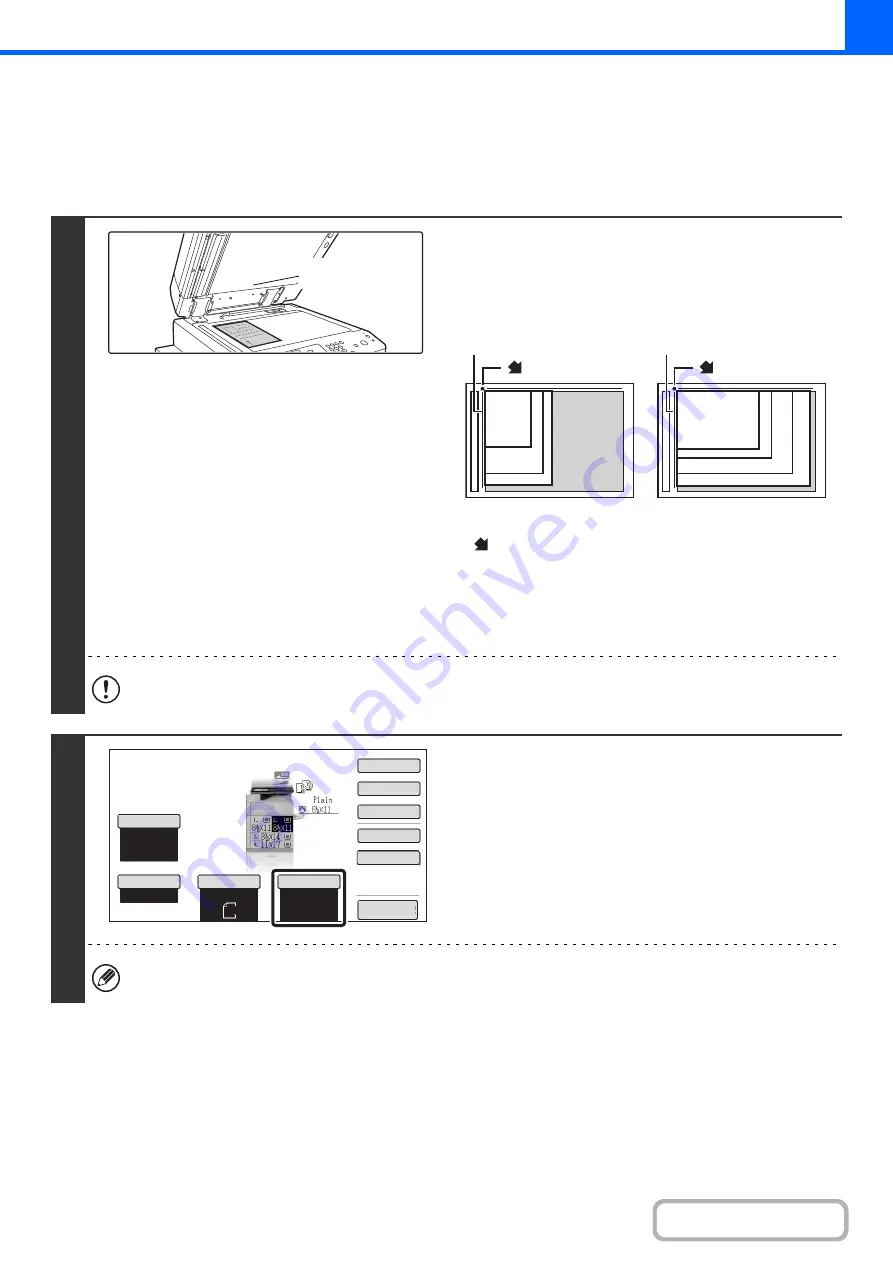
Open the automatic document feeder,
place the original face down on the
document glass, and then gently close
the automatic document feeder.
• Align the corner of the original with the tip of the arrow mark
on the document glass scale.
• Place the original in the appropriate position for its size as
shown above.
• After placing the original, be sure to close the automatic
document feeder. If left open, parts outside of the original will
be copied black, causing excessive use of toner.
Do not place any objects under the original size detector. Closing the automatic document feeder with an object
underneath may damage the original size detector plate and prevent correct detection of the document size.
2
Check the paper to be used.
Make sure that the desired paper (tray) is selected.
To change the paper (tray), touch the [Paper Select] key.
☞
(page 2-11)
Depending on the size of the placed original, there may be cases where the same size of paper as the original is not
selected automatically. In this event, change the paper size manually.
Original size
detector
8-1/2" x 11"R (A4R)
B5R
8-1/2" x 14" (B4)
11" x 17" (A3)
8-1/2" x 11" (A4)
5-1/2" x 8-1/2"
(A5)
B5
mark
Document glass scale
Document glass scale
mark
Auto
8½x11
Plain
8½x11
Special Modes
2-Sided Copy
Output
File
Quick File
Copy Ratio
100%
Original
Paper Select
Auto
Exposure
Auto
Preview
Summary of Contents for MX-M623
Page 6: ...Make a copy on this type of paper Tab Paper Transparency film ...
Page 11: ...Conserve Print on both sides of the paper Print multiple pages on one side of the paper ...
Page 35: ...Organize my files Delete a file Delete all files Periodically delete files Change the folder ...
Page 324: ...3 18 PRINTER Contents 4 Click the Print button Printing begins ...