


4-73
1
Place the original.
Place the original in the document feeder tray or on the document glass as appropriate for the functions stored in the
program.
2
Select the special modes.
(1) Touch the [Special Modes] key.
(2) Touch the [Program] key.
☞
(page 4-70)
3
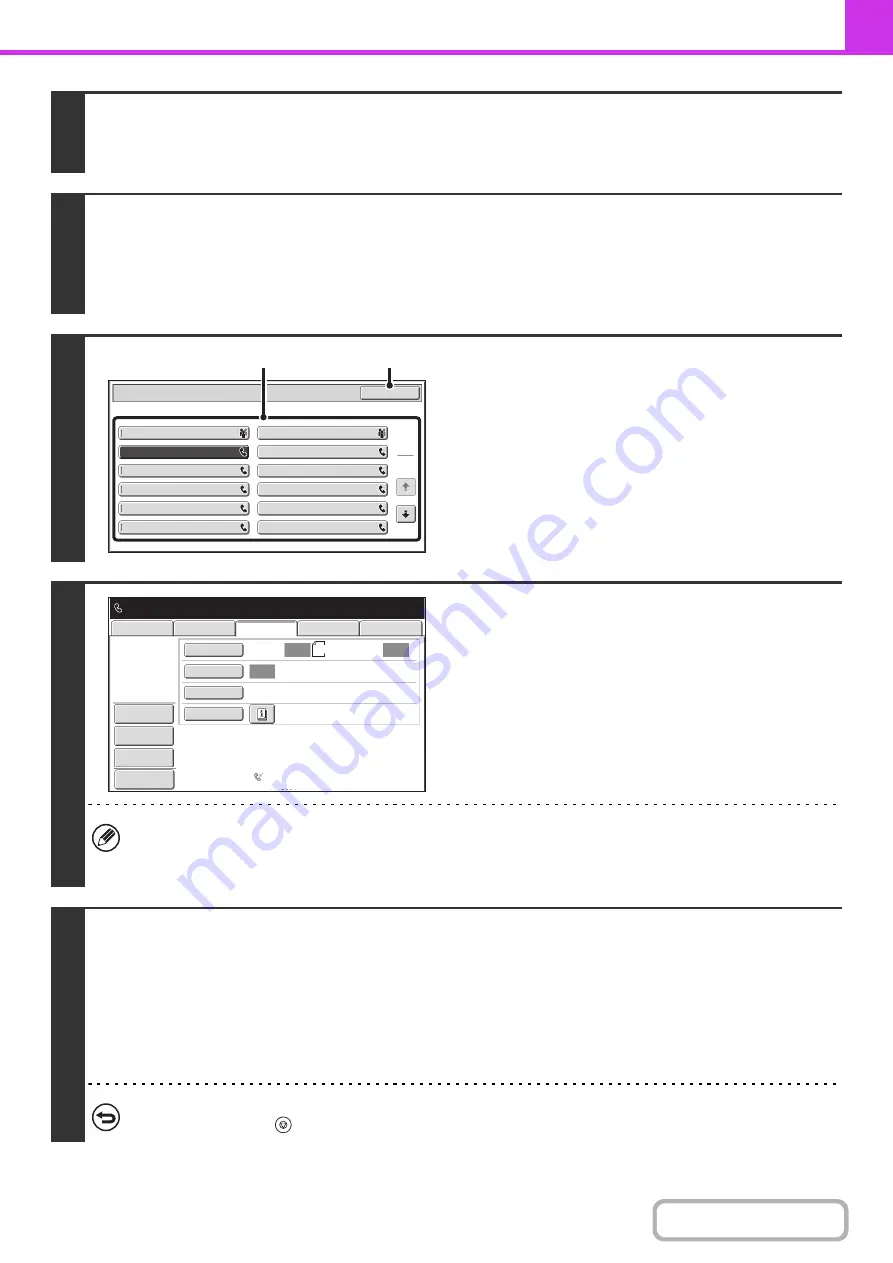
Retrieve the stored program.
(1) Touch the desired program key.
(2) Touch the [OK] key.
4
Select additional settings.
When a program is used, the following settings can be
additionally specified:
• Image settings: Original scan size*, send size
• Special modes: Timer Transmission, Card Shot, File, Quick
File, Own Name Select, Transaction Report
* When stored in the program, this cannot be additionally
specified.
• The screen that appears will vary depending on the destination stored in the program.
• The mode cannot be changed here.
• Functions stored in the program cannot be canceled here.
5
Press the [START] key.
Scanning begins.
• If you inserted the original pages in the document feeder tray, all pages are scanned.
A beep will sound to indicate that scanning is finished.
• If you are scanning the original on the document glass, scan each page one page at a time.
When scanning finishes, place the next original and press the [START] key. Repeat until all pages have been scanned and
then touch the [Read-End] key.
A beep will sound to indicate that scanning is finished.
To cancel scanning...
Press the [STOP] key (
).
Program C
Program A
Program
Program E
Program G
Program I
Program K
Program D
Program B
Program F
Program H
Program J
Program L
OK
1
2
(1)
(2)
Program : Program C
0123456789
Auto
Auto
Auto
USB Mem. Scan
Fax
Special Modes
Resolution
Exposure
Original
Scan
Standard
Auto Reception
Fax Memory:100%
Internet Fax
PC Scan
Scan:
Send:
8½x11
File
Quick File
Address Review
Preview
Summary of Contents for MX-M623
Page 6: ...Make a copy on this type of paper Tab Paper Transparency film ...
Page 11: ...Conserve Print on both sides of the paper Print multiple pages on one side of the paper ...
Page 35: ...Organize my files Delete a file Delete all files Periodically delete files Change the folder ...
Page 324: ...3 18 PRINTER Contents 4 Click the Print button Printing begins ...