1 2
3 4
18
The Sapling Company, Inc.
670 Louis Drive
Warminster, PA 18974
USA
P. (+1) 215.322.6063
F. (+1) 215.322.8498
www.sapling-inc.com
Wall Mount Installation
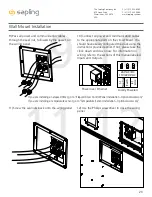
1) Locate a section of wall capable of supporting
the clock. If mounting the clock on wood drywall,
locate two separate studs for attaching the
mounting pieces.
2) Run power and communication wiring to the
point of installation.
CHECK YOUR WIRING
The voltage between the hot and common wires
should measure 105-126 volts AC in the 110 volt
model, 207-253 volts AC in the 230 volt model, or
Yellow & orange wires for 21.5-26.5 volts AC/DC
in the 24 volt model.
If you are using the 24 volt model, make sure
that the wiring leading to the clock is from an
ISOLATED transformer.
To power your clock with a PoE connection, the
clock must satisfy the following conditions:
• Has an RJ45 Port • Part number ends with “0”
• Has either a Red or Amber display
• Has either 6.0” or 9.0” digits.
If any of these conditions are not met, PoE
cannot be used with the clock.
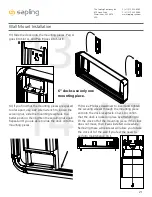
3) Using either the clock template or the holes
on the wall plates and a level, mark holes for wall
anchors. If on a section of drywall, all marked holes
should overlap a wall stud. Use the topmost and
bottommost holes to make these marks.
4) Use a drill to drill the holes into the wall.


