4.2
Attachment according to
IEC 60534-6 (NAMUR)
Refer to Table 4 on page 42 for the required
mounting parts and the accessories.
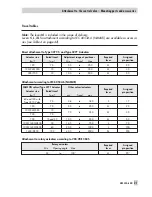
Note the travel table on page 21!
The positioner is attached to the control
valve with a NAMUR bracket (10).
1. Screw the two bolts (14) to the bracket
(9.1) of the stem connector (9), place
the follower plate (3) on top and use
the screws (14.1) to tighten.
Actuator size 2800 cm
²
and 1400 cm²
(120 mm travel)
:
– For a travel of 60 mm or smaller,
screw the longer follower plate (3.1)
directly to the stem connector (9).
– For a travel exceeding 60 mm,
mount the bracket (16) first and then
the follower plate (3) to the bracket
together with the bolts (14) and
screws (14.1).
2. Mount NAMUR bracket (10) to the con-
trol valve as follows:
– For attachment to the NAMUR rib,
use an M8 screw (11), washer and
toothed lock washer directly in the
existing yoke bore.
– For attachment to valves with
rod-type yokes, use two U-bolts (15)
around the yoke.
Align the NAMUR bracket (10) in
such a way that the slot of the follo-
wer plate (3) is centrally aligned with
the NAMUR bracket at mid valve
travel.
3. Mount connecting plate (6) or pressure
gauge bracket (7) with pressure gauges
(8) on the positioner, making sure both
seal rings (6.1) are seated properly.
4. Select required lever size (1)
M
,
L
or
XL
and pin position according to the actu-
ator size and valve travels listed in the
table on page 21.
Should you require a pin position other
than position
35
with the standard in-
stalled lever
M
, or require a lever size
L
or
XL
, proceed as follows:
NOTICE
The lever must be held stationary in the mid
position while undoing or fastening the nut
to ensure that the lever does not move to one
of the end stops.
5. Fasten the follower pin (2) in the as-
signed lever bore (pin position) as listed
in the table. Only use the longer fol-
lower pin (2) included in the mounting
kit.
6. Place lever (1) on the positioner shaft
and screw tight using the disk spring
(1.2) and nut (1.1).
7. Place positioner on the NAMUR
bracket in such a manner that the fol-
lower pin (2) rests in the slot of the fol-
lower plate (3, 3.1). Adjust the lever (1)
correspondingly.
Screw the positioner to the NAMUR
bracket using both fixing screws.
26
EB 8384-6 EN
Attachment to the control valve – Mounting parts and accessories
Summary of Contents for 3730-6
Page 19: ...EB 8384 6 EN 19...
Page 51: ...EB 8384 6 EN 51...
Page 113: ...EB 8384 6 EN 113...
Page 114: ...114 EB 8384 6 EN...
Page 115: ...EB 8384 6 EN 115...
Page 116: ...116 EB 8384 6 EN...
Page 117: ...EB 8384 6 EN 117...
Page 118: ...118 EB 8384 6 EN...
Page 119: ...EB 8384 6 EN 119...
Page 120: ...120 EB 8384 6 EN...
Page 123: ...EB 8384 6 EN 123 diagnostic functions 11 Z Zero calibration 68 Index...


