28 MILLING UNIT
User’s manual
Planmeca Chairside CAD/CAM solution 143
28.14.2 Replacing/inserting tools
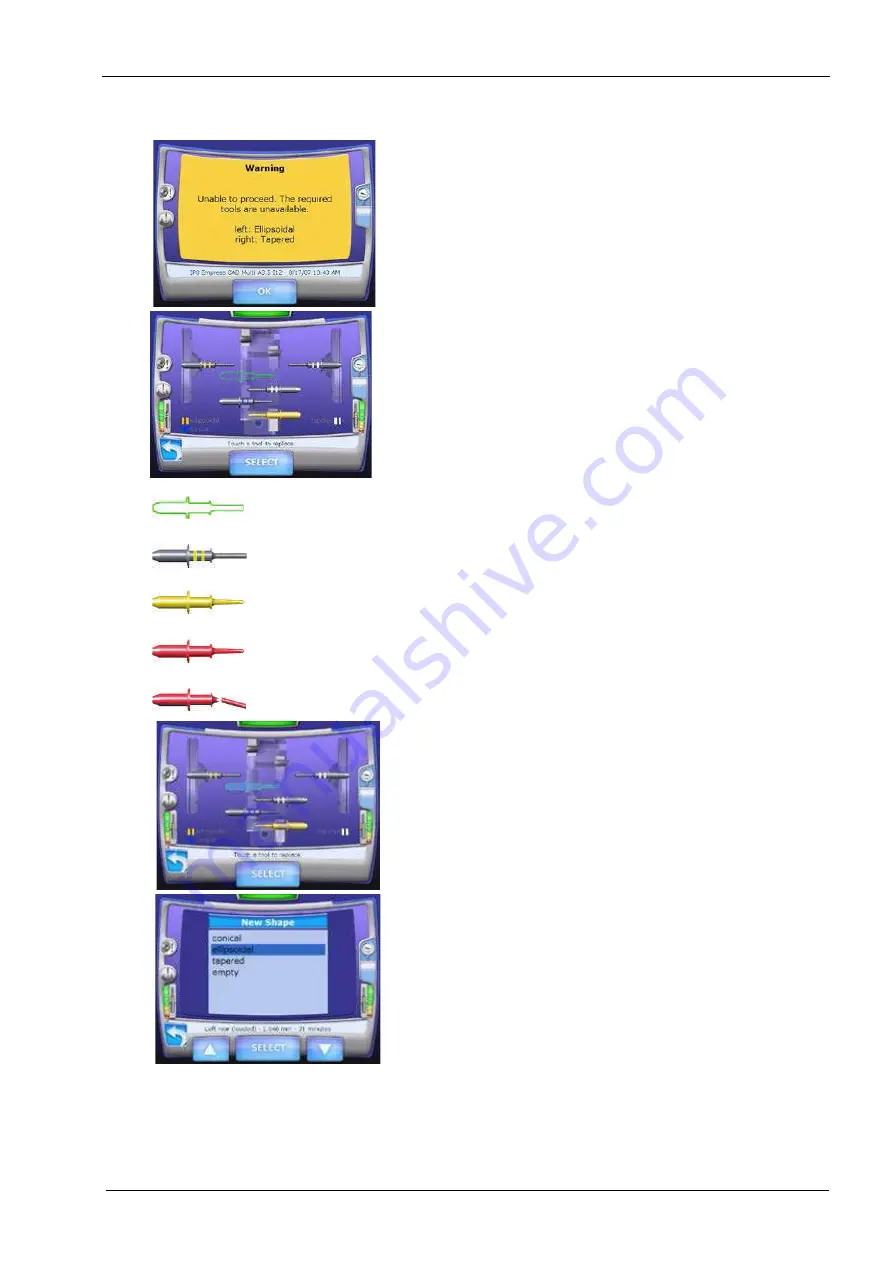
If a needed tool is not already in the tool changer, the
following message will appear.
The reasons for replacing a tool include:
• Tool(s) needed for the restoration are not in the tool
changer.
• Fill empty slots in tool changer.
• Tool in spindle is broken.
• Tool is too worn down to use.
1. On the Home screen Select Maintenance. The Mill
Options menu appears.
2. Select Replace tools by touching the screen or using the
up/down arrows and touch Select.
The
Replace tools
screen appears. In the example below,
there is a tool in each spindle, three extras in the tool
changer, and one empty slot (green outline).
There are two vacant places shown in the tool changer
that do not have the green outline. The tools in the
spindles will be placed there when they are being
exchanged for another tool in the changer.
3. Touch the desired tool or empty slot.
The tool or empty slot changes colour when selected. The
bottom of the screen details the position, diameter, and
elapsed time of the selected item. The tools are colour
coded to match the legend at the bottom of the screen.
4. Touch Select.
5. Select the shape of the new tool or touch Empty to
remove the tool without a replacement.
Empty tool
Coloured
stripes represent
tool shape
Old tool
Worn tool
Broken tool


