16 ORIENTATION
72 Planmeca Chairside CAD/CAM solution
User’s manual
16.5 Verifying orientation
After the Margin is drawn and edited, the Preview Library
button appears. See “Creating the Margin” on page 90 for
more information. This is an optional step that displays an
example proposal that has not been aligned with the
adjacent teeth. The position of the preview tooth is based
on the Orientation. It can be used to evaluate and adjust
the Orientation.
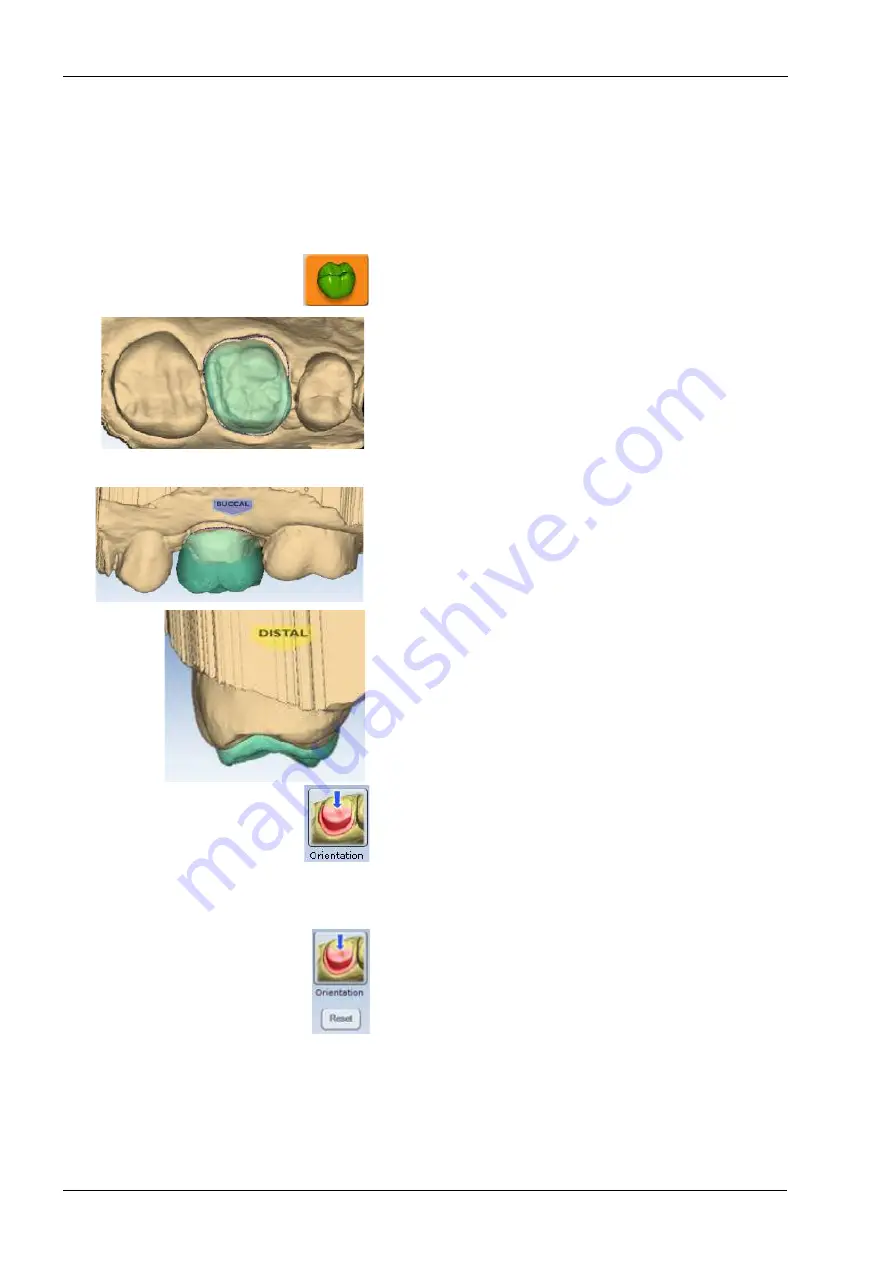
1. Click Preview Library.
A green tooth appears above the margin. If this is a partial
restoration, the preview tooth may be significantly smaller.
With Preview Library activated, you can activate
Orientation and evaluate the overall alignment of the
model.
2. From the occlusal, check that the central groove is in
alignment.
3. From the buccal, check that the marginal ridges are
parallel to the marginal ridges of the adjacent dentition.
NOTE
The preview tooth is usually higher than the adjacent
teeth. The proposal will drop down to align with the
adjacent teeth during Autogenesis.
4. From the distal, check that the cusp tips are in parallel
alignment
Since the preview tooth usually sits higher than the
adjacent teeth, it will not follow the curve of spee.
If necessary make changes to the orientation.
5. When satisfied with the alignment, click Orientation to
accept the current position.
6.
16.6 Resetting the orientation
The Orientation can be reset at any time. If there are
multiple restorations, the Reset will only affect the tooth of
the currently selected tab. Clicking Reset moves the
model into position based on the first scan.


