3-14
Chapter 3: Installing and Configuring the ITS
Step 5. Add the APCs to the Network.
Once you have performed the initial configuration procedure on all of the Access
Point Controllers to configure their static IP address and system type (1.4 GHz or
2.4 GHz) settings, it is now time to add the first APC to the network.
At this point, we assume that you have already configured the network switches and
have identified each port on each switch to which the Access Point Controllers will
be connected.
Note
All switch ports to which the APCs are connected must be configured for 100 Mbps
Full Duplex communications.
Initially, only one APC is added to the network, and then this APC is configured. Do
not add additional Access Point Controllers to the network until instructed to do so.
You should power off all APCs before beginning the procedure below.
Note
Follow the procedure given below only when adding APCs to a new ITS installation. If
you are adding an APC to an existing ITS then refer to “Adding APCs to an Existing
ITS” on page 4-13. If you are replacing an APC in an existing ITS then refer to
“Replacing an ITS APC” on page 4-19.
To add Access Point Controllers to the wireless subnet:
1. Identify the port on the network switch to which you will connect the first APC to
be added to the network.
Again, the switch port must be configured for 100 Mbps Full Duplex
communications.
2. Connect a Category 5 network cable between the switch port and the APC.
3. Power on the APC.
Verify that the APC power LED turns Green after its self-test (during which the
LED is amber). This APC (i.e., the first installed APC) will become the Master APC
within the system.
4. Connect to the APC web-based management interface.
a) Connect your service PC to a network switch on the ITS wireless subnet.
b) Open a web browser on the PC.
c) Enter the static IP address of the APC in the URL field of the browser.
The APC web interface appears.
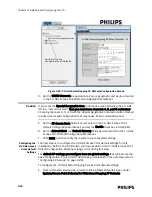
In the View Devices navigational tree, under System\AP Controllers, observe
that the APC you just added to the network is listed and identified with the
nomenclature APC-<mac address>.
Note that the UPGRADE button that appears in APC management screens is not
used.
Summary of Contents for IntelliVue Telemetry System Infrastructure
Page 8: ...viii Contents ...
Page 14: ...xiv About This Guide ...
Page 100: ...3 22 Chapter 3 Installing and Configuring the ITS Figure 3 10 APC Filter Configuration Screen ...
Page 162: ...5 12 Chapter 5 Troubleshooting and Testing ...
Page 168: ...A 6 Chapter A Installing Multiple ITSs at a Single Hospital Site ...
Page 180: ...Index 8 Index ...


