5.[Registration] Tab Page
[Registration] Tab Page Overview 65
5 [Registration] Tab Page
2
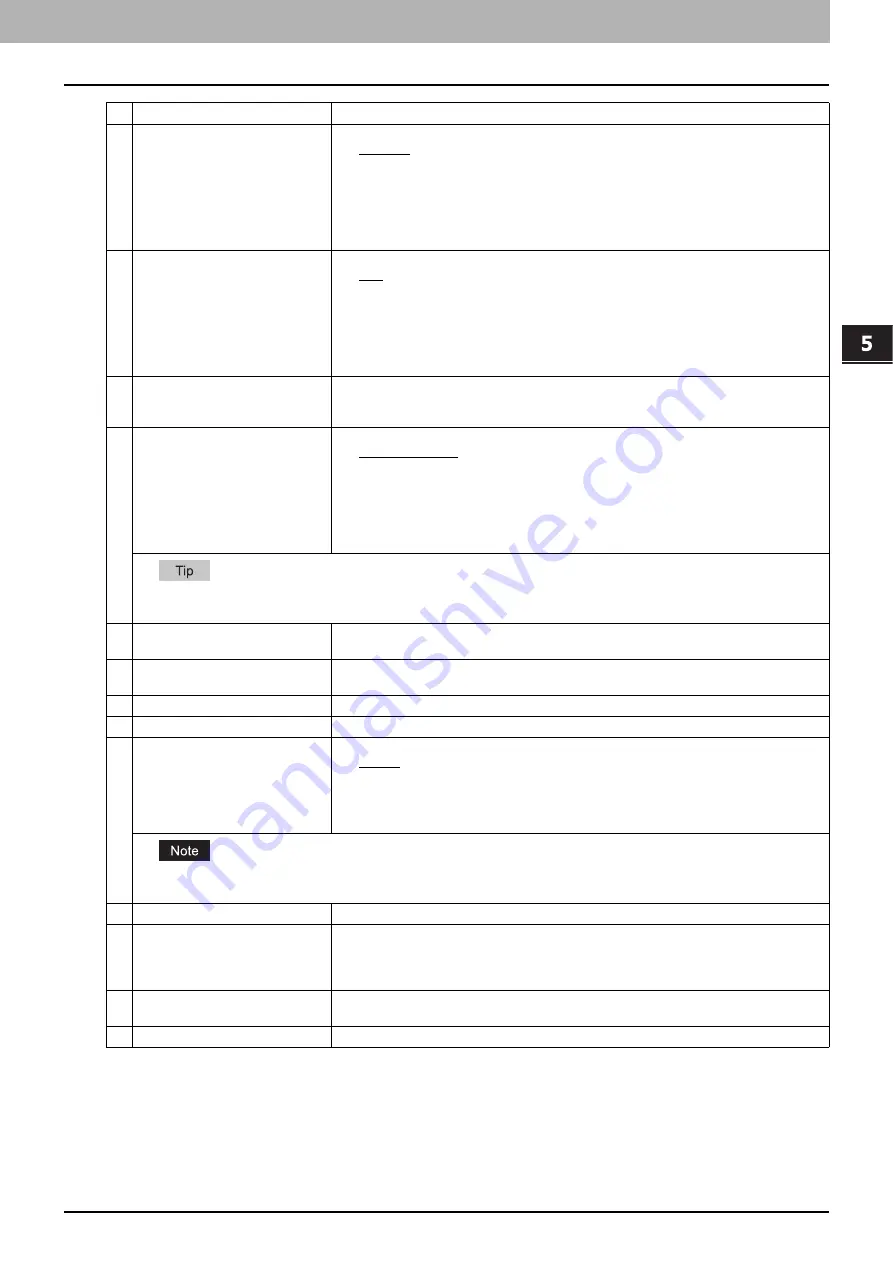
Resolution
Select the resolution for sending faxes.
y
Standard
— Select the Standard mode as the normal resolution. This mode is suitable
when you are frequently transmitting text documents with normal size characters.
y
Fine
— Select the Fine mode as the normal resolution. This mode is suitable when you
are transmitting documents with small size characters or fine drawings.
y
Ultra Fine —
Select the Ultra Fine mode as the normal resolution. This mode is suitable
when you are transmitting documents with very small size characters or detailed
drawings.
3
Original Mode
Select the image quality mode for sending faxes.
y
Text
— Select the Text mode as the normal image quality mode. This mode is suitable
when you are transmitting text documents.
y
Text/Photo
— Select the Text/Photo mode as the normal image quality mode. This
mode is suitable when you are transmitting documents which contain both texts and
photos.
y
Photo
— Select the Photo mode as the normal image quality mode. This mode is
suitable when you are transmitting photo documents.
4
Exposure
Select the exposure for sending faxes.
Select [Auto] to automatically apply the ideal contrast, or adjust the contrast manually in 11
stages.
5
Transmission Type
Select the send mode.
y
Memory Transmit
— Select the Memory TX mode to automatically send the document
after it has been temporarily stored to memory. This mode is useful if you want to return
original files immediately. You can also send the same originals to two or more remote
faxes.
y
Direct Transmit
— Select the Direct TX mode to send the original as it is being
scanned. This mode is useful if you want confirmation from the remote party. Originals
are not stored to memory, and you can specify only one remote fax at a time.
You can select [Direct Transmit] when you have created a template for Fax/InternetFax (not for Saved as file).
When Fax/InternetFax and [Save as file setting] are combined, this item will be unselectable and will not be displayed.
6
ECM
Enable or disable the ECM (Error Correction Mode) to automatically resend any portion of
the document affected by phone line noise or distortion.
7
Quality Transmit
Select this to send a document in the Quality TX mode. This feature sends a document at a
slower speed than normal so the transmission will be less affected by line conditions.
8
SUB/SEP
Enter the SUB number or SEP number if you want to set the mailbox transmission.
9
SID/PWD
Enter the password for SUB or SEP if required.
10
Polling
Select this to set Polling communications.
y
(Blank)
— Select the blank box when you do not want to perform polling.
y
Transmission
— Select this to perform Polling Reservation that allows users to store
the document in the memory.
y
Received
— Select this to perform Turnaround Polling that allows users to poll another
fax after transmitting documents to the remote fax on the same phone call.
You can select [Transmission] when you have created a template for Fax/InternetFax (not to be Saved as file).
When Fax/InternetFax and [Save as file setting] are combined, this item will be unselectable and will not be displayed.
11
Password
Enter the 4-digit security code for the document to be stored or received.
12
Fax Number(Security)
When you select [Transmission] at the [Polling] box, enter the security fax number that
allows polling of stored document.
When you select [Received] at the [Polling] box, enter the security fax number to poll the
documents from remote faxes.
13
Delayed Transmit
If you enable the delayed communications for this agent, enter the day and time to send a
document. Delayed transmission is disabled when the date is set to "0".
14
Priority Transmit
Select whether the document will be sent prior to other jobs.
Item name
Description
Summary of Contents for MC780f
Page 1: ...User s Manual TopAccess Guide ...
Page 21: ...1 Overview 20 Accessing TopAccess 6 The TopAccess website appears ...
Page 25: ...1 Overview 24 Access Policy Mode ...
Page 29: ...2 Device Tab Page 28 Displayed Icons ...
Page 103: ...5 Registration Tab Page 102 Registration How to Set and How to Operate ...
Page 345: ...8 Administration Tab Page 344 Registration Administration tab How to Set and How to Operate ...
Page 375: ...11 APPENDIX 374 Installing Certificates for a Client PC ...
Page 380: ...January 2013 45511102EE Rev1 ...


