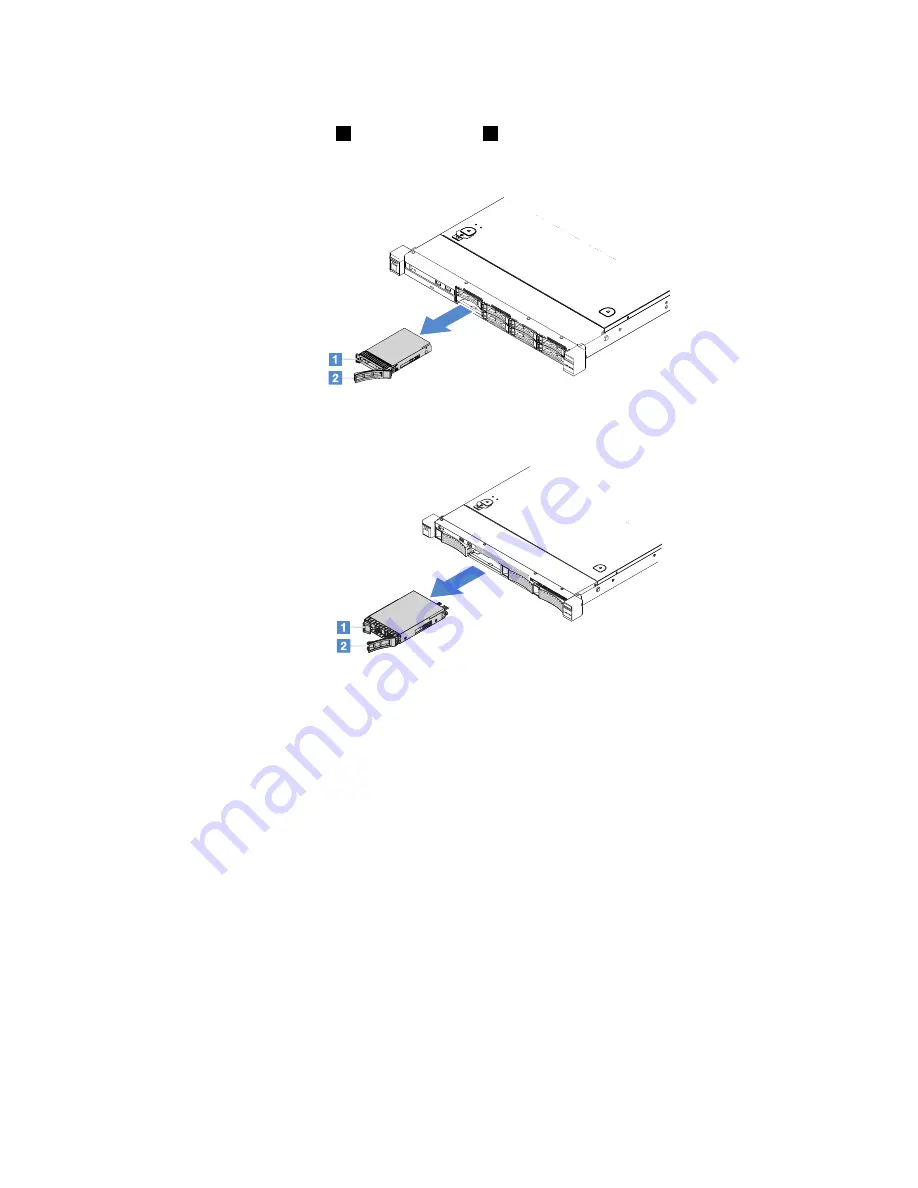
Step 1.
Remove the security bezel. See “Removing the security bezel” on page 91.
Step 2.
Press the release button
1
to open the handle
2
of the drive. Then, grasp the handle and pull the
hot-swap hard disk drive out of the drive bay.
Figure 28. 2.5-inch hot-swap hard disk drive removal
000
000
000
000
000
000
000
000
000
00000000
00000000
00000000
00000000
00000000
00000000
Figure 29. 3.5-inch hot-swap hard disk drive removal
Step 3.
Install a new hot-swap hard disk drive or install a filler into the bay.
Step 4.
Reinstall the security bezel. See “Installing the security bezel” on page 92.
Installing a hot-swap hard disk drive
The drive ID that is assigned to each drive is printed on the front of the server. The ID numbers and the drive
bay numbers are the same. For detailed information, see “Front view” on page 15.
Attention:
To avoid damage to the hard disk drive connectors, make sure that the server cover is in place
and fully closed whenever you install or remove a hard disk drive.
The following tips describe the type of hard disk drives that the server supports and other information that
you must consider when you install a hard disk drive.
• Locate the documentation that comes with the hard disk drive and follow those instructions in addition to
the instructions in this topic.
• Make sure that you have all the cables and other equipment specified in the documentation that comes
with the drive.
• Select the bay in which you want to install the drive.
Removing and installing server components
101
Summary of Contents for x3250 m6
Page 1: ...Lenovo System x3250 M6 Installation and Service Guide Machine Types 3633 and 3943 ...
Page 6: ...iv Lenovo System x3250 M6 Installation and Service Guide ...
Page 18: ...4 Lenovo System x3250 M6 Installation and Service Guide ...
Page 60: ...46 Lenovo System x3250 M6 Installation and Service Guide ...
Page 100: ...86 Lenovo System x3250 M6 Installation and Service Guide ...
Page 516: ...502 Lenovo System x3250 M6 Installation and Service Guide ...
Page 678: ...664 Lenovo System x3250 M6 Installation and Service Guide ...
Page 685: ...Taiwan Class A compliance statement Appendix E Notices 671 ...
Page 695: ......
Page 696: ......


