Step 4.
Remove the air baffle. See “Removing the air baffle” on page 90.
Step 5.
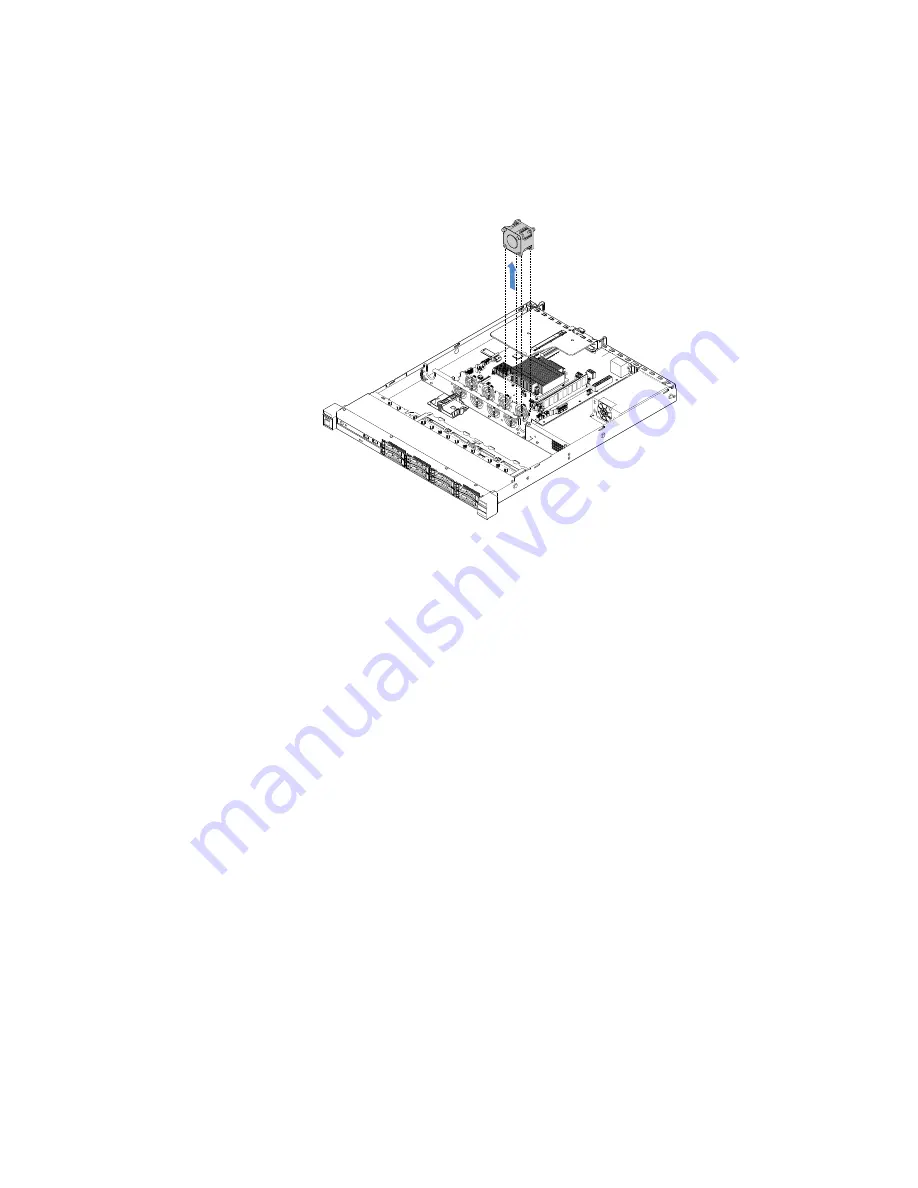
Disconnect the fan cable from the system board. Record the routing of the fan cable; you will have
to route the fan cable the same way when you install the fan.
Step 6.
Grasp the top of the fan with your index finger and thumb and lift the fan out of the server.
Figure 61. System fan removal
Step 7.
Complete the parts replacement. See “Completing the parts replacement” on page 172.
Installing a system fan
To install a system fan, do the following:
Step 1.
Turn off the server. Then, disconnect all external cables and remove all peripheral devices.
Step 2.
Remove the server cover. See “Removing the server cover” on page 88.
Step 3.
Remove the air baffle. See “Removing the air baffle” on page 90.
Step 4.
Position the new fan so that the airflow arrow on the fan points toward the rear of the server.
Note:
The correct airflow is from the front to the rear of the server.
Removing and installing server components
125
Summary of Contents for x3250 m6
Page 1: ...Lenovo System x3250 M6 Installation and Service Guide Machine Types 3633 and 3943 ...
Page 6: ...iv Lenovo System x3250 M6 Installation and Service Guide ...
Page 18: ...4 Lenovo System x3250 M6 Installation and Service Guide ...
Page 60: ...46 Lenovo System x3250 M6 Installation and Service Guide ...
Page 100: ...86 Lenovo System x3250 M6 Installation and Service Guide ...
Page 516: ...502 Lenovo System x3250 M6 Installation and Service Guide ...
Page 678: ...664 Lenovo System x3250 M6 Installation and Service Guide ...
Page 685: ...Taiwan Class A compliance statement Appendix E Notices 671 ...
Page 695: ......
Page 696: ......


