8
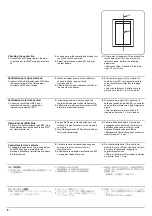
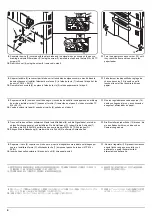
B5
A4
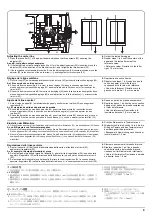
24 (G)
26
26
25
25
27
27
23 (F)
23 (F)
24 (G)
24 (G)
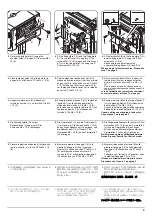
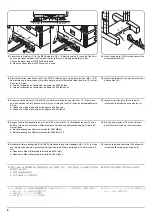
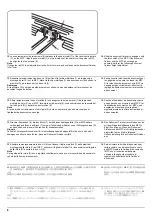
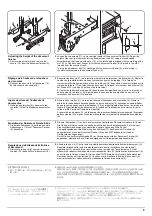
6.
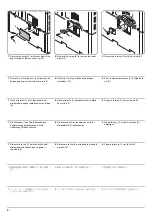
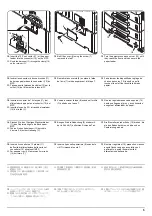
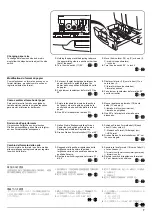
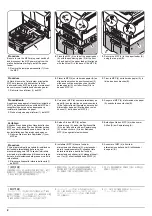
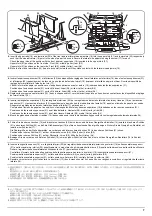
各ビス (24)1 本を外し、縦幅サイズ板 (23) を取り外す。
(センチ仕様のみ)
7.
用紙サイズに応じて、
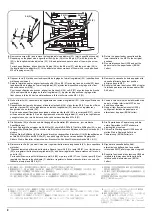
縦幅サイズ板 (23) のピン穴 (25) を A4 ピン (26) または B5 ピン (27) に合わ
せて取り付け、
ビス (24)1 本で固定する。
インチ仕様では、用紙サイズに応じて、
縦幅サイズ板 (F) のピン穴 (25) を A4 ピン (26) または B5
ピン (27) に合わせて取り付け、
ビス + ナベ M3 × 8 タッピング (G)1 本で固定する。
8.
ペーパーフィーダのカセットおよび MFP 本
体の下段カセットを元に戻す。
9.
MFP 本体の電源プラグをコンセントに差し込
み、主電源スイッチを ON にする。
メンテナンスモード U208 でペーパーフィーダ
にセットする用紙のサイズ(B5 / A4 / Letter)
を設定する。
6.
Remove the screw (24) and remove the longitudinal size adjusters (23). (metric specifications only)
7.
Depending on the paper size, align either the A4 pins (26) or the B5 pins (27) with the pin holes
(25) in the longitudinal size adjusters (23), fit the adjusters and secure each of them with a screw
(24).
For inch specifications, align either the A4 pins (26) or the B5 pins (27) with the pin holes (25) in
the longitudinal size adjusters (F), fit the adjusters and secure each of them with a round pan-head
M3 x 8 tapping screw (G).
8.
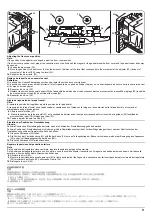
Return the paper feeder cassette and the
lower cassette in the MFP to their original
positions.
9.
Run maintenance item U208 and set the
paper size for the paper feeder (B5/A4/
Letter).
6.
Déposer la vis (24) et déposer les dispositifs de réglage du format longitudinal (23). (spécifications
métriques seulement)
7.
Selon le format du papier, aligner les broches A4 (26) ou B5 (27) avec les trous de broche (25) dans
les dispositifs de réglage du format longitudinal (23), ajuster les dispositifs de réglage et les fixer
chacun avec une vis (24).
Pour les spécifications en pouces, aligner les broches A4 (26) ou B5 (27) avec les trous de broche
(25) des dispositifs de réglage du format longitudinal (F), ajuster les dispositifs de réglage et les
fixer chacun à l’aide d'une vis autotaraudeuse à tête cruciforme ronde M3 × 8 (G).
8.
Ramener la cassette du bureau papier et la
cassette inférieure dans leur position
d'origine dans le MFP.
9.
Exécuter l’élément d’entretien U208 et régler
la taille du papier pour le bureau papier (B5/
A4/Letter).
6.
Quite el tornillo (24) y desmonte los reguladores de tamaño longitudinal (23). (sólo especificaciones
métricas)
7.
Dependiendo del tamaño del papel, alinee las clavijas A4 (26) o las clavijas B5 (27) con los orificios
para las clavijas (25) en los reguladores de tamaño longitudinal (23), inserte los reguladores y
asegúrelos con un tornillo (24).
En el caso de especificaciones de pulgadas, alinee las clavijas A4 (26) o las clavijas B5 (27) con los
orificios para las clavijas (25) en los reguladores de tamaño longitudinal (F), encaje los reguladores
y asegúrelos con un tornillo de roscado de cabeza redonda plana M3 x 8 (G).
8.
Vuelva a colocar el cajón del alimentador de
papel y el cajón inferior del MFP en sus
posiciones originales.
9.
Haga el ítem de mantenimiento U208 y
configure el tamaño de papel para el
alimentador de papel (B5/A4/Letter).
6.
Die Schraube (24) entfernen und die Längsgrößen-Einsteller (23) abnehmen. (nur metrische
Spezifikationen)
7.
Je nach Papiergröße entweder die A4-Stifte (26) oder die B5-Stifte (27) auf die Stiftlöcher (25) in den
Längsgrößen-Einstellern (23) ausrichten, die Einsteller einsetzen und jeden mit einer Schraube (24)
sichern.
Richten Sie die Stiftlöcher (25) im linken und rechten Längsgrößen-Einsteller (F) für Zollspezifikationen
auf die A4-Stifte (26) oder B5-Stifte (27) aus, abhängig von der zu verwendenden Papiergröße.
Sichern Sie die Einsteller mit jeweils einer Kreuzschlitz- Rundkopf-Schneidschraube M3 × 8 (G).
8.
Die Papierlade des Papiereinzug und die
untere Papierlade im MFP wieder wie
ursprünglich einsetzen.
9.
Führen Sie Wartungspunkt U208 aus und
stellen Sie die Papiergröße für den
Papiereinzug (B5/A4/Letter) ein.
6.
Rimuovere la vite (24) e quindi rimuovere i regolatori della misura longitudinale (23). (solo specifiche
metriche)
7.
Dipendentemente dal formato della carta, allineare i perni A4 (26) o i perni B5 (27) con i fori dei perni
(25) nei regolatori della misura longitudinale (23), adattare i regolatori e fissare ciascuno di loro con
una vite (24).
Per le specificazioni in pollici, allineare i perni A4 (26) o i perni per B5 (27) con i fori dei perni (25) nei
regolatori della misura longitudinale (F), adattare i regolatori e fissare ciascuno di loro con una vite
filettante a testa piana M3 x 8 (G).
8.
Riportare la cassetta dell’unità di
alimentazione della carta e la cassetta
inferiore dell’MFP alle loro posizioni originali.
9.
Eseguire l’opzione di manutenzione U208 ed
impostare la dimensione della carta della
relativa unità di alimentazione (B5/A4/
Letter).
6. 拆下螺丝 (24),然后拆下纵向尺寸板 (23)。( 仅适用于厘米尺寸的产品 )
7. 根据纸张尺寸,将 A4 插销 (26) 和 B5 插销 (27) 与纵向尺寸板 (23) 上的插销孔 (25) 对齐,装上
纵向尺寸板,并用螺丝 (24) 将每个尺寸板都固定。
对于英制规格的机器,将 A4 插销 (26) 和 B5 插销 (27) 与纵向尺寸板 (F) 上的插销孔 (25) 对
齐,装上纵向尺寸板,并用圆盘头
M3
×
8
自攻螺丝 (G) 将每个尺寸板都固定。
8. 将供纸工作台供纸盒和 MFP 的下部供纸盒装
回至原来的位置。
9. 将 MFP 主机上的电源插头插入电源插座中,打
开主电源开关。
使用维修模式 U208 设定供纸工作台所使用的复印
纸尺寸 (B5/A4/Letter)。
Summary of Contents for TASKalfa 420i
Page 1: ...SERVICE MANUAL Published in May 2010 842KS113 2KSSM063 Rev 3 TASKalfa 420i TASKalfa 520i ...
Page 4: ...This page is intentionally left blank ...
Page 10: ...This page is intentionally left blank ...
Page 14: ...2KR 2KS This page is intentionally left blank ...
Page 224: ...2KR 2KS 1 4 66 This page is intentionally left blank ...
Page 328: ...2KR 2KS 2 3 30 This page is intentionally left blank ...
Page 371: ...INSTALLATION GUIDE FOR PAPER FEEDER ...
Page 381: ...INSTALLATION GUIDE FOR 3000 SHEETS PAPER FEEDER ...
Page 436: ...INSTALLATION GUIDE FOR CENTER FOLDING UNIT ...
Page 450: ...INSTALLATION GUIDE FOR MAILBOX ...
Page 458: ...INSTALLATION GUIDE FOR HOLE PUNCH UNIT ...
Page 470: ...INSTALLATION GUIDE FOR BUILT IN FINISHER ...
Page 483: ...INSTALLATION GUIDE FOR JOB SEPARATOR ...
Page 491: ...INSTALLATION GUIDE FOR FAX System ...
Page 507: ......
Page 508: ......

