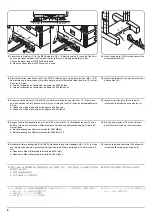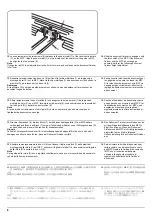
5
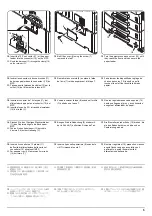
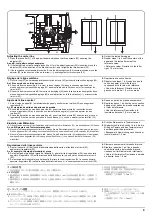
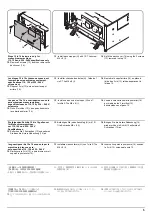
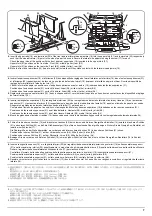
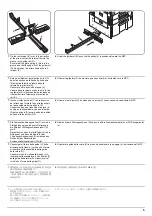
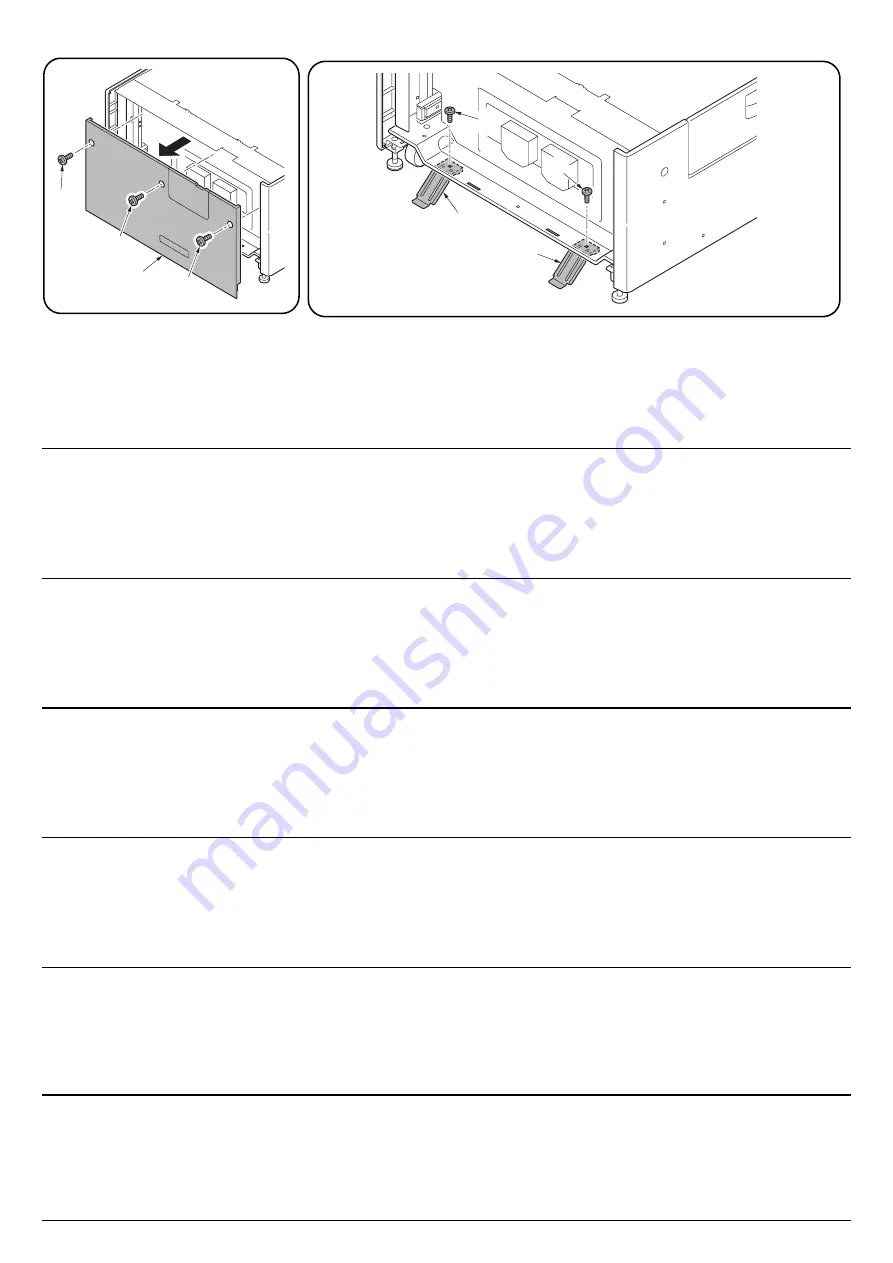
Steps 12 to 14 below are only for
monochrome machines.
110, 120 and 220 - 240Vspecifications only
12.
Remove 3 screws (13), and then remove the
back cover (14).
13.
Install each stopper (H) with 1 S Tite screw
M4 × 8 (I).
14.
Refit the back cover (14) using the 3 screws
(13) removed in step 12.
Les étapes 12 à 14 ci-dessous concernent
les machines monochromes seulement.
spécifications 110, 120 et 220 - 240 V
uniquement
12.
Déposer 3 vis (13) puis enlever le capot
arrière (14).
13.
Installer chacune des butes (H)
l’aide de 1
vis S Tite M4 x 8 (I).
14.
Remettre le capot arrière (14) en place à
l’aide des 3 vis (13) retirée auparavant à
l’étape 12.
Los pasos 12 a 14 a continuación son sólo
para máquinas monocromáticas.
especificaciones de 110, 120 y 220 – 240 V,
solamente
12.
Quite 3 tornillos (13) y, después, desmonte
la cubierta posterior (14).
13.
Instale cada uno de los topes (H) con 1
tornillo S Tite M4 x 8 (I).
14.
Vuelva a colocar la cubierta posterior (14)
por medio de los 3 tornillos (13)
desmontados en el paso 12.
Die folgenden Schritte 12 bis 14 gelten nur
für Monochrommaschinen.
nur 110, 120 und 220 - 240 V
Spezifikationen
12.
Entfernen Sie 3 Schrauben (13) und nehmen
Sie dann die hintere Abdeckung (14) ab.
13.
Befestigen Sie jeden Anschlag (H) mit 1 S-
Tite-Schraube M4 × 8 (I).
14.
Bringen Sie die hintere Abdeckung (14)
wieder mit den in Schritt 12 entfernten 3
Schrauben (13) an.
I seguenti passi da 12 a 14 sono solo per le
macchine in bianco e nero.
solo specifiche 110, 120 e 220 - 240 V
12.
Rimuovere le 3 viti (13), e quindi rimuovere il
coperchio posteriore (14).
13.
Installare ciascun fermo (H) con 1 vite S Tite
M4 × 8 (I).
14.
Inserire il coperchio posteriore (14) usando
le 3 viti (13) rimosse al punto 12.
[ 手順 12 ~ 14 は
モノクロ機のみ
]
[110V/120V/220-240V 仕様のみ ]
12.
ビス (13)3 本を外し、後カバー(14) を取り外
す。
13.
転倒防止金具 (H) をビス M4 × 8 S タイト
(I) 各 1 本で取り付ける。
14.
手順 12 で取り外したビス (13)3 本で後カ
バー(14) を元通り取り付ける。
[
步骤 12
~
14 仅限于黑白机
]
[
仅限 110V、120V 及 220-240V 规格
]
12.取下 3 颗螺丝(13),然后拆下后盖板(14)。
13. 使用 1 颗紧固型 S 螺丝 M4 × 8(I)安装
各限位器(H)。
14.使用在步骤 12 中取下的 3 颗螺丝(13)重
新安装后盖板(14)。
13
13
14
13
I
I
H
H
Summary of Contents for TASKalfa 420i
Page 1: ...SERVICE MANUAL Published in May 2010 842KS113 2KSSM063 Rev 3 TASKalfa 420i TASKalfa 520i ...
Page 4: ...This page is intentionally left blank ...
Page 10: ...This page is intentionally left blank ...
Page 14: ...2KR 2KS This page is intentionally left blank ...
Page 224: ...2KR 2KS 1 4 66 This page is intentionally left blank ...
Page 328: ...2KR 2KS 2 3 30 This page is intentionally left blank ...
Page 371: ...INSTALLATION GUIDE FOR PAPER FEEDER ...
Page 381: ...INSTALLATION GUIDE FOR 3000 SHEETS PAPER FEEDER ...
Page 436: ...INSTALLATION GUIDE FOR CENTER FOLDING UNIT ...
Page 450: ...INSTALLATION GUIDE FOR MAILBOX ...
Page 458: ...INSTALLATION GUIDE FOR HOLE PUNCH UNIT ...
Page 470: ...INSTALLATION GUIDE FOR BUILT IN FINISHER ...
Page 483: ...INSTALLATION GUIDE FOR JOB SEPARATOR ...
Page 491: ...INSTALLATION GUIDE FOR FAX System ...
Page 507: ......
Page 508: ......


