3
9
10
8
7
5
6
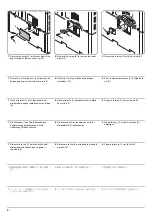
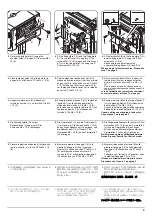
4.
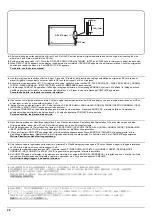
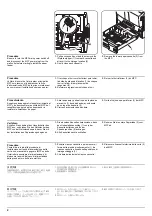
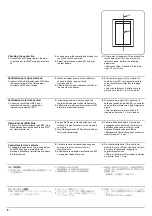
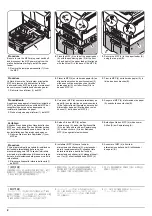
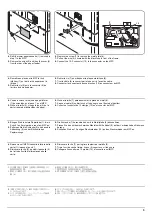
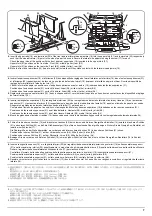
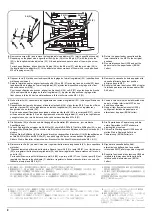
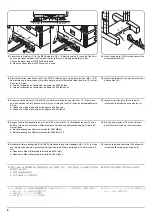
Refit the lower paper cassette (1) removed in
step 1 to the MFP.
5.
Remove the screw (5) and then the cover (6)
from the rear of the paper feeder.
4.
Remettre en place sur le MFP le tiroir
inférieur (1) qui a été retiré auparavant à
l’étape 1.
5.
Retirer la vis (5) puis le couvercle (6) de
l’arrière du bureau papier.
4.
Vuelva a colocar el cajón de papel inferior
(1) desmontado en el paso 1 en el MFP.
5.
Quite el tornillo (5) y luego la tapa (6) de la
parte trasera del alimentador de papel.
4.
Bringen Sie die untere Papierlade (1), die in
Schritt 1 entfernt wurde, erneut am MFP an.
5.
Entfernen Sie die Schraube (5) und dann die
Abdeckung (6) von der Rückseite des
Papiereinzugs.
4.
Reinserire nell’MFP il cassetto inferiore della
carta (1) rimosso al punto 1.
5.
Rimuovere la vite (5) e quindi il pannello (6)
dal retro dell’unità di alimentazione della
carta.
4.
手順 1 で取り外した MFP 本体の下段カセッ
ト (1) を元に戻す。
5.
ビス (5)1 本を外し、ペーパーフィーダ後部
のカバー(6) を取り外す。
4. 在步骤 1 取下的 MFP 主机的下部供纸盒 (1)
装回原来的位置。
5. 拆除 1 个螺丝 (5),拆下供纸工作台的后部盖
板 (6)。
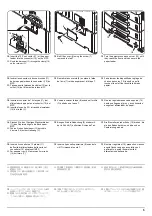
6.
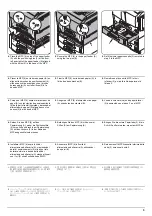
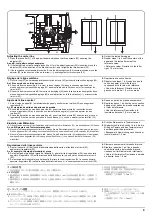
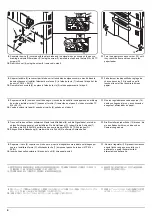
Remove the screw (7) to remove the metal plate (8).
7.
Pull out the wire (9) covered with the black tube in front of the frame.
8.
Connect the 12-P connector (10) to the connector on the MFP.
6.
Retirer la vis (7) pour déposer la plaque métallique (8).
7.
Tirer le câble (9) recouvert par le tube noir à l’avant du cadre.
8.
Connecter le connecteur à douze broches (10) au connecteur du MFP.
6.
Quite el tornillo (7) para desmontar la placa de metal (8).
7.
Saque el cable (9) cubierto con el tubo negro en el frente del bastidor.
8.
Conecte el conector de 12 clavijas (10) en el conector del MFP.
6.
Die Schraube (7) herausdrehen, um die Metallplatte (8) abzunehmen.
7.
Ziehen Sie das mit dem schwarzen Mantel umhüllte Kabel (9) auf der Vorderseite des Rahmens
heraus.
8.
Schließen Sie den 12-poligen Steckverbinder (10) an den Steckverbinder am MFP an.
6.
Rimuovere la vite (7) per togliere la piastra di metallo (8).
7.
Tirare fuori, davanti al telaio, il cavo (9) coperto con il tubo nero.
8.
Collegare il connettore a 12 piedini (10) al connettore sull’MFP.
6.
ビス (7)1 本を外し、金具 (8) を取り外す。
7.
黒いチューブで覆われた電線 (9) を、フレームの手前に引き出す。
8.
12P コネクタ (10) を MFP 本体のコネクタに接続する。
6. 拆除 1 个螺丝 (7),拆下金属件 (8)。
7. 将用黑套管包覆的电线 (9) 拉至机架前。
8. 将 12 脚接头 (10) 与 MFP 主机上的接口连接。
Summary of Contents for TASKalfa 420i
Page 1: ...SERVICE MANUAL Published in May 2010 842KS113 2KSSM063 Rev 3 TASKalfa 420i TASKalfa 520i ...
Page 4: ...This page is intentionally left blank ...
Page 10: ...This page is intentionally left blank ...
Page 14: ...2KR 2KS This page is intentionally left blank ...
Page 224: ...2KR 2KS 1 4 66 This page is intentionally left blank ...
Page 328: ...2KR 2KS 2 3 30 This page is intentionally left blank ...
Page 371: ...INSTALLATION GUIDE FOR PAPER FEEDER ...
Page 381: ...INSTALLATION GUIDE FOR 3000 SHEETS PAPER FEEDER ...
Page 436: ...INSTALLATION GUIDE FOR CENTER FOLDING UNIT ...
Page 450: ...INSTALLATION GUIDE FOR MAILBOX ...
Page 458: ...INSTALLATION GUIDE FOR HOLE PUNCH UNIT ...
Page 470: ...INSTALLATION GUIDE FOR BUILT IN FINISHER ...
Page 483: ...INSTALLATION GUIDE FOR JOB SEPARATOR ...
Page 491: ...INSTALLATION GUIDE FOR FAX System ...
Page 507: ......
Page 508: ......

